BMW K bikes (Bricks)


You are not connected. Please login or register

View previous topic View next topic Go down  Message [Page 1 of 1]


Leon

Leon
active member
active member
I decided today to start on righting the wronges on the bike and shorten the big list of jobs I need to do to make the bike roadworthy / reliable for the spring. Plus as well to look smart! I didnt know where to start at first, undecided which job to tackle first. So I made a pot of tea and went into the garage and messed about cleaning and prepairing the engine cases with steel wool to take off the corrosion and old paint and to get me motivated so to speak.
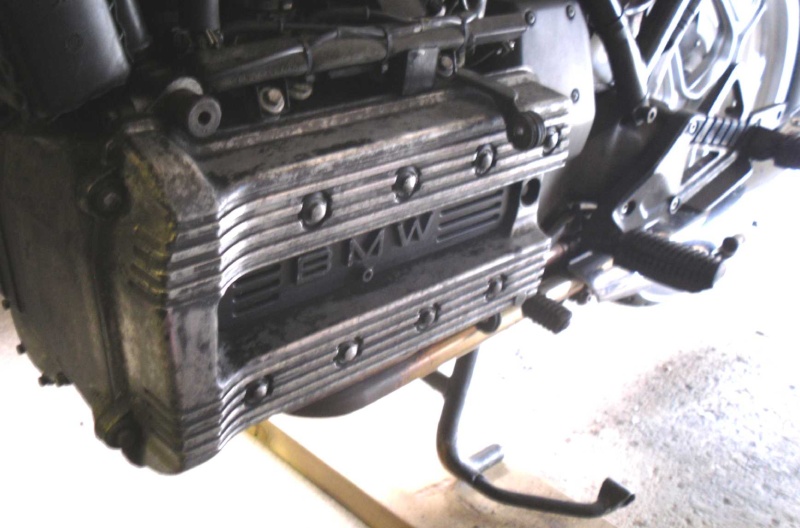
My 1988 K100LT (renovation) Tidy - up!! Cover111

After a little thought I decided to start at the rear of the bike and work my way to the front. I stripped off the seat and tailpeice to reveal the rear of the frame which was quite rusty under the seat. The rest of the frame can be easily touched up anytime. So I spent the next 3 hours removing the rust firstly with a flap disc on my angle grinder then used files an old chisel and emery cloth to get a decent finish. I ended the day by giving the frame a coat of "KURUST" ready for my next stage....
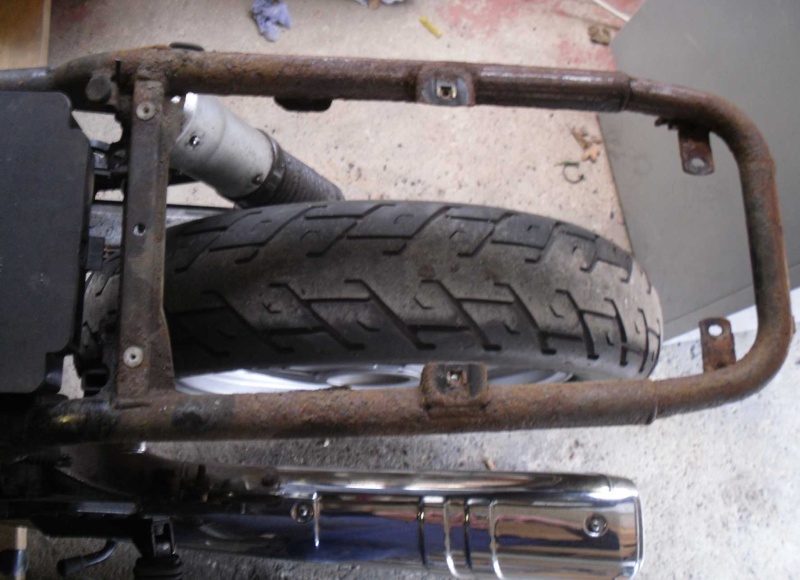
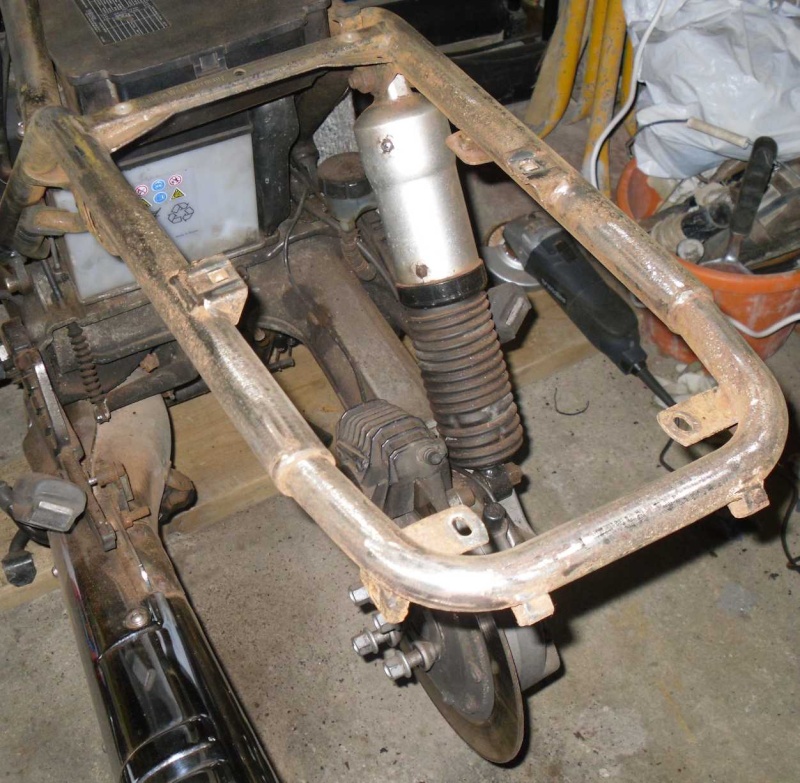
My 1988 K100LT (renovation) Tidy - up!! Rear111

My 1988 K100LT (renovation) Tidy - up!! Rear210

There will be more to come over the following weeks / months which I am looking forword in taking on the challenge. I am finding it an easy and enjoyable bike to work on. Roll on the weekend........


RT

RT
Life time member
Life time member
Good job Leon I'll be keen to see how you go on the engine mine has a coat of old crusty looking black paint, so watching with interest.
regards RT


Crazy Frog

Crazy Frog
admin
admin
This is how I started to work on my K100. Just cleaning and making it 'pretty'.
After a couple of days, it ended like this:

My 1988 K100LT (renovation) Tidy - up!! 32a

My 1988 K100LT (renovation) Tidy - up!! 44

You may have started an endless job which will keep busy during this snowy winter.

Enjoy and just dream about a 'new' bike coming out of your garage next spring!

Bert


__________________________________________________
My 1988 K100LT (renovation) Tidy - up!! Frog15My 1988 K100LT (renovation) Tidy - up!! Logo2101986 k75, 1985 K100rt, 1985 K100rt/EML GT2 sidecar, 1999 K1200lt/Hannigan Astro Sport sidecar.
    

club_c

club_c
Life time member
Life time member
Heh heh. That's what happened to me too. Right down to the nuts and bolts before I was done. But now looks gorgeous. That was last winter. Have since picked up a K100RT to do this winter. And really hoping it doesn't come to bits again. This one is already spoken for, my buddy who LOVED the K100RS I did wants the RT in the spring. Just need to complete the HoneyDo list in the house so I can get started on it.


Leon

Leon
active member
active member
Wow Bert
I am impressed with the engine. I dont have the space to strip my bike down fully. I will taking the easy option and spraying the covers silver / black etc. One good thing about dismantling and re-assemling apart from the enjoyment side, I like to replace nuts,bolts and washers etc with new ones for what they cost. Makes the bike look maintained!!

This weekend I am hoping to dismantle the drive shaft assembly to check everythings OK and grease the splines. So there will be an update on Sunday night how I have faired.

Regards
Leon


Crazy Frog

Crazy Frog
admin
admin
It will be a good time to dismantle, clean and grease the clutch mechanism/automatic folding of the side stand.
If you remove the swing arm, it would be good to clean the Transmission Gear Position Switch and coat it with silicone (See this page for information). This is easy when the swing arm is removed, but impossible when everything is assembled.


__________________________________________________
My 1988 K100LT (renovation) Tidy - up!! Frog15My 1988 K100LT (renovation) Tidy - up!! Logo2101986 k75, 1985 K100rt, 1985 K100rt/EML GT2 sidecar, 1999 K1200lt/Hannigan Astro Sport sidecar.
    

club_c

club_c
Life time member
Life time member
whoopsie, thinking of another bike!


Last edited by club_c on Tue Jan 04, 2011 8:54 pm; edited 1 time in total


Crazy Frog

Crazy Frog
admin
admin
Are you still on rum and eggnog? Very Happy .... End of the year parties are supposed to be over!
I can see only one back wheel on this trike.


__________________________________________________
My 1988 K100LT (renovation) Tidy - up!! Frog15My 1988 K100LT (renovation) Tidy - up!! Logo2101986 k75, 1985 K100rt, 1985 K100rt/EML GT2 sidecar, 1999 K1200lt/Hannigan Astro Sport sidecar.
    

club_c

club_c
Life time member
Life time member
yep, my bad, thinking of another resto...


Leon

Leon
active member
active member
The weekend has arrived and I have had another session in the garage. During the week before going into work ( late shift ). I set about cleaning up my rear wheel. The steel wool came out again and plenty of elbow grease to take out the corrosion and blemishes. I gave the wheel and cover three coats of silver paint and three coats of clear laquer and kept it warm for a good while near my oil heater. It looks like a new wheel and I am really pleased with the result.

My 1988 K100LT (renovation) Tidy - up!! Wheel-10

I tackled taking the beval final drive and shaft out this afternoon but I needed an angle stand or something to support the swingarm which I dont posses. So I dug out my Clark gasless mig welder and made a stand for the swingarm.

My 1988 K100LT (renovation) Tidy - up!! Stand-10

My 1988 K100LT (renovation) Tidy - up!! Stand-11

Looking at the splines they are in need of a good clean and grease. Most of my time was taken up with making the stand and putting everything away.

My 1988 K100LT (renovation) Tidy - up!! Bevel-10

My 1988 K100LT (renovation) Tidy - up!! Spline10

My 1988 K100LT (renovation) Tidy - up!! Spline11

Thats it for now, tommorow ( Sunday ) I will be taking the swing arm out and inspecting gear indicator switch as Bert kindly mentioned to have a look at.....


K-BIKE

avatar
Life time member
Life time member
Really good start to a great project, just think of what it is going to look like when you finish. Good on you as they say here in NZ.
Regards,
K-BIKE


Crazy Frog

Crazy Frog
admin
admin
My 1988 K100LT (renovation) Tidy - up!! 447221 My 1988 K100LT (renovation) Tidy - up!! 652573 You will have to wear sun glasses to look at your bike!
But wait for the 1st My 1988 K100LT (renovation) Tidy - up!! 178468 .... You will be My 1988 K100LT (renovation) Tidy - up!! 177381


__________________________________________________
My 1988 K100LT (renovation) Tidy - up!! Frog15My 1988 K100LT (renovation) Tidy - up!! Logo2101986 k75, 1985 K100rt, 1985 K100rt/EML GT2 sidecar, 1999 K1200lt/Hannigan Astro Sport sidecar.
    

Leon

Leon
active member
active member
Cheers for the feedback I appreciate any comments...

In the garage today (Sunday) and started on de-rusting the radiator grill and frame. Gave them both a dose of Kurust and left to dry. After a brew I took the swing arm off. I was suprised how much gung and muck was behind it. Most of my time this afternoon was getting everything clean.

My 1988 K100LT (renovation) Tidy - up!! Boot-l10

Noticed a leak on the rubber boot, looks like I will have to purchase one. I got the swing arm really clean after de-greasing and using steel wool and a lot of elbow grease. A bit more work on it and I will be able to spray it silver.....

My 1988 K100LT (renovation) Tidy - up!! Swinga10

There is just one problem I have come across and that is removing the two small countersunk bolts which hold the rear disk on the beval box. I just cant budge them after using an impact driver and heated the nuts up slightly Crying or Very sad I dont know if to just drill them out and buy new bolts...............

Thats it so far......im off to surf for parts.


charlie99

charlie99
VIP
VIP
wow good work leon


__________________________________________________
cheezy grin whilst riding, kinda bloke ....oh the joy !!!! ...... ( brick aviator )

'86 K100 RT..#0090401 ..."Gerty" ( Gertrude Von Clickandshift ) --------O%O
'86 k100 rs.. #######..  "Fred " (f(rame) red ) ( Fredrick leichtundschnell ) - -
bits and pieces from many kind friends across the k100 world ...with many thanks ..
1987 k100rs ########   "Red"  - (red sports rs TWB style )
1989 K100rt #009637   "Black Betty"  (naked rt ala Nigel , now sporting an rs main fairing )
    

Leon

Leon
active member
active member
The weekend is over but I have been busy in the garage once again. During the week I purchased a bearing puller which arrived in the post Thursday morning. I booked a half day holiday leave in the afternoon so I could have a play with the new toy. I spent the next few hours removing the bearings from the swing arm, de-greased the bearings,cleaned and inspected outer race then packed with grease and pressed the bearings back into place. They feel nice and smooth now they have been serviced.

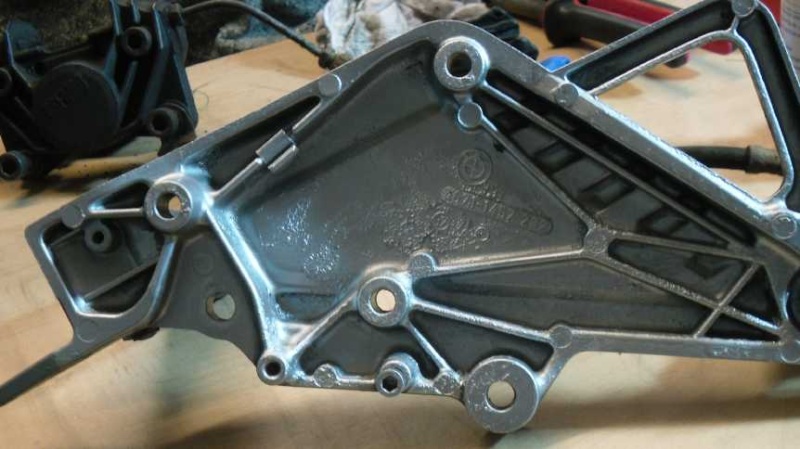
My next job was the rear brake unit. Looking at the state it is in, it looks like it has not been touched for a good while. I had trouble with the allen bolts holding the master cyclinder to the plate so I had to drill the tops off and remove the rest of the bolts with a pair of moll grips.

My 1988 K100LT (renovation) Tidy - up!! Plate-10
I inspected all the parts after cleaning everything which took me ages ( hours ). The master cyclinder and brake caliper are both fine with no leaks. All I need is a length of flexible brake pipe from the reservoir to the master cyclinder. I junked the old disk pads and cleaned the pins for the new pads.

My 1988 K100LT (renovation) Tidy - up!! Plate-11

My next job was removing the rear brake disk from the beval box. I naffed the heads on the bolts so I had to drill them out. I took it steady and in stages using larger sized drill bits to take the top out and not drill too deep. Once I got the disk off it was easy enough with the moll grips again to unscrew the rest of the bolts out. Even with the moll grips they were quite stiff and hard to move for small bolts. I have new ones on order for delivery this next week. I de-greased and cleaned the beval box and checked for any leaks,which there is non.

My 1988 K100LT (renovation) Tidy - up!! Beval-10

I will be eagerly awaiting the postman this coming week for 6 small packages of items needed to re-assemble and complete the rear end of the the bike.

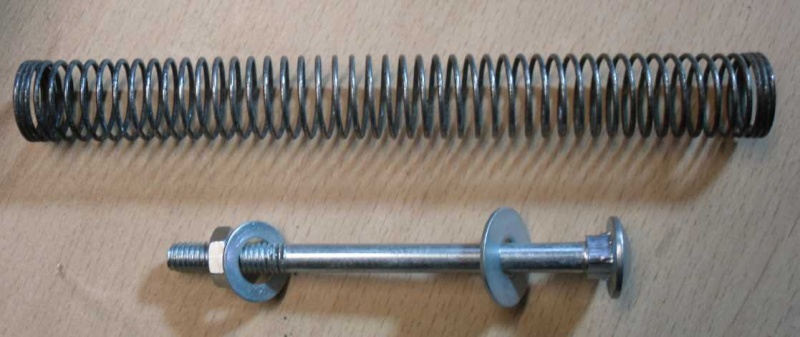
A little trick I have found usefull when cleaning small springs that have rusted a little and in need of cleaning. I have found that if you compress the spring using a long bolt,nut and a couple of washers it is easier to clean the spring with a wire brush.

My 1988 K100LT (renovation) Tidy - up!! Spring10

My 1988 K100LT (renovation) Tidy - up!! Spring11

Thats it for this week until next time

Regards
Leon


club_c

club_c
Life time member
Life time member
Moll grips?


Leon

Leon
active member
active member
oops should have put mole grips! or locking pliers Embarassed
Whatever they are called they did the trick........

Regards
Leon


barryt

barryt
Silver member
Silver member
Good stuff Leon...looking good!


club_c

club_c
Life time member
Life time member
Leon wrote:oops should have put mole grips! or locking pliers Embarassed
Whatever they are called they did the trick........

Regards
Leon
Ahh. Generally referred to as Vice Grips here in Canada, though technically that is a brand name...


View previous topic View next topic Back to top  Message [Page 1 of 1]

Permissions in this forum:
You cannot reply to topics in this forum