1

 LED Lights in the Instrument Pod, Plus Sealing Out the Moisture Sat Jan 10, 2009 7:09 am
K-BIKE
Life time member

The talk about speedo repairs recently made me decide to open mine up do
some preventative maintenance and to also change the instrument cluster illumination
lamps from filament bulbs to LED’s using the kit from Drake Smith at http://smithduck3.home.comcast.net/~smithduck3/kbikeparts/ledupgrade.htm
As my speedo has intermittently suffered from mist
condensation on the inside of the glass I wanted to take a look at the reasons for that and
any possible cures.
I ordered the LED kit a week or so ago from Drake in the US and it turned up here
in New Zealand very promptly with excellent feedback from Drake about where we
were in the process of order and shipping. Payment was by PayPal so that was
all painless as well. As Drake also has a good selection of second hand spare parts for
K bikes it is worth taking a look at his site for those items alone.
Now to the instrument cluster. In the case of the K100 RS 4 Valve, getting the
instrument cluster off the bike is fairly easy, calling only for a 5 mm Allen
key for the removal of the unit and a 3 mm Allen key for releasing the
electrical connector. I have big hands and the removal of the cluster can be
done without taking any of the fairing off just by moving the bars from lock to
lock and reaching underneath. It helps if one also removes the screws fastening the “crash pad”
which surrounds the ignition switch lock barrel first and then pushing that away as that gives a little
more manoeuvring room and helps avoid accidentally scuffing the inside of the
fairing windscreen. The crash pad is held by two 5mm Allen headed screws which
are screwed into the top of the fork yoke close to the petrol tank.
The other thing that makes a HUGE difference to the ease of
carrying out this project is to use ball ended Allen keys because one then has
a wide range of angles one can work at, using fixed non ball ended keys would I
suspect be a real pain. Do yourself a favour and get a set for use on all Allen
head bolts on the bike, you will not regret it!
To remove the cluster put the bike on the centre stand and after releasing and shifting the crash pad put the bars onto full
lock and reach in to the fairing to undo the two 5 mm Allen head screws underneath
the cluster on that side. Putting the handlebars on opposite full lock facilitates removal of the last two 5mm fixing screws. These secure the instrument cluster into the top of the forks and
also seat the pod into a cast mounting plate which surrounds the rear of the
pod. Each 5mm Allen screw has a thin washer and the screws and washers are
really easy to drop into the fairing as I found out the hard way.
Having got the four screws out I then undid the 3mm Allen socket
in the cable loom. As one unscrews this it drives the plug and socket almost fully
apart as one undoes the screw, enabling one to then pull it off fairly easily.
One can then lift out the instrument cluster and take it to where one can sit
down at a table and work on it in clean conditions. It possibly would be easier to disconnect the
connector before taking out the 4 by 5mm Allen screws, I did not do that so
cannot say for sure which order would be best. One thing about the 3 mm
connector is that it does not look like an Allen head socket but it is.
Having carried the unit to somewhere one can sit and work, lay
the unit face down on something like an old towel to prevent scratches to the
face and then remove the 9 Phillips screws which hold the instrument pod closed,
that enables one to separate the back from the main body by pulling them apart.
Pull straight up not at an angle because the pins for the socket on the cable
loom all pass through the base.
I suggest it is worth having a replacement O-ring gasket to
hand as these are quite cheap and still available from BMW. This is because
when one separates the two units the O-ring is likely to move out of position
and replacing it in exactly the same place would be hard. On mine it is obvious
by the different amounts of squash which have become set in the O-ring that the
gap differs all the way around so a new gasket was imperative for mine.
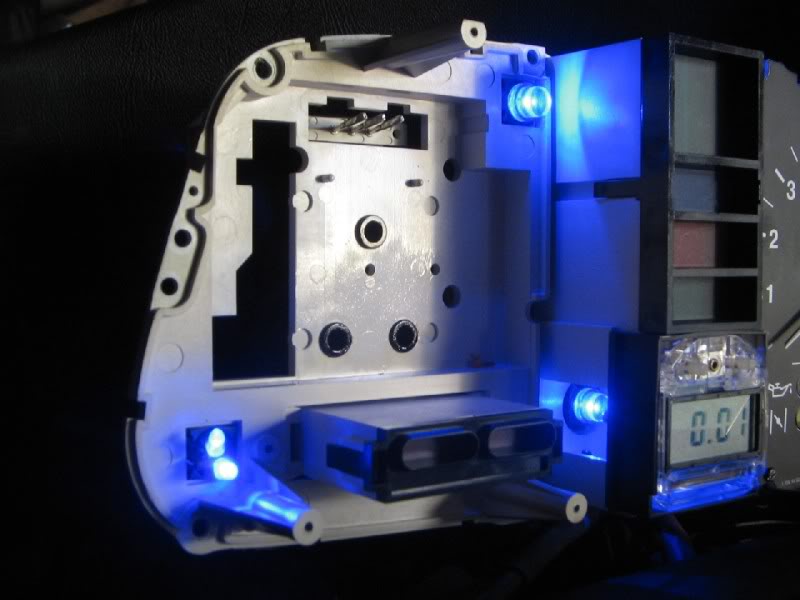
Looking at the base of the instrument cluster to my mind reveals a number of design
faults with regard to water resistance. Firstly the O-ring is made of a type of
high density foam which in my experience can wick moisture through the body of
the O-ring seal and thereby into the inside of the pod. Secondly the base
fixings of the instrument pod are not sealed, as you will see when you open it
and look at the inside of the base where two metal plates form the support
which holds the cluster to the top of the forks. These two plates each have
areas where moisture can get in from the outside to the inside. I chose to seal
these using a neutral cure silicone gasket material and Loctite instant gasket
on the threads. Fortunately my cluster has the two Gore-Tex breathers on the
rear so I left those alone as they looked spotless.
After fitting the LED’s it is worth checking that all
connections are OK and that the lighting is working. This can be done by
temporarily fitting the instrument pod cover and pushing the cable loom and
connector down out of the fairing to a position above the front mudguard and then
screwing it onto the back of the pod where in that position it is easy to
reach. Having verified all is working correctly, it is easy to disconnect the
wiring loom and return to the table and fit the base permanently to the body of
the cluster using the 9 screws
When I re-assembled the unit I sealed each of the 9 screw
heads with a dab of Tef-Gel made by http://www.tef-gel.com/index.html
which permanently remains as a stiff grease, note I did not use their similar
sounding but different Tuf-Gel which is a self curing product. I used the Tef-Gel on the four mounting
screws as well to prevent condensation wicking up their threads.
I came across the Tef-Gel at my local marine engineering
supplies store near where I work, as the streets surrounding our offices are a
major area for the marine industry. It is intended to prevent differential
metal corrosion and water penetration of fasteners so it looked like just the
thing for my job, since buying it I have also used it on a lot of other screw
fastenings on the bike.
I chose to also seal the instrument case gasket seam with a
strip of 3M black adhesive tape right around the body covering the gasket with a good overlap so as
to seal that against the water wicking issue, once in place it is nigh on
invisible so it is well worth doing.
The internal instrument pod wiring system chosen by Moto
Meter, the manufacturers of the cluster, uses flexible printed circuit wiring
looms which are then folded over the edge of each light hole so the bulb holder
contacts can press directly against a tab of the printed circuit wiring. NOT a
very durable system but the replacement of bulbs is infrequent and with Drake’s
LED’s hopefully it will never be needed again. Each connection in the
instrument cluster was treated thoroughly with DeoxIT as were all accessible
plugs and sockets inside the housing including the main exterior one at the
rear which connects the instrument pod to the chassis loom.
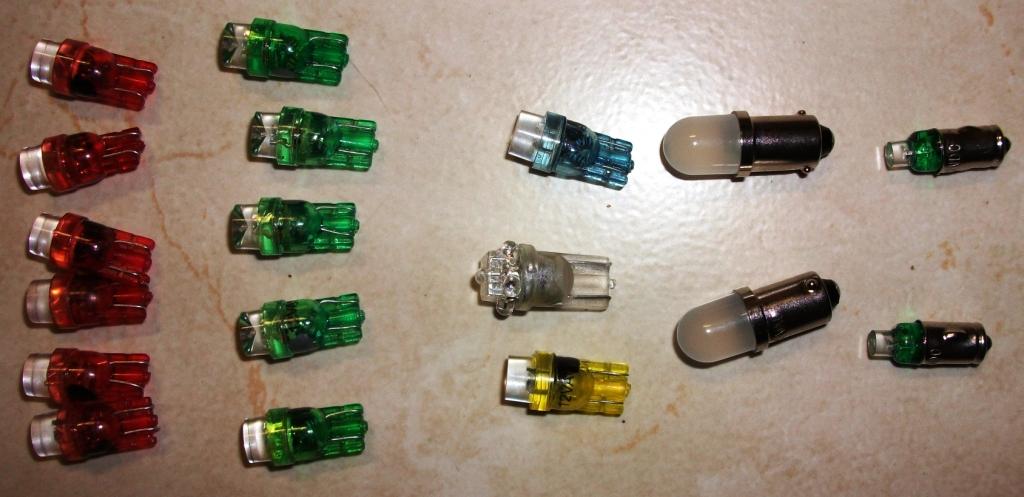
The actual installation of the LED bulbs is well covered in
Drake’s instructions so I shall not repeat them here except to say he comments
that it is important to ensure when removing and replacing the bulb holders
that the contacts formed by the printed circuit wiring do not get flipped out
of position when pulling the bulb holders out. That happened on one of mine and
thanks to Drake I spotted it had happened before replacing the holder. The same warning would still apply even if one
were simply putting in new replacement filament lamps instead of LED’s.
As LED’s are polarity sensitive they will only work one way
round and Drake marks them with a spot of silver paint and notes which way
round to put them in his instructions. It is important to note that the LED’s
go one way round at the top of the instrument and the other way round at the
bottom. One needs to pay close attention to that as it could be easy to skim
read the instructions which are completely specific about which way round to
put them and then put the LED’s all in the same way round. All that will happen
is any LED’s the wrong way round will not light until they are removed and
replaced in the correct polarity direction.
So all in all a worthwhile job done plus the opportunity to
seal the housing and DeoxIT the connections inside to hopefully avoid the connection
gremlins. Drake’s kit makes the night lighting slightly brighter than standard
but I found that is not a problem even in country areas without street lights and
the very pure green colour is excellent. Drake comments he experimented with
different colours before settling on staying with the standard BMW green
colour, it is an excellent kit and I found Drake was a great guy to do business
with.
Once assembled I found I still got condensation and then realised the only place
I had not sealed was the odometer reset shaft so I opened up the cluster again
and gave that shaft a good dose of Tef-Gel and sealed it up. Result all misting cured
K-BIKE January 2009
Last edited by K-BIKE on Fri Feb 17, 2012 4:38 pm; edited 1 time in total


 1986 k75, 1985 K100rt,


 .
.