Go to page :  1, 2, 3 ... 11 ... 20
52

 Re: 85 RS restoration (part #1) Sat Apr 02, 2011 7:27 pm
Oldgoat
Life time member

Last edited by Oldgoat on Sat Apr 02, 2011 9:00 pm; edited 2 times in total (Reason for editing : update)
53

 Re: 85 RS restoration (part #1) Sat Apr 02, 2011 10:45 pm
charlie99
VIP

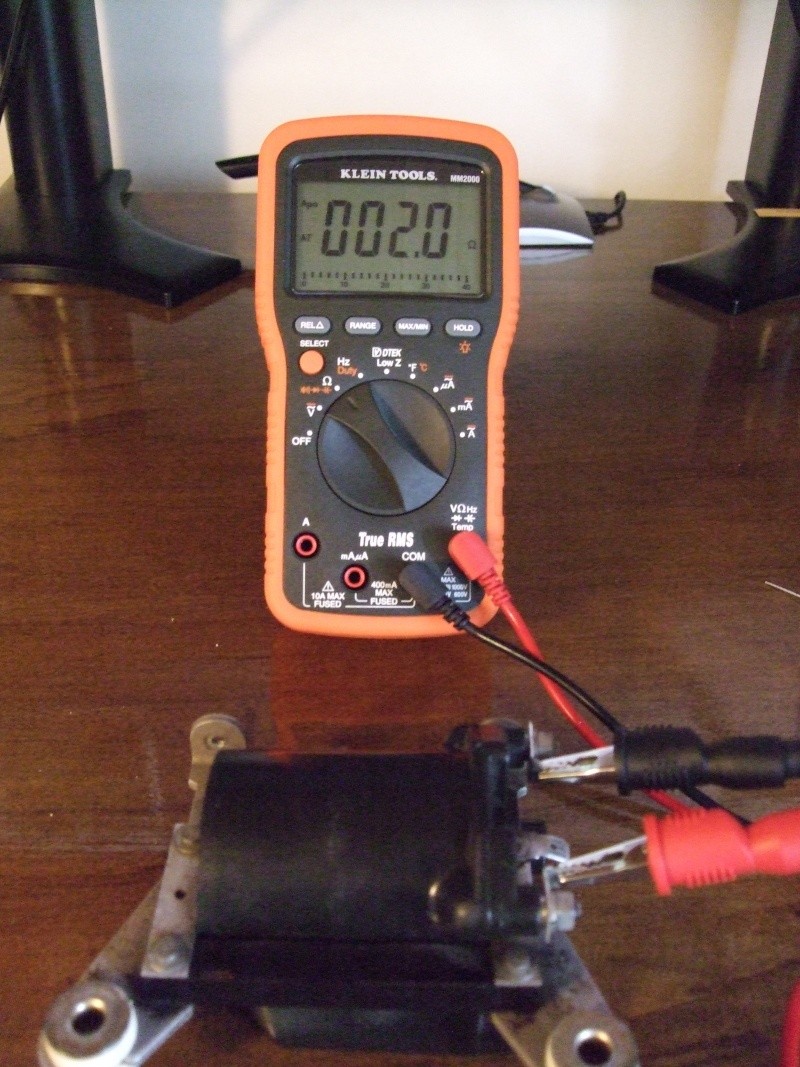
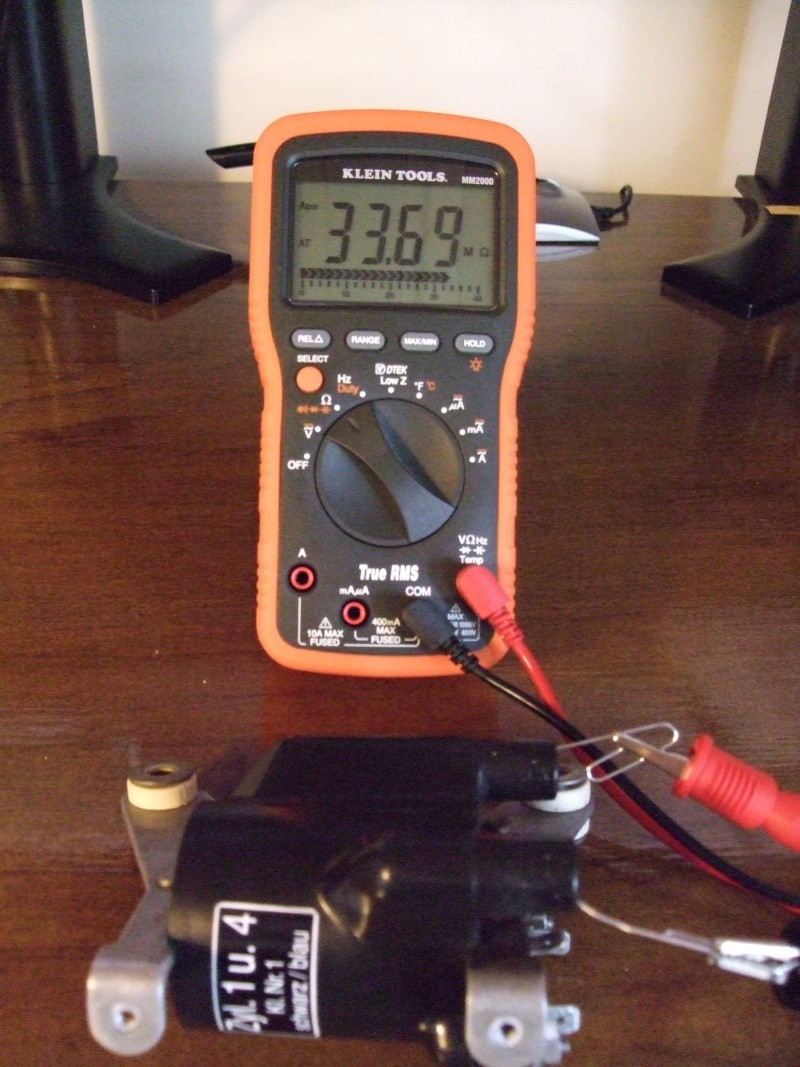
i hope it was high .....like 200,000 = 200k or 2 meg
if you only had it on 200 ohms it would show open
most secondarys of coils are above 10 k ohms
and it looks like you are measuring ht output to ht output which would be over 20,000 ohms
try earth side to ht output
and try to confirm that you are in fact touching the inner connection ...(doesnt look like red lead has enough angle to make that connection )
just a thought
54

 Re: 85 RS restoration (part #1) Sat Apr 02, 2011 11:16 pm
Oldgoat
Life time member

OG
55

 Re: 85 RS restoration (part #1) Sun Apr 03, 2011 1:34 am
charlie99
VIP

but i do think you should be looking at earthy side of the coil and output of the high tension to get an accurate measurement, even if you got the positive side of the primary it would only add 2.4 ohms to the overall result ....12,000 + 2.4 is nothing to worry about
maybe even a length of stiff wire wound around the probe would let you see if you are indeed touching the high tension cup inside the insulator stack .... try again mate ..and good luck
__________________________________________________
cheezy grin whilst riding, kinda bloke ....oh the joy !!!! ...... ( brick aviator )
'86 K100 RT..#0090401 ..."Gerty" ( Gertrude Von Clickandshift ) --------O%O
'86 k100 rs.. #######.. "Fred " (f(rame) red ) ( Fredrick leichtundschnell ) - -
bits and pieces from many kind friends across the k100 world ...with many thanks ..
1987 k100rs ######## "Red" - (red sports rs TWB style )
1989 K100rt #009637 "Black Betty" (naked rt ala Nigel , now sporting an rs main fairing )
56

 Re: 85 RS restoration (part #1) Sun Apr 10, 2011 2:09 am
K-BIKE
Life time member

Regards,
K-BIKE
57

 Re: 85 RS restoration (part #1) Sun Apr 10, 2011 1:52 pm
Oldgoat
Life time member

Tested them with a new RMS meter and still no joy. Have a set of used coils coming from a trusted vender on Flea-Bay so hopefully closing in a getting her up again.
OG
Last edited by Oldgoat on Tue Apr 12, 2011 10:05 pm; edited 2 times in total (Reason for editing : update)
58

 Re: 85 RS restoration (part #1) Sun Apr 10, 2011 5:42 pm
Crazy Frog
admin


__________________________________________________
  1986 k75, 1985 K100rt, 1986 k75, 1985 K100rt, |
59

 Re: 85 RS restoration (part #1) Sun Apr 10, 2011 6:34 pm
Oldgoat
Life time member

Last edited by Oldgoat on Sun Apr 10, 2011 6:35 pm; edited 1 time in total (Reason for editing : pics)
61

 Re: 85 RS restoration (part #1) Thu Apr 14, 2011 9:25 pm
Oldgoat
Life time member

Last edited by Oldgoat on Thu Apr 14, 2011 11:29 pm; edited 2 times in total (Reason for editing : pics)
62

 Re: 85 RS restoration (part #1) Thu Apr 14, 2011 9:46 pm
club_c
Life time member

64

 Re: 85 RS restoration (part #1) Fri Apr 15, 2011 5:30 pm
K-BIKE
Life time member

Regards,
K-BIKE
66

 Re: 85 RS restoration (part #1) Sat Apr 16, 2011 1:34 pm
charlie99
VIP

seems the coils arent wired the way i thought ....seems as if there the isolated types ...hmmm ...well you learn something new every day ...thank hevens
good work on finding some replacements
__________________________________________________
cheezy grin whilst riding, kinda bloke ....oh the joy !!!! ...... ( brick aviator )
'86 K100 RT..#0090401 ..."Gerty" ( Gertrude Von Clickandshift ) --------O%O
'86 k100 rs.. #######.. "Fred " (f(rame) red ) ( Fredrick leichtundschnell ) - -
bits and pieces from many kind friends across the k100 world ...with many thanks ..
1987 k100rs ######## "Red" - (red sports rs TWB style )
1989 K100rt #009637 "Black Betty" (naked rt ala Nigel , now sporting an rs main fairing )
67

 Re: 85 RS restoration (part #1) Sat Apr 16, 2011 2:13 pm
Oldgoat
Life time member

OG
68

 Re: 85 RS restoration (part #1) Sat Apr 16, 2011 2:15 pm
Oldgoat
Life time member

OG
69

 Re: 85 RS restoration (part #1) Sat Apr 16, 2011 8:32 pm
blaKey
Life time member

Great work Oldgoat.
__________________________________________________
Neil
K100RS 1986 RED!
Dress for the ride and the potential slide.
71

 Re: 85 RS restoration (part #1) Tue Apr 19, 2011 12:39 pm
Oldgoat
Life time member


OG

73

 Re: 85 RS restoration (part #1) Tue Apr 19, 2011 8:06 pm
robmack
Life time member

You're welcome OG.Oldgoat wrote:Wrapping fuel lines with fiberglass tape and than plan on putting a silicone sleeve over this. Thanks Robmack! :-)
I read the description for this product and it reduces the transferance of heat by reflecting it. Will this be sufficient to keep the engine heat away from the fuel? The usual material used is foam insulation. Foam insulation functions differently by introducing a resistance to heat conduction. I'm unsure that the reflective tape will have the same effect.
Why cover the taped fuel line in sillicone sleave afterwards? What's the purpose?
__________________________________________________
Robert
1987 K75 @k75retro.blogspot.ca
74

 Re: 85 RS restoration (part #1) Tue Apr 19, 2011 8:21 pm
Oldgoat
Life time member

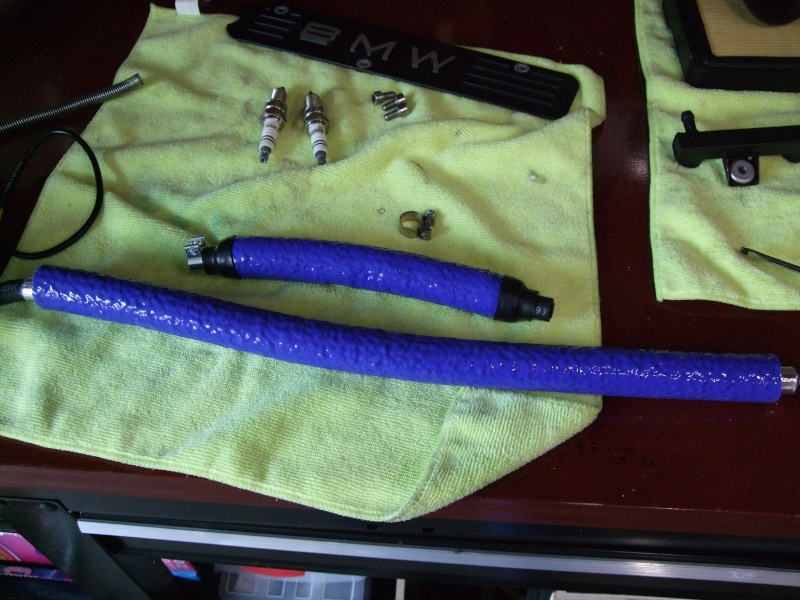
My bad with the description. It's actually Silicone Jacketed fiberglass.
http://www.techflex.com/prod_FIN.asp
I have this from another project so I thought I would do a little experiment and see how they work in conjunction. The tape is just a thin layer of fiberglass adhered to the reflective foil so I think you're right that it wouldn't do the job on its own, and I don't think it would hold up well being exposed to fuel and such.
I'll let you know how it turns out.
OG
Last edited by Oldgoat on Tue Apr 19, 2011 8:29 pm; edited 2 times in total (Reason for editing : update)
75

 Re: 85 RS restoration (part #1) Tue Apr 19, 2011 8:35 pm
Crazy Frog
admin

During the months of July-August, the temperature is around 40C and when riding in town, the fan will start every 5 min. Other than a blast of hot air blowing on my legs, I never experienced any problems with the gas being too hot. I always try to keep a good level of gas in my tank (I refill when the 7 liters light comes on) and that seems to prevent the fuel from bubbling.
What you are doing is an improvement but I don't think this is necessary. I cannot hurt to improve the design.
CF
__________________________________________________
  1986 k75, 1985 K100rt, 1986 k75, 1985 K100rt, |
76

 Re: 85 RS restoration (part #1) Tue Apr 19, 2011 9:15 pm
Oldgoat
Life time member

OG
77

 Re: 85 RS restoration (part #1) Tue Apr 19, 2011 9:37 pm
robmack
Life time member

Last season, driving around in 35-40C temperatures in Toronto, I experienced hot tank problems. To alleviate that problem this year, I re-routed the return line to the outside of the engine compartment. The normal route for the return line is from the pressure regulator, through the engine compartment, past the rad return hose and into the tank. I routed my line from the pressure regulator, between the 3rd and 4th intake manifold, up along the left frame member and into the tank. I secured the line loosely with a tie wrap to the frame. Since the line now exits the hot engine compartment early and does not run against the hot rad hose, I'm hoping the change will keep the gas cooler and tank consequently cooler.Crazy Frog wrote:...Other than a blast of hot air blowing on my legs, I never experienced any problems with the gas being too hot.
I'm also going to try out the Jerry Blanket idea as well. My tank has the insulation on the underside but the Jerry Blanket will add extra insulation. I'll report my findings later this summer.
__________________________________________________
Robert
1987 K75 @k75retro.blogspot.ca
78

 Re: 85 RS restoration (part #1) Tue Apr 19, 2011 10:46 pm
charlie99
VIP

i have also insulated the return fuel line and noticed some effect ...but if you actually feel the tank near the front ...right above the radiator you will notice that it is verry hot . mine has an additional issue in that just near the fuel takeoffs i have no insulation at all for that whole area ...so that exposes about 6 inches by 2 inches directly to that saturated area .
i noticed on a ride last weekend (air temp was much cooler 23c than we usually have 30 c +) the tank was no where near as hot at all ...flow of air i suspect and cooling affect, heat transfer was still there but no where near as high .
still working on my ram air shroud in front of the radiator to push cool air into those areas . ive got the mould but need enchoragement to get the fibreglass work done .....and stop riding on my days off .
__________________________________________________
cheezy grin whilst riding, kinda bloke ....oh the joy !!!! ...... ( brick aviator )
'86 K100 RT..#0090401 ..."Gerty" ( Gertrude Von Clickandshift ) --------O%O
'86 k100 rs.. #######.. "Fred " (f(rame) red ) ( Fredrick leichtundschnell ) - -
bits and pieces from many kind friends across the k100 world ...with many thanks ..
1987 k100rs ######## "Red" - (red sports rs TWB style )
1989 K100rt #009637 "Black Betty" (naked rt ala Nigel , now sporting an rs main fairing )
79

 Re: 85 RS restoration (part #1) Tue Apr 19, 2011 10:57 pm
Oldgoat
Life time member

OG
80

 Re: 85 RS restoration (part #1) Wed Apr 20, 2011 5:16 am
charlie99
VIP


youll have to use a little imagination as this is will be the outer shell
below this on the fairing propper are two triangular holes that mate up with passages that go to the underside of the tank through the frame.
if you have the tank off you will be able to see them either side of the ignition controller computer (ignitor) and once you cable manage the cables and stuff around that area.
yes i know there is the y bar yolk for the brake feed about the same location on the frame /bottom of the stearing head ..but a little cut in the fiberglass will enable clearance once fitted up .

the bmw crew made cups to push air into the fairing through the fork sockets in the fairing ......which is fine but its really just a presure thing to try to cause flow through the fairing proper ...i see my mod as feeding air to the underside of the tank with the intention of creating a high presure and cooling flow to the underside of the tank ....with the right application (of removal of the heat shield through the centre line of the tank ) ambient temperature air will push through sucking the heat out of the whole area ,,,,and near ambient air should now vent out past the tank right about the thigh area .....well whilst mooving anyhow
well thats my theory
as you know i cable tie my multimeter to the inside of the fairing with a temp sensor bluetacked to the area im trying to measure ....ill let you know how it goes ......with the mould made it should be perty easy to pop out a couple of extras ....for testing
yeah im, crazy ...but if you never try ...you dont know what your capable of ....huh ?
81

 Re: 85 RS restoration (part #1) Wed Apr 20, 2011 12:19 pm
Oldgoat
Life time member

OG
p.s. I've been know to pull out the temp probe too so you're not the only crazy one.
Last edited by Oldgoat on Wed Apr 20, 2011 1:01 pm; edited 1 time in total (Reason for editing : Edit)
82

 Re: 85 RS restoration (part #1) Wed Apr 20, 2011 5:01 pm
83

 Re: 85 RS restoration (part #1) Wed Apr 20, 2011 5:18 pm
charlie99
VIP

__________________________________________________
cheezy grin whilst riding, kinda bloke ....oh the joy !!!! ...... ( brick aviator )
'86 K100 RT..#0090401 ..."Gerty" ( Gertrude Von Clickandshift ) --------O%O
'86 k100 rs.. #######.. "Fred " (f(rame) red ) ( Fredrick leichtundschnell ) - -
bits and pieces from many kind friends across the k100 world ...with many thanks ..
1987 k100rs ######## "Red" - (red sports rs TWB style )
1989 K100rt #009637 "Black Betty" (naked rt ala Nigel , now sporting an rs main fairing )
84

 Re: 85 RS restoration (part #1) Sat Apr 23, 2011 1:08 pm
Oldgoat
Life time member

[url=https://servimg.com/view/16262455/93]
 [/url]
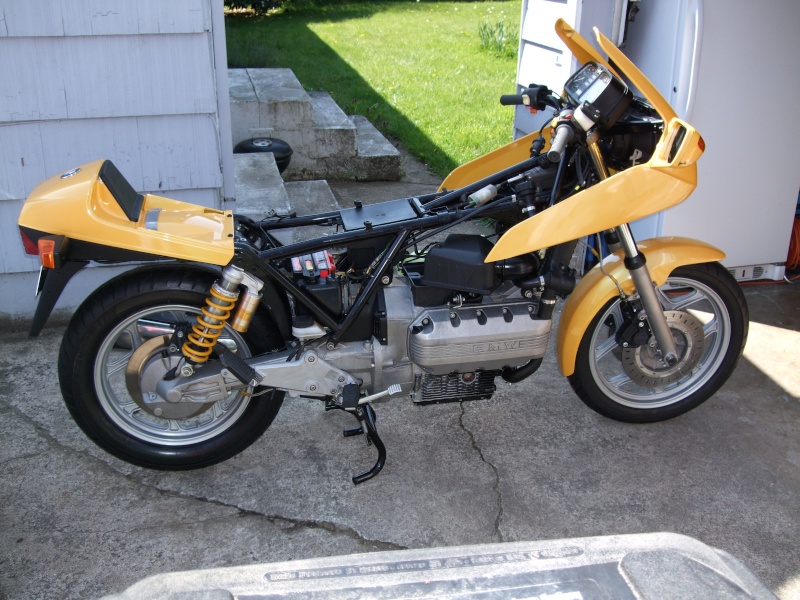
Will be posting progress over the weekend
OG

86

 Re: 85 RS restoration (part #1) Sat Apr 23, 2011 3:35 pm
robmack
Life time member

I suggest that you replace the stock parking light with a LED strip while the fairing is off. These strips have SMD LEDs soldered to a flexible substrate and covered with vinyl tubing. They can be cut to length. Even Walmart has them in stock complete with leads. Substituting for the pilot light is simple -- remove the OEM light and socket, fish the flexible LED strip in through the hole and connect up the 12V power. It iwll look something like this when finished:

__________________________________________________
Robert
1987 K75 @k75retro.blogspot.ca
87

 Re: 85 RS restoration (part #1) Sat Apr 23, 2011 5:16 pm
Oldgoat
Life time member

I found them. Apparently the guy who repainted wrapped them up and zip tied them to the mounting bracket. I like the LED's. Looks like a new Audi!
OG
88

 Re: 85 RS restoration (part #1) Sat Apr 23, 2011 5:20 pm
89

 Re: 85 RS restoration (part #1) Sun Apr 24, 2011 11:33 am
Oldgoat
Life time member

Was planning on doing the tank rubber this morning along with testing, but the pacific northwest weather rolled in last night so might have to postpone as my tiny garage is not well ventilated. :-(
OG
Last edited by Oldgoat on Sun Apr 24, 2011 11:51 am; edited 1 time in total (Reason for editing : update)
90

 Re: 85 RS restoration (part #1) Sun Apr 24, 2011 6:45 pm
SEGAFREDO
active member


91

 Re: 85 RS restoration (part #1) Sun Apr 24, 2011 8:49 pm
robmack
Life time member

Thanks for the updates, OG. I for one am interested to find out more about the fuel line insulation you are trialing. If you could give a short summary of the products you're using, that would be great. That way, I'll see if I can source them or equivalents here in Canada; sometimes the original products are not readily available.Oldgoat wrote:Quick update folks. Replaced cables and all the remaining rubber hoses that were still original. The silicone jacketed fiberglass sleeving looks a bit like a sex toy option, and may have to be covered with some black fuel resistant shrink tube to bring back an OEM look. In my impromptu experiments it was very effective at keeping the inside of the lines cool.
__________________________________________________
Robert
1987 K75 @k75retro.blogspot.ca
92

 Re: 85 RS restoration (part #1) Fri Apr 29, 2011 3:40 pm
Oldgoat
Life time member

http://www.mcmaster.com/#sleeving/=c38adi
The foil wrap I had around the garage as I said, but you can get it from a bunch of places including Amazon.com
I tested these with a temp probe and my heat gun and tried to keep the variables the same for all three.
Fuel hose alone went up to 185F after five minutes and stabilized at this temp.
Silicone sleeve over the fuel hose without foil tape went up to 143F after ten minutes and was ever so slowly creeping upwards.
Silicone sleeve with the foil tape wrapped under it went up to 129F after 10 minutes and was also ever so slowly creeping upwards.
Hope this gives you some more info you can use and I will also post back actual road results once it starts to really heat up here.
OG
93

 Re: 85 RS restoration (part #1) Fri Apr 29, 2011 6:25 pm
charlie99
VIP

myself ..i used the "standard" refrigeration mechanics insulation
which is 9.0 mm wall x 13mm id which stretches ever so slightly to fit over the hose. at $5.00 per length ( 2 meters)
given that most of the hose that were insulating is more or less hiden , i havent tried to "tart" it up .
but i see that your end product should pass through just about everywhere it needs to ...just be carefull near the fan huh ?
looking good mate
__________________________________________________
cheezy grin whilst riding, kinda bloke ....oh the joy !!!! ...... ( brick aviator )
'86 K100 RT..#0090401 ..."Gerty" ( Gertrude Von Clickandshift ) --------O%O
'86 k100 rs.. #######.. "Fred " (f(rame) red ) ( Fredrick leichtundschnell ) - -
bits and pieces from many kind friends across the k100 world ...with many thanks ..
1987 k100rs ######## "Red" - (red sports rs TWB style )
1989 K100rt #009637 "Black Betty" (naked rt ala Nigel , now sporting an rs main fairing )
95

 Re: 85 RS restoration (part #1) Sun May 01, 2011 8:02 pm
charlie99
VIP

__________________________________________________
cheezy grin whilst riding, kinda bloke ....oh the joy !!!! ...... ( brick aviator )
'86 K100 RT..#0090401 ..."Gerty" ( Gertrude Von Clickandshift ) --------O%O
'86 k100 rs.. #######.. "Fred " (f(rame) red ) ( Fredrick leichtundschnell ) - -
bits and pieces from many kind friends across the k100 world ...with many thanks ..
1987 k100rs ######## "Red" - (red sports rs TWB style )
1989 K100rt #009637 "Black Betty" (naked rt ala Nigel , now sporting an rs main fairing )
96

 Re: 85 RS restoration (part #1) Sun May 01, 2011 10:49 pm
Oldgoat
Life time member

OG
Last edited by Oldgoat on Sun May 01, 2011 10:51 pm; edited 2 times in total (Reason for editing : pic)
97

 Re: 85 RS restoration (part #1) Mon May 02, 2011 3:25 am
K-BIKE
Life time member

Regards,
K-BIKE.
98

 Re: 85 RS restoration (part #1) Mon May 02, 2011 10:34 pm
Oldgoat
Life time member

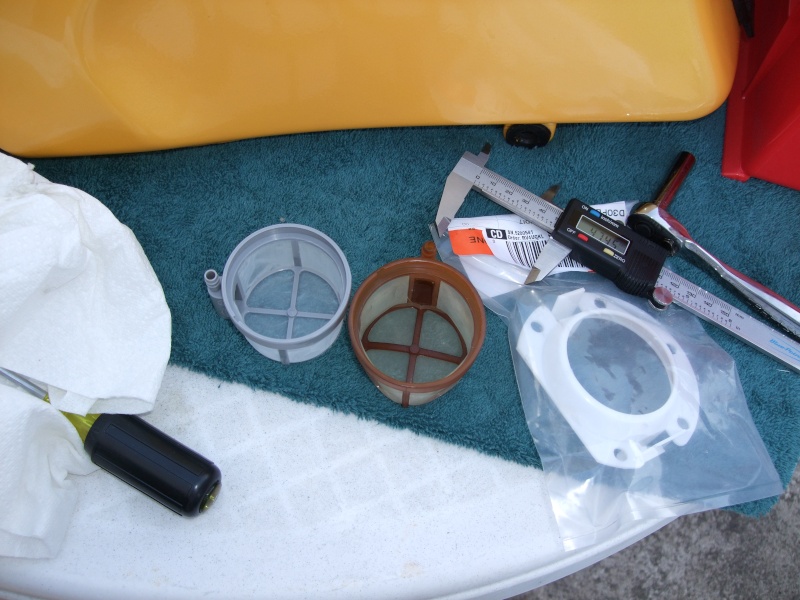
That was the confusing part as the fuel pump is the correct 52mm model. It's the new fuel pump filter on the left that is to small to fit over the fuel pump. The pump measured 52.12mm on the calipers and the ID of the new fuel pump filter measured out at 52.15mm so not really close considering it has to go over the rubber damper as well. The ID of my old brown colored filter is 53.75mm so a good bit bigger. I was unaware that the fuel filter with the hose attachment came in different diameters?
Anyway, had to just re-use my old brown one for now as she's got to go over the DMW for her inspection this week. Will have to track the mystery down as the old had some small tears and will need to be swapped out.
OG
99

 Re: 85 RS restoration (part #1) Tue May 03, 2011 1:25 pm
Oldgoat
Life time member

OG
100

 Re: 85 RS restoration (part #1) Wed May 04, 2011 2:24 pm
charlie99
VIP

but i am going to take cf's idea of a pipe to the top of the tank as the best option i have heard to date......
dont forget i welcome the sound of a ratly valve for the moment ....giggles....
but that being solved ...i realy should get the soldering iron out and fit something up before our meet up in a few weeks .
__________________________________________________
cheezy grin whilst riding, kinda bloke ....oh the joy !!!! ...... ( brick aviator )
'86 K100 RT..#0090401 ..."Gerty" ( Gertrude Von Clickandshift ) --------O%O
'86 k100 rs.. #######.. "Fred " (f(rame) red ) ( Fredrick leichtundschnell ) - -
bits and pieces from many kind friends across the k100 world ...with many thanks ..
1987 k100rs ######## "Red" - (red sports rs TWB style )
1989 K100rt #009637 "Black Betty" (naked rt ala Nigel , now sporting an rs main fairing )
101

 Re: 85 RS restoration (part #1) Wed May 04, 2011 5:34 pm
Oldgoat
Life time member

OG
Go to page :  1, 2, 3 ... 11 ... 20
Similar topics
Permissions in this forum:
You cannot reply to topics in this forum


