1

 K1100 Electric Windscreen - overhauling the lifting mechanism Sat Mar 11, 2023 10:57 am
Dai
Life time member

The topic title has been chosen so that it should also trigger Bert's original post from a search. The expanded pics are also rather large so that you can see the detail.
Chris Harris has a Youtube video in which he uses copious quantities of various lubricants and the power of the lifting motor to free up the sliding mechanism but IMO, that's not a particularly good idea because it could be something a bit more nasty jamming things up. I had two windscreen mechanisms, both of which were jammed and both, as it turned out, had something blocking the sliders that lubricant would not have shifted. The first one ran nice and smoothly after cleaning but the second one would not stay in sync. On top of crap in the sliders, this one also turned out to have one severely damaged drive cable and the other was very close to giving up. So, two new drive cables it was. BMW wanted £140 each for them (WTF!!!) but Motorworks will do good s/h ones for considerably less (£40 each). I got unbelievably lucky and picked up brand new left and right drive cables on ebay on successive days from different sellers for just £30 each.
As this windscreen was destined for an RT, the relays are mounted on the crossbar as per Bert's original post. You can use a pair of micro-relays and a much smaller bracket mounted higher up, but this was just the way I chose to do it.
Haynes, eat your heart out
Disassembly.
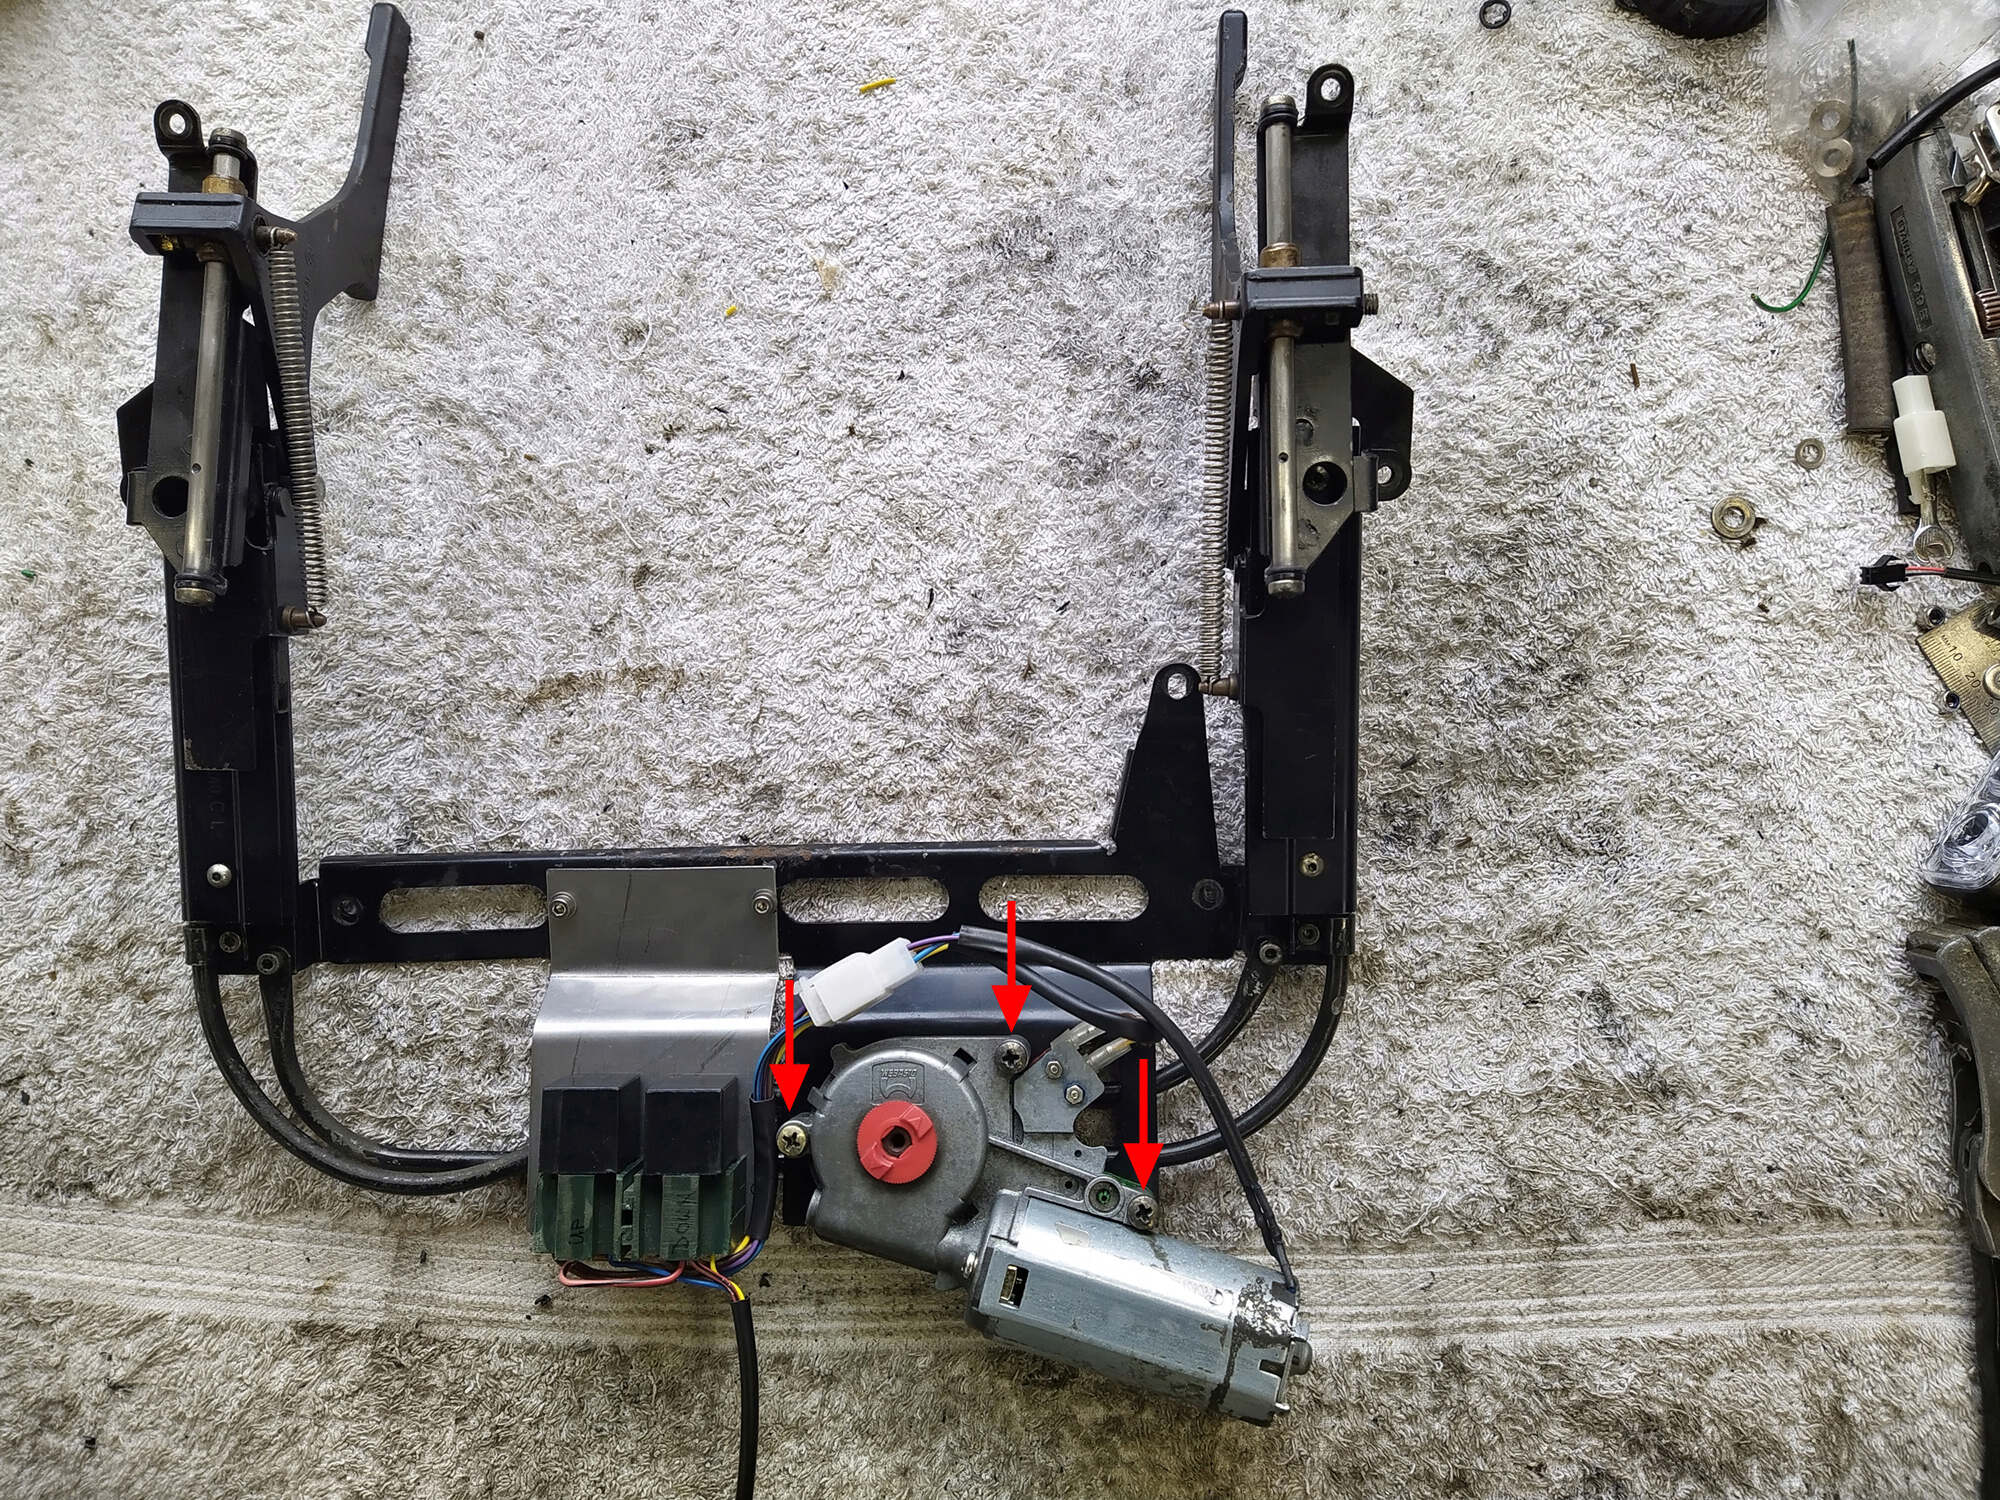
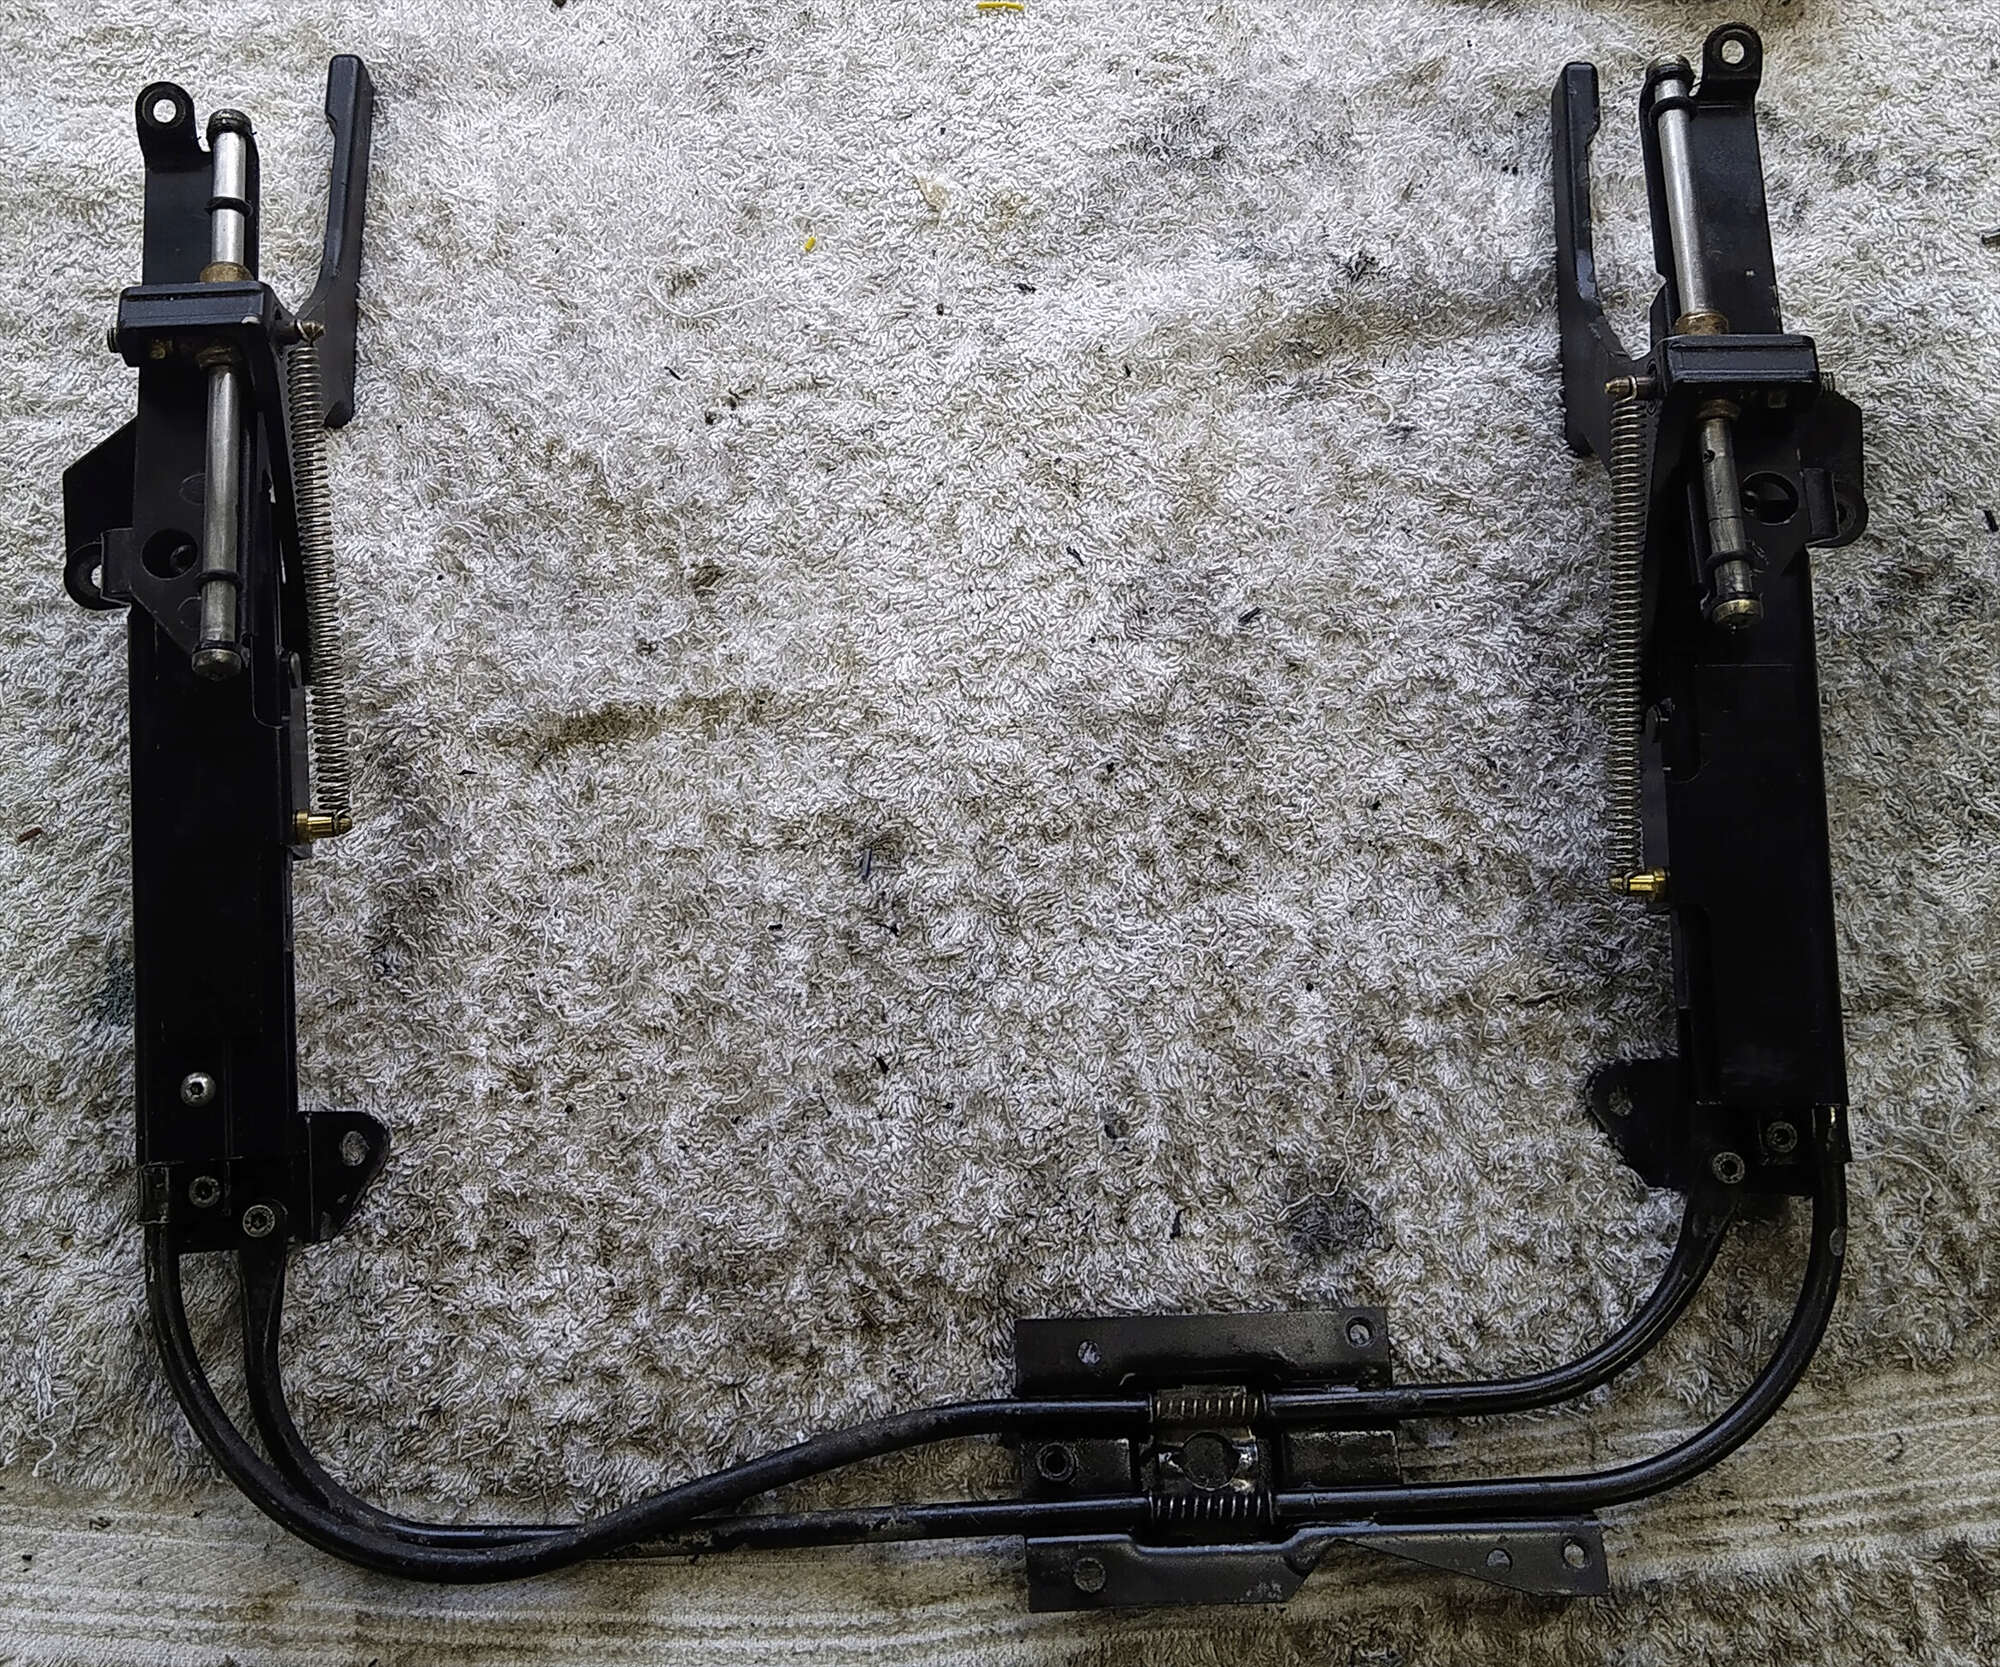
1. There are seven pretty obvious crosshead screws holding the mechanism to the windscreen mount. It's also obvious in this picture that the lifting arms are out of sync. Remove the three screws holding the lifting motor and put it to one side. Don't worry about drive positioning - we'll deal with that later.
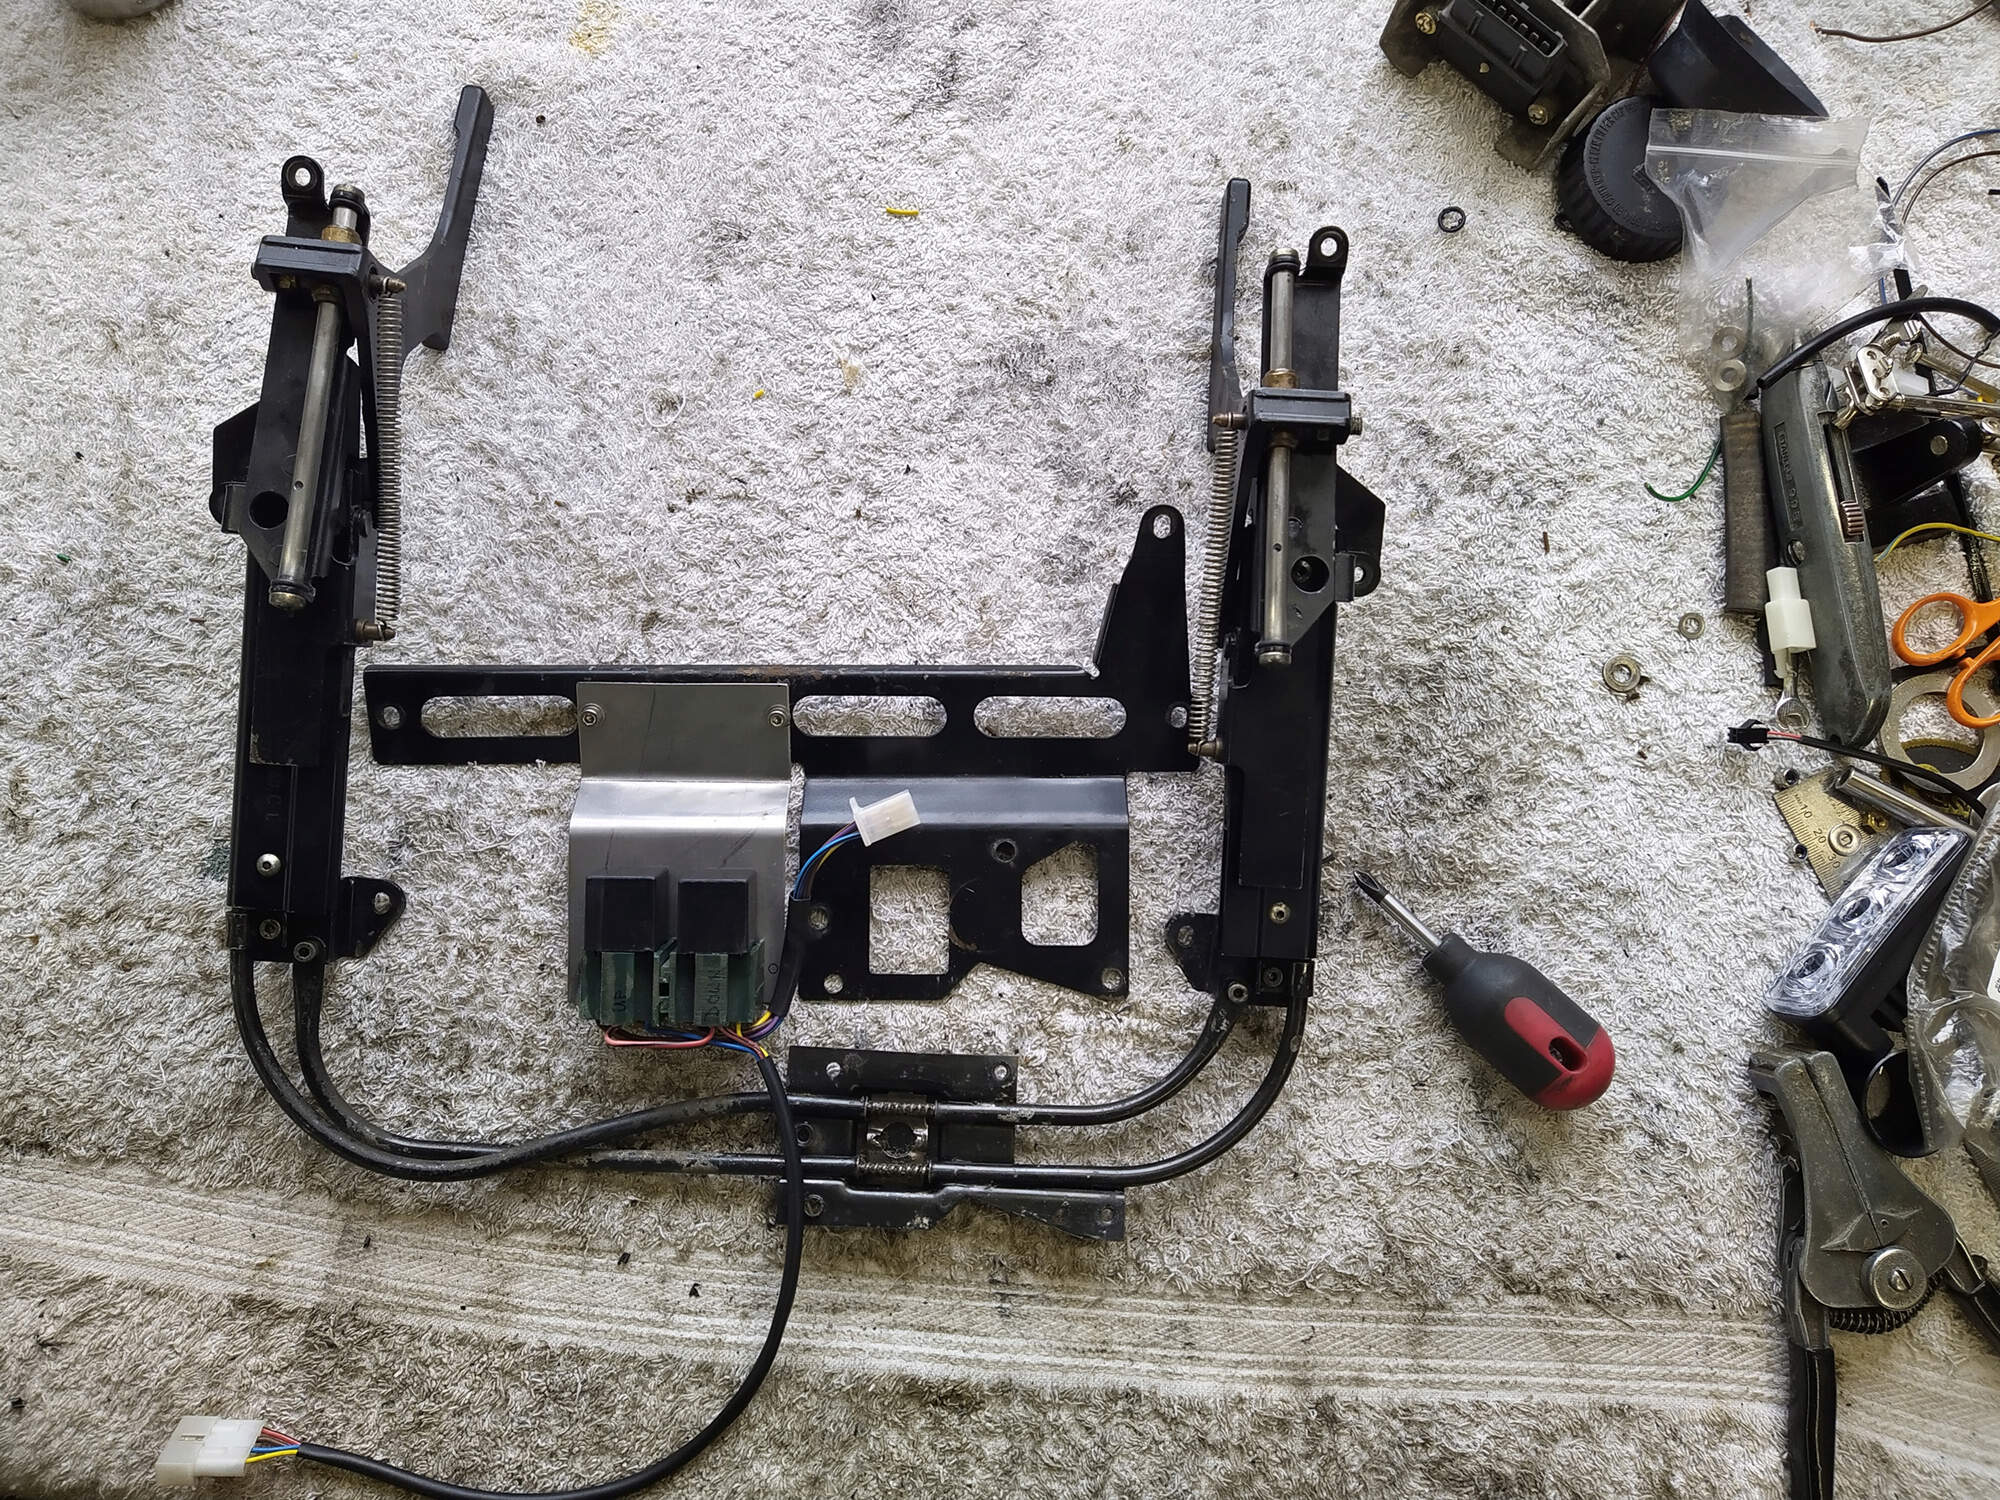
2. That will free up the crossbar. Put that to one side too.
3. Remove the tension springs. They will come off with just finger and thumb.
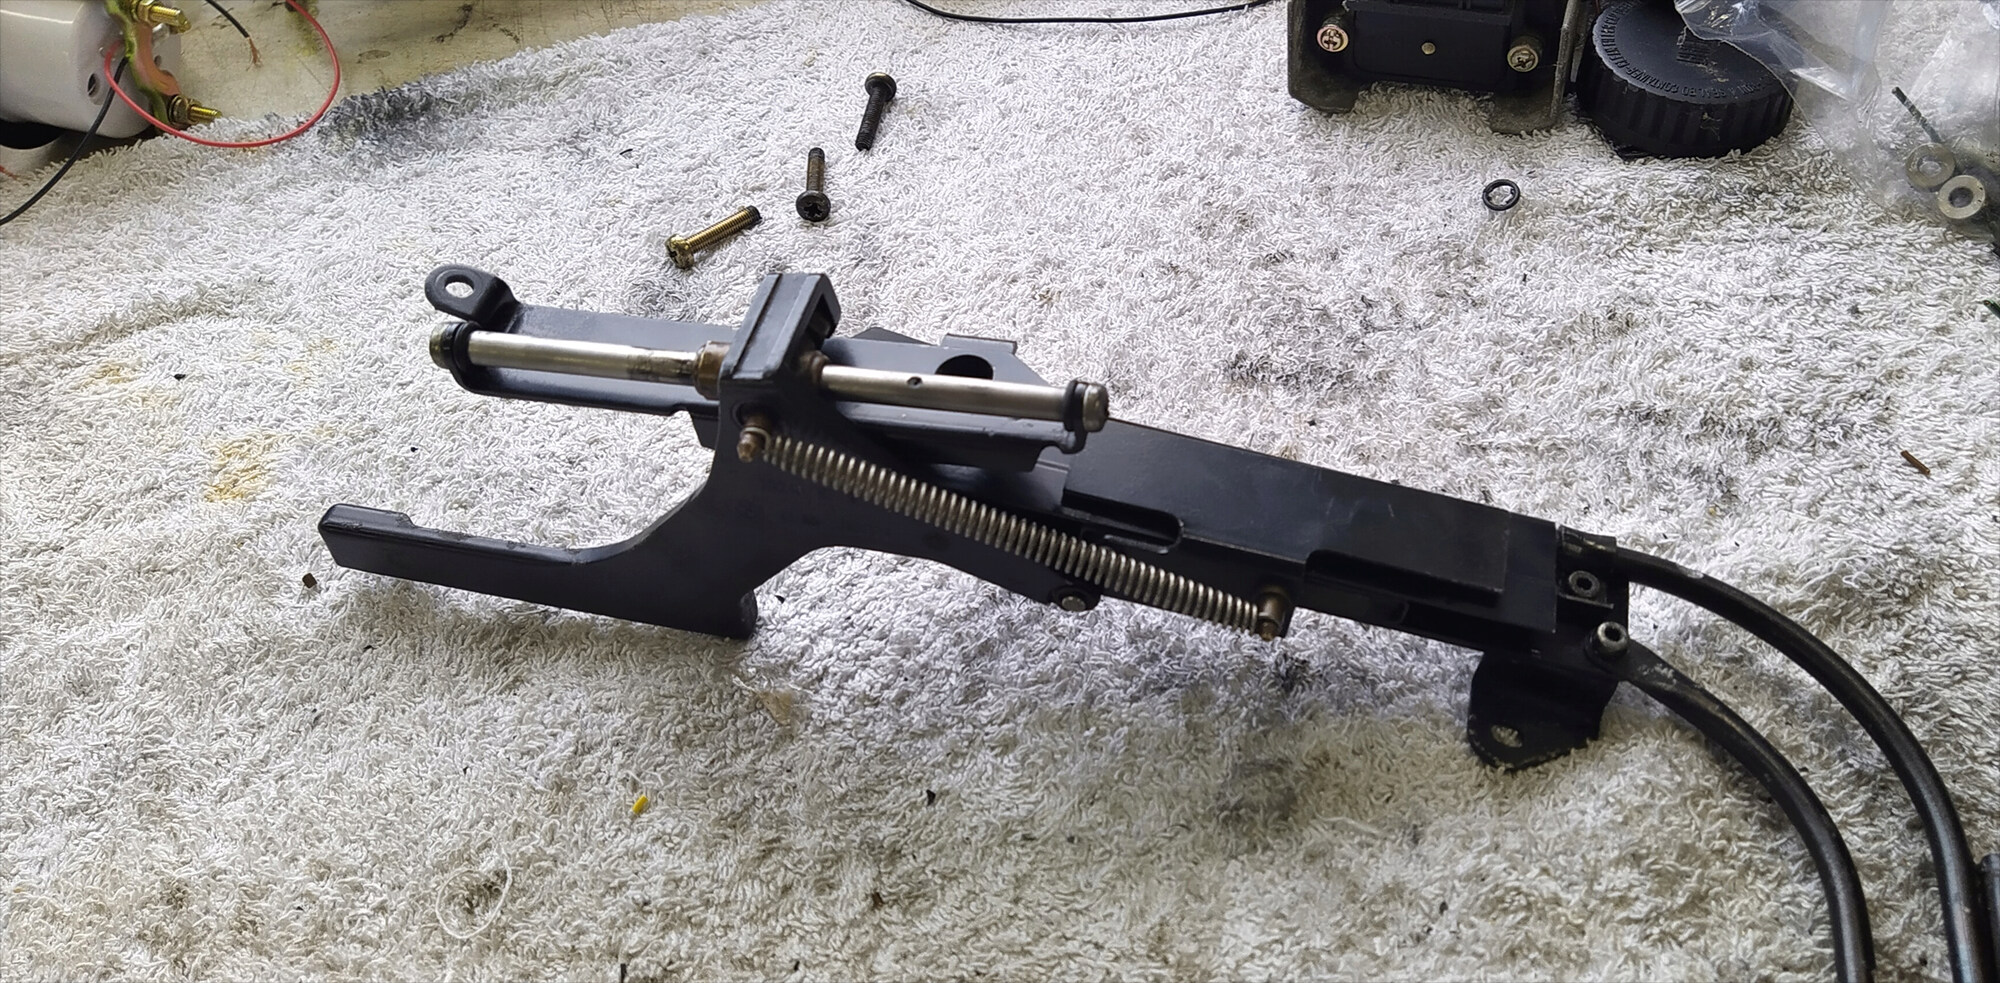
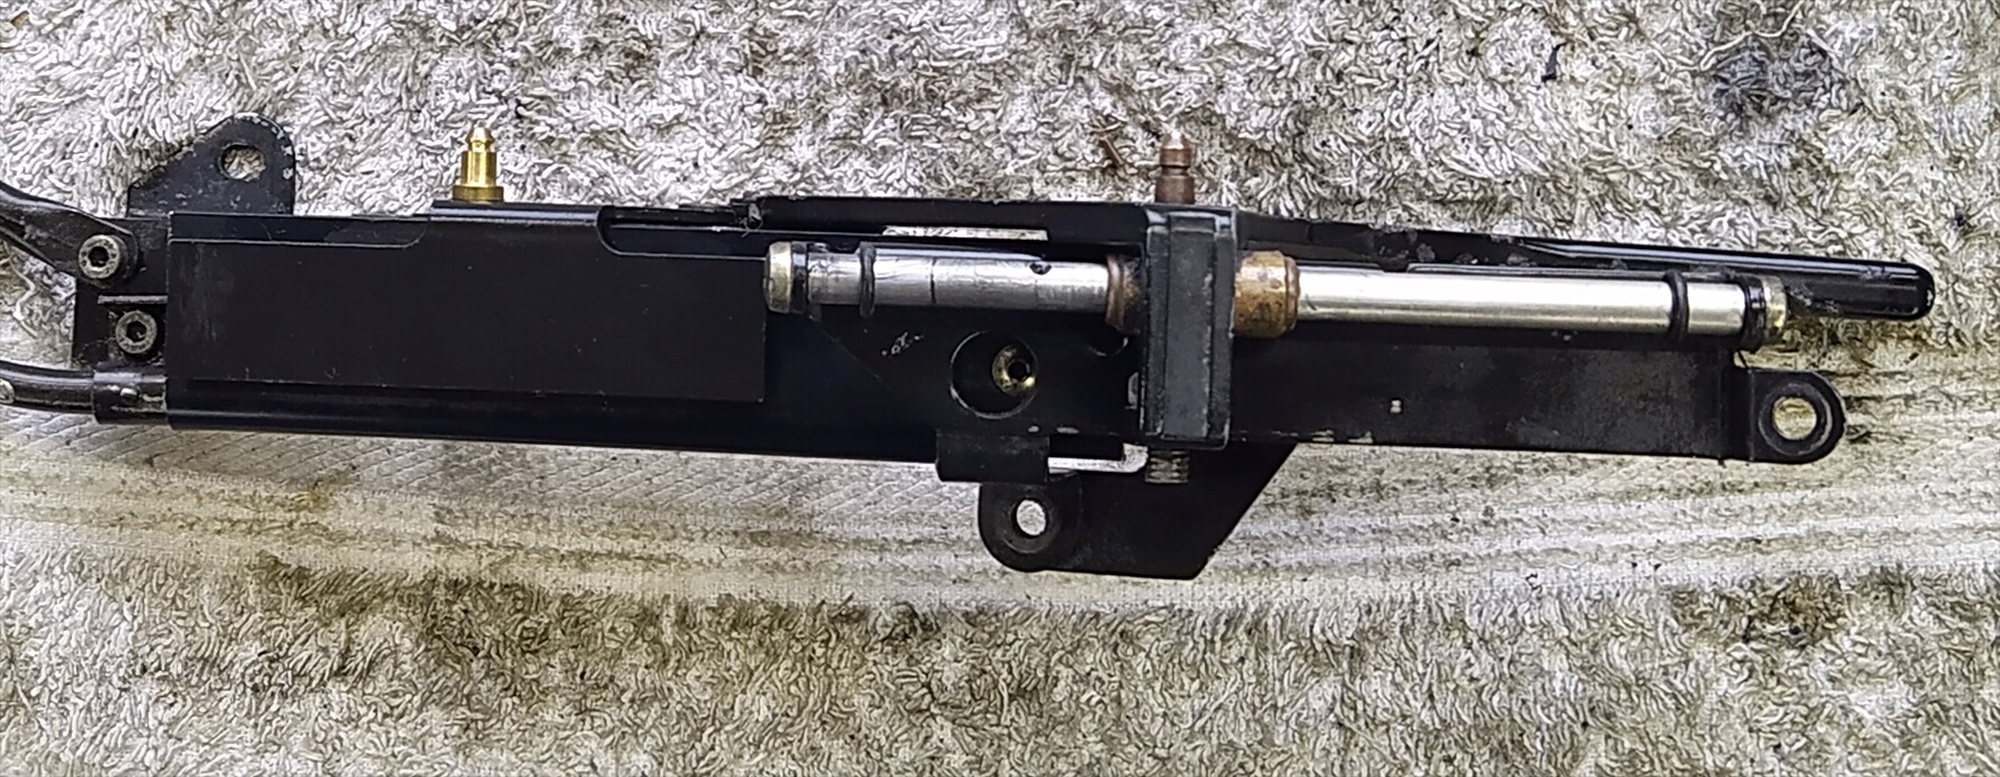
4. Remove the guide rods. There's a crosshead screw and a rubber o-ring at each end. One screw will always come out easily, but to release the other you will need to hold the slide rod gently! with a pair of pliers.
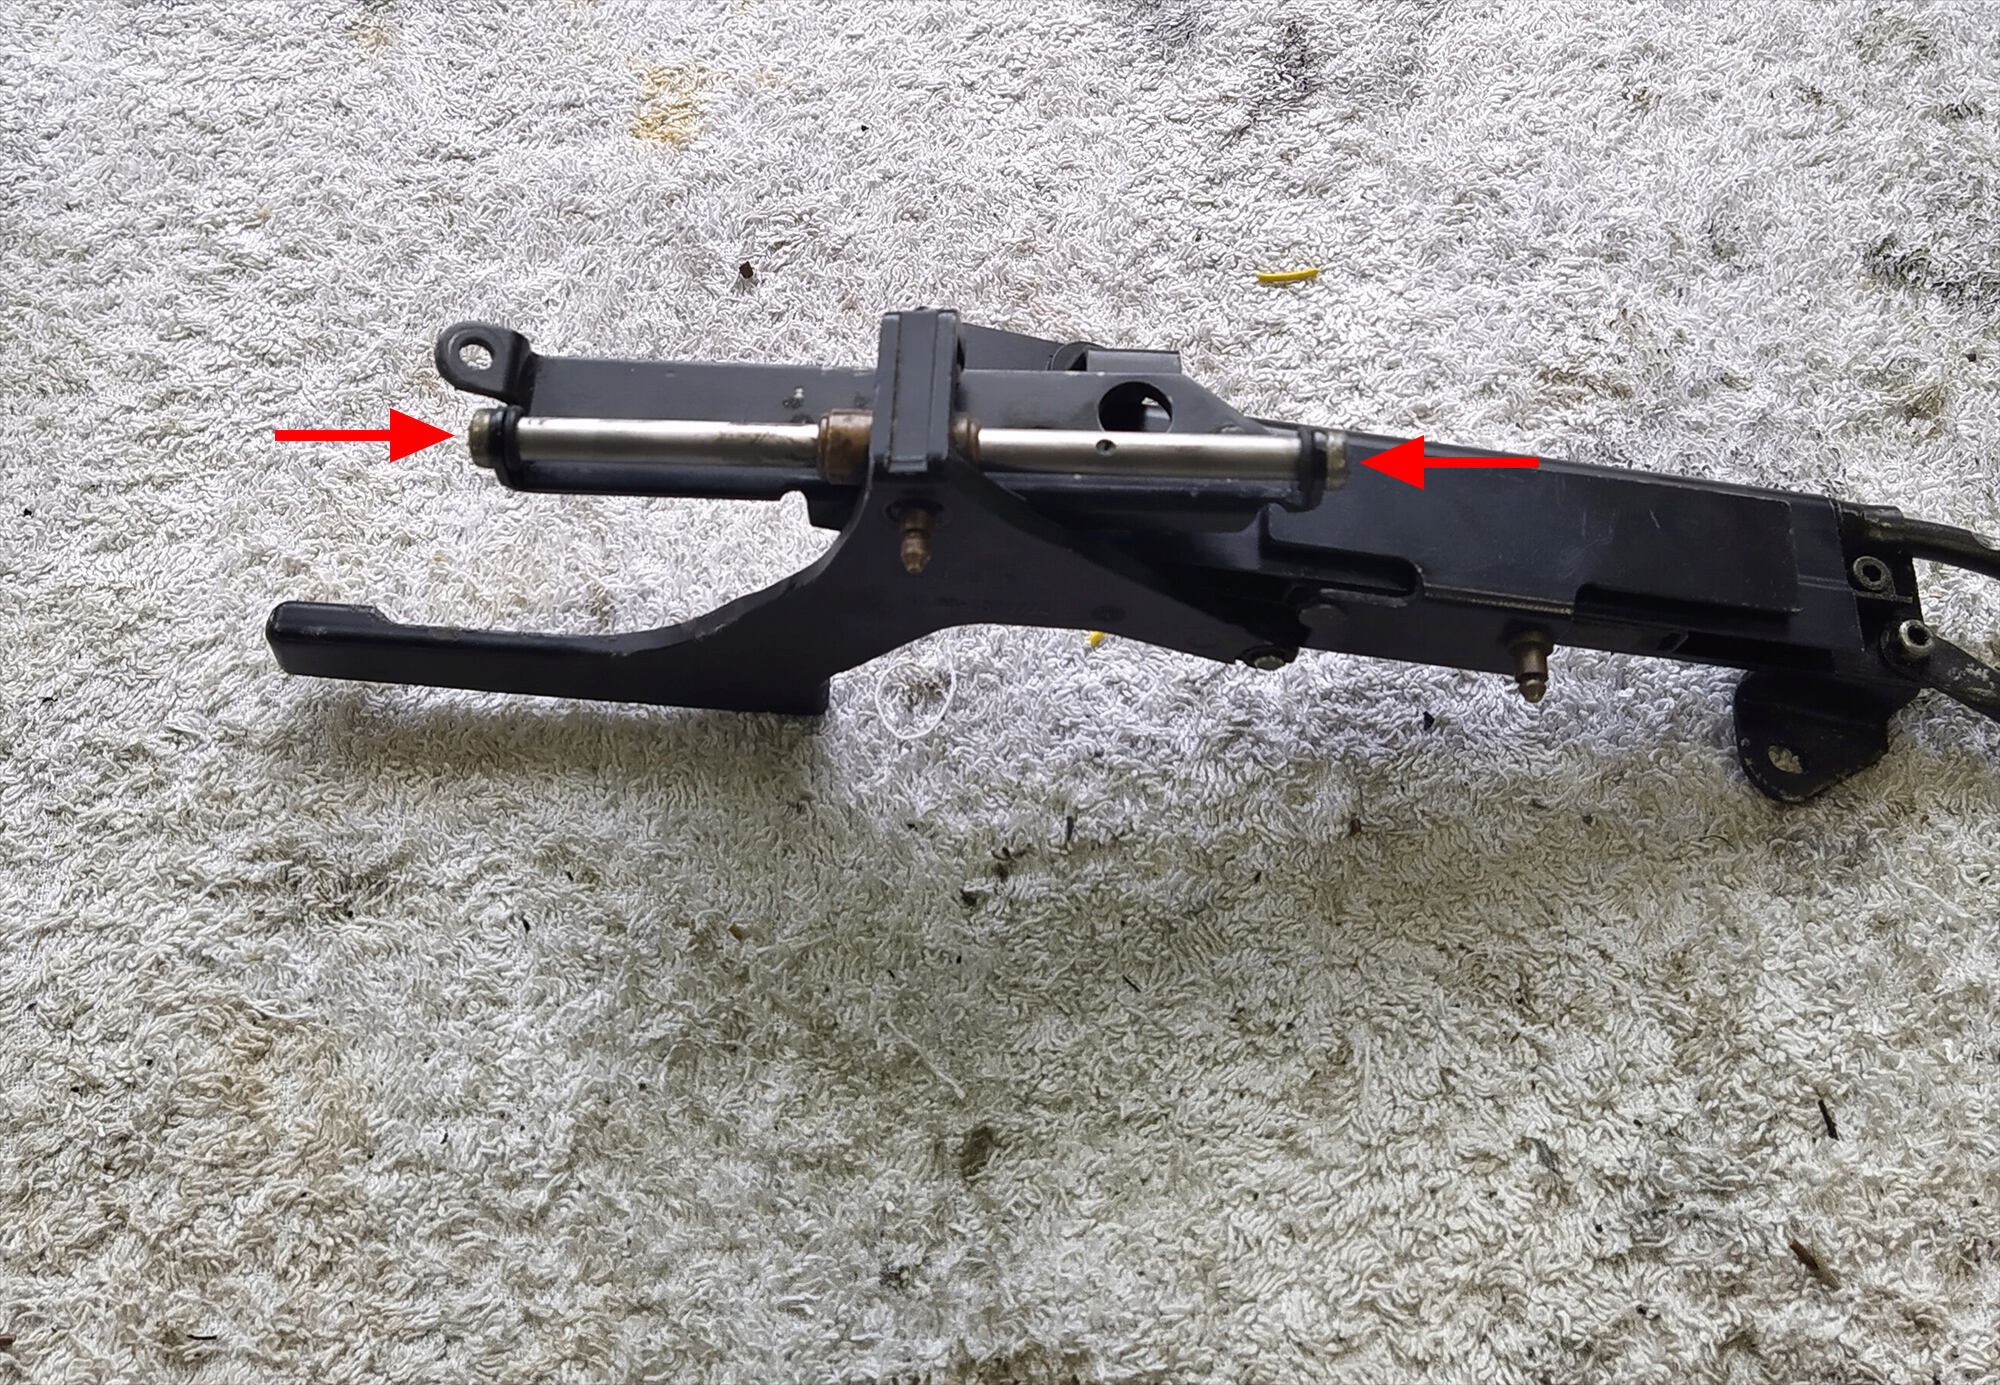
5. Rod and o-rings. These are new o-rings - the old ones were pretty manky. Change them if you can.
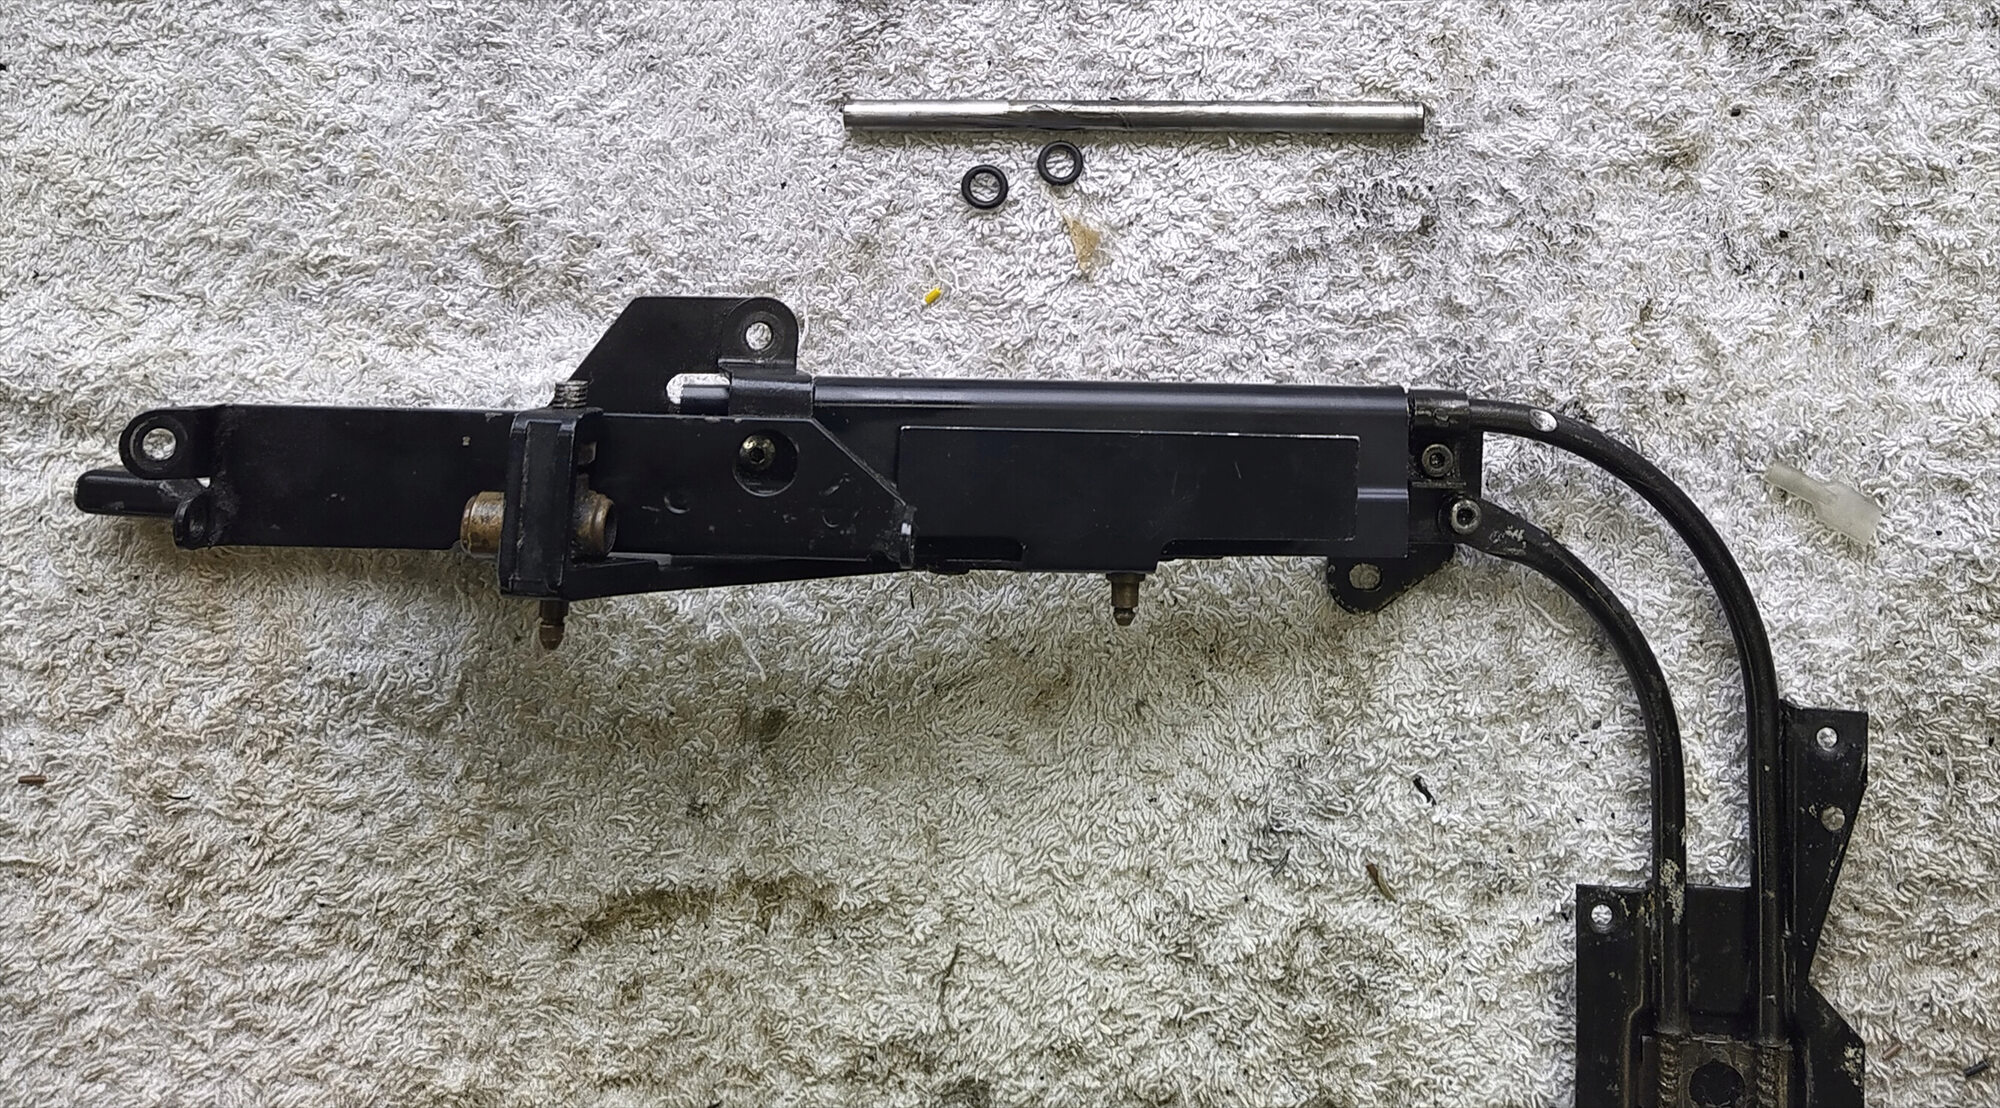
6. Manually move the slider to expose these two dome head allen screws. Don't remove them just yet.
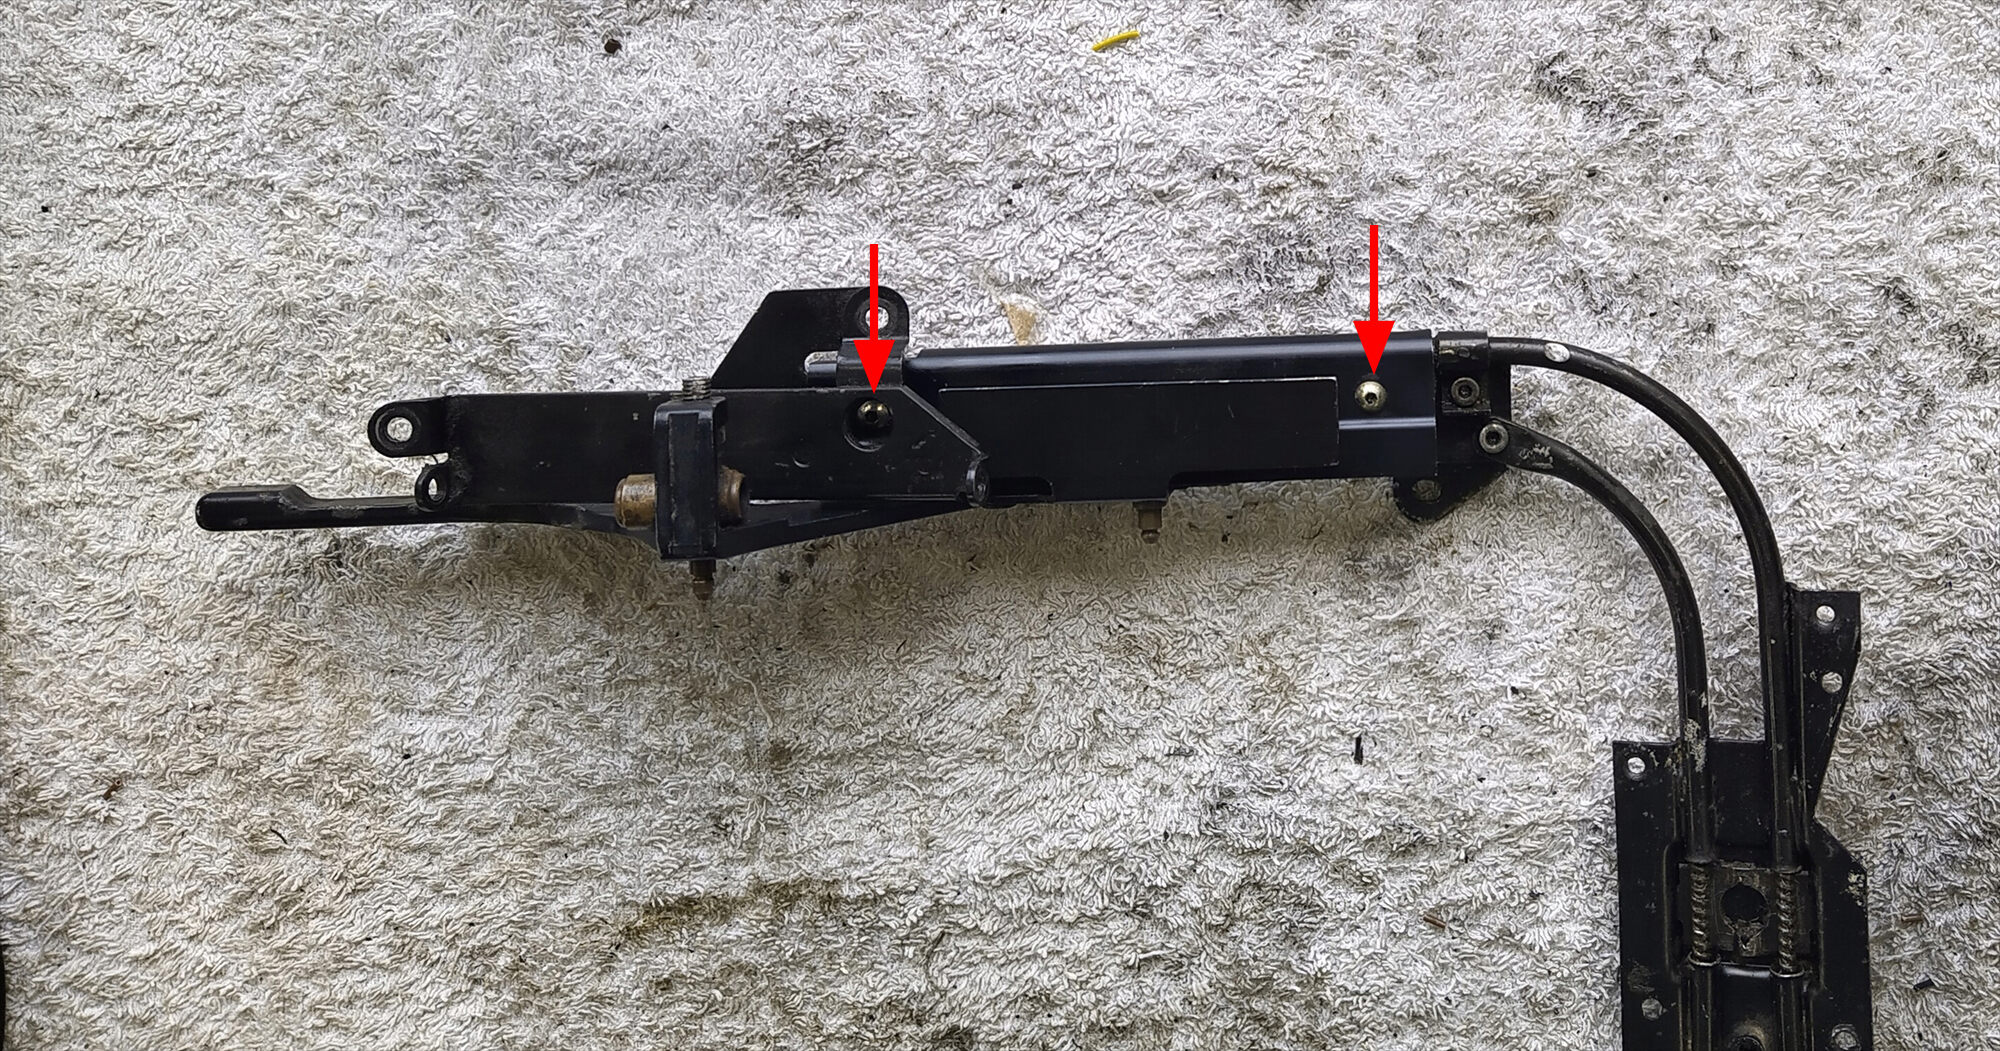
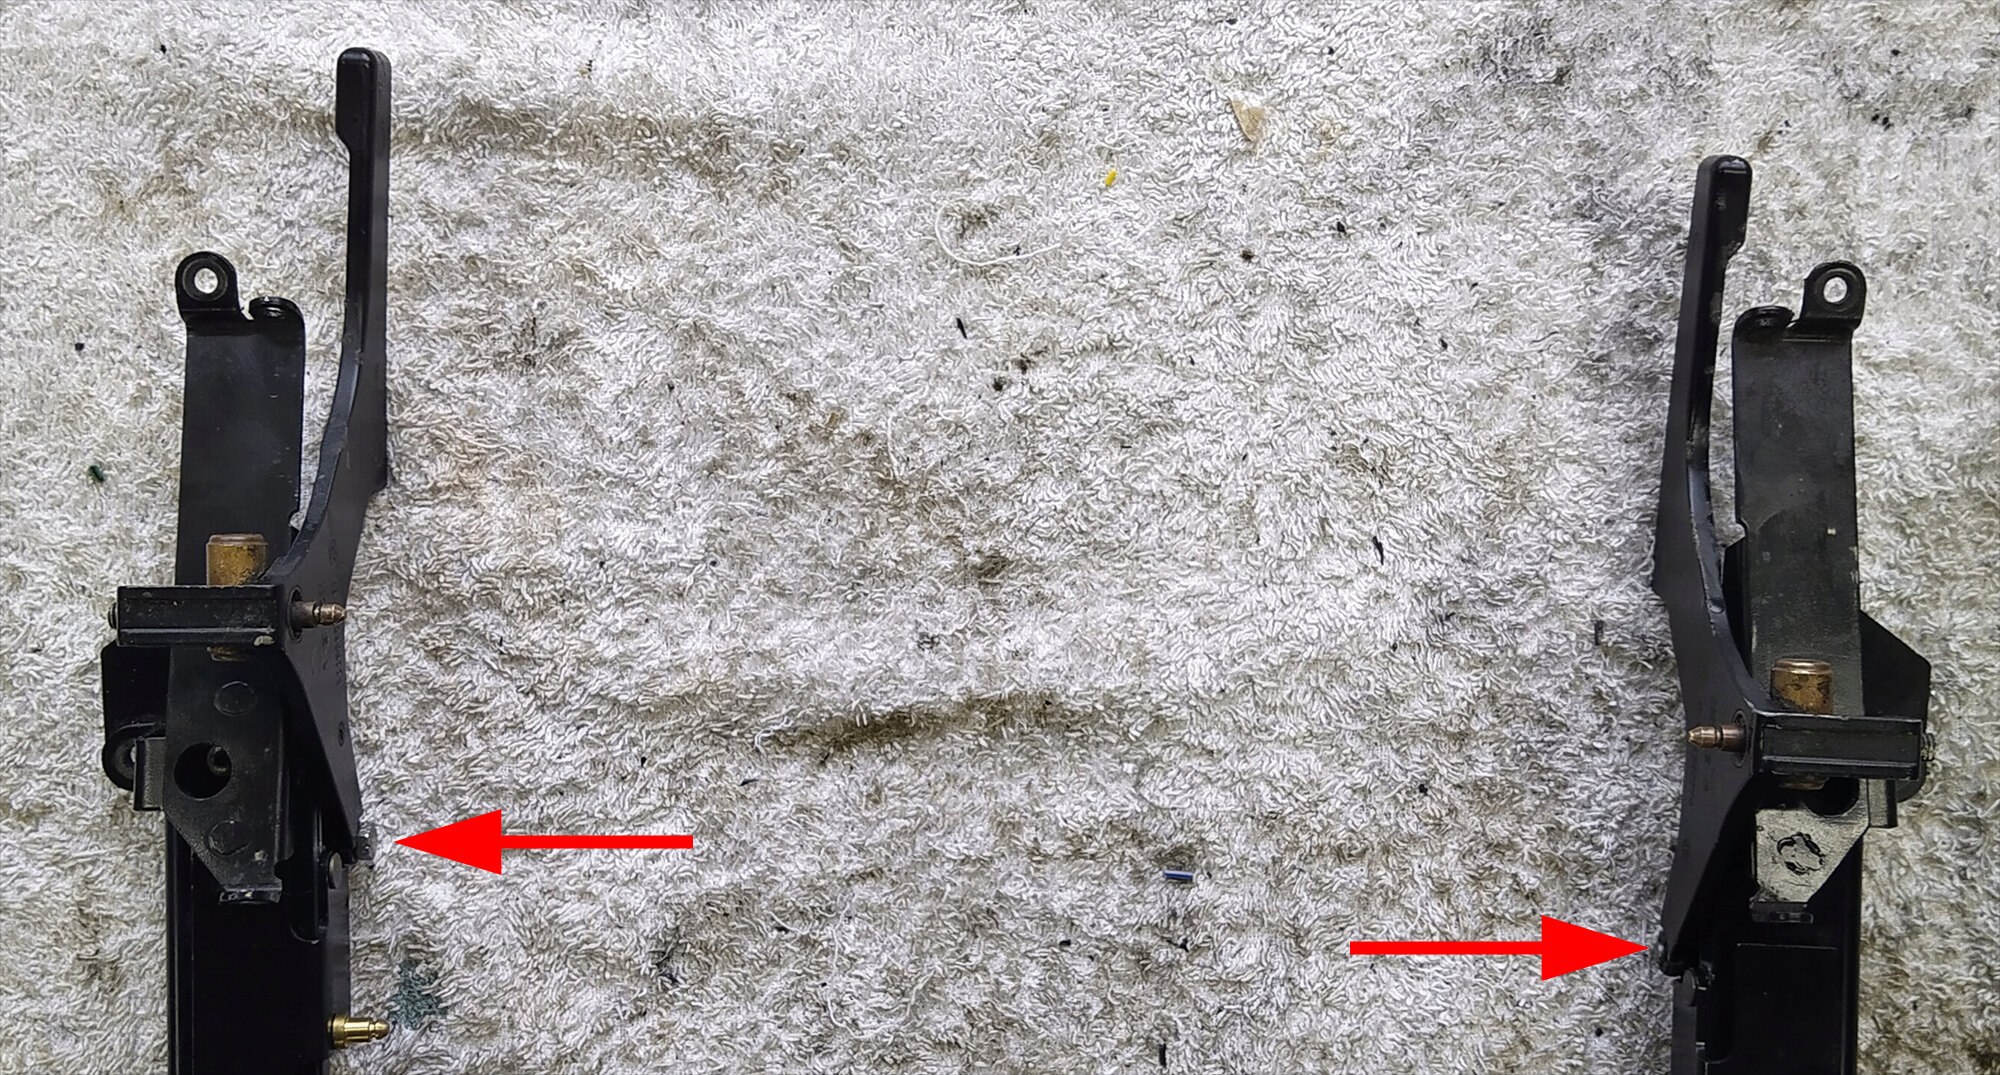
7. Release the lifting arms. There should be a pivot with a circlip at each end. If you look at the right side there's a bit of a giveaway that this mechanism has been apart before and the pivot/circlips were lost. You may need to wriggle the lifting arms off but be careful: they feel like they are cast ally and so could break if handled too roughly.
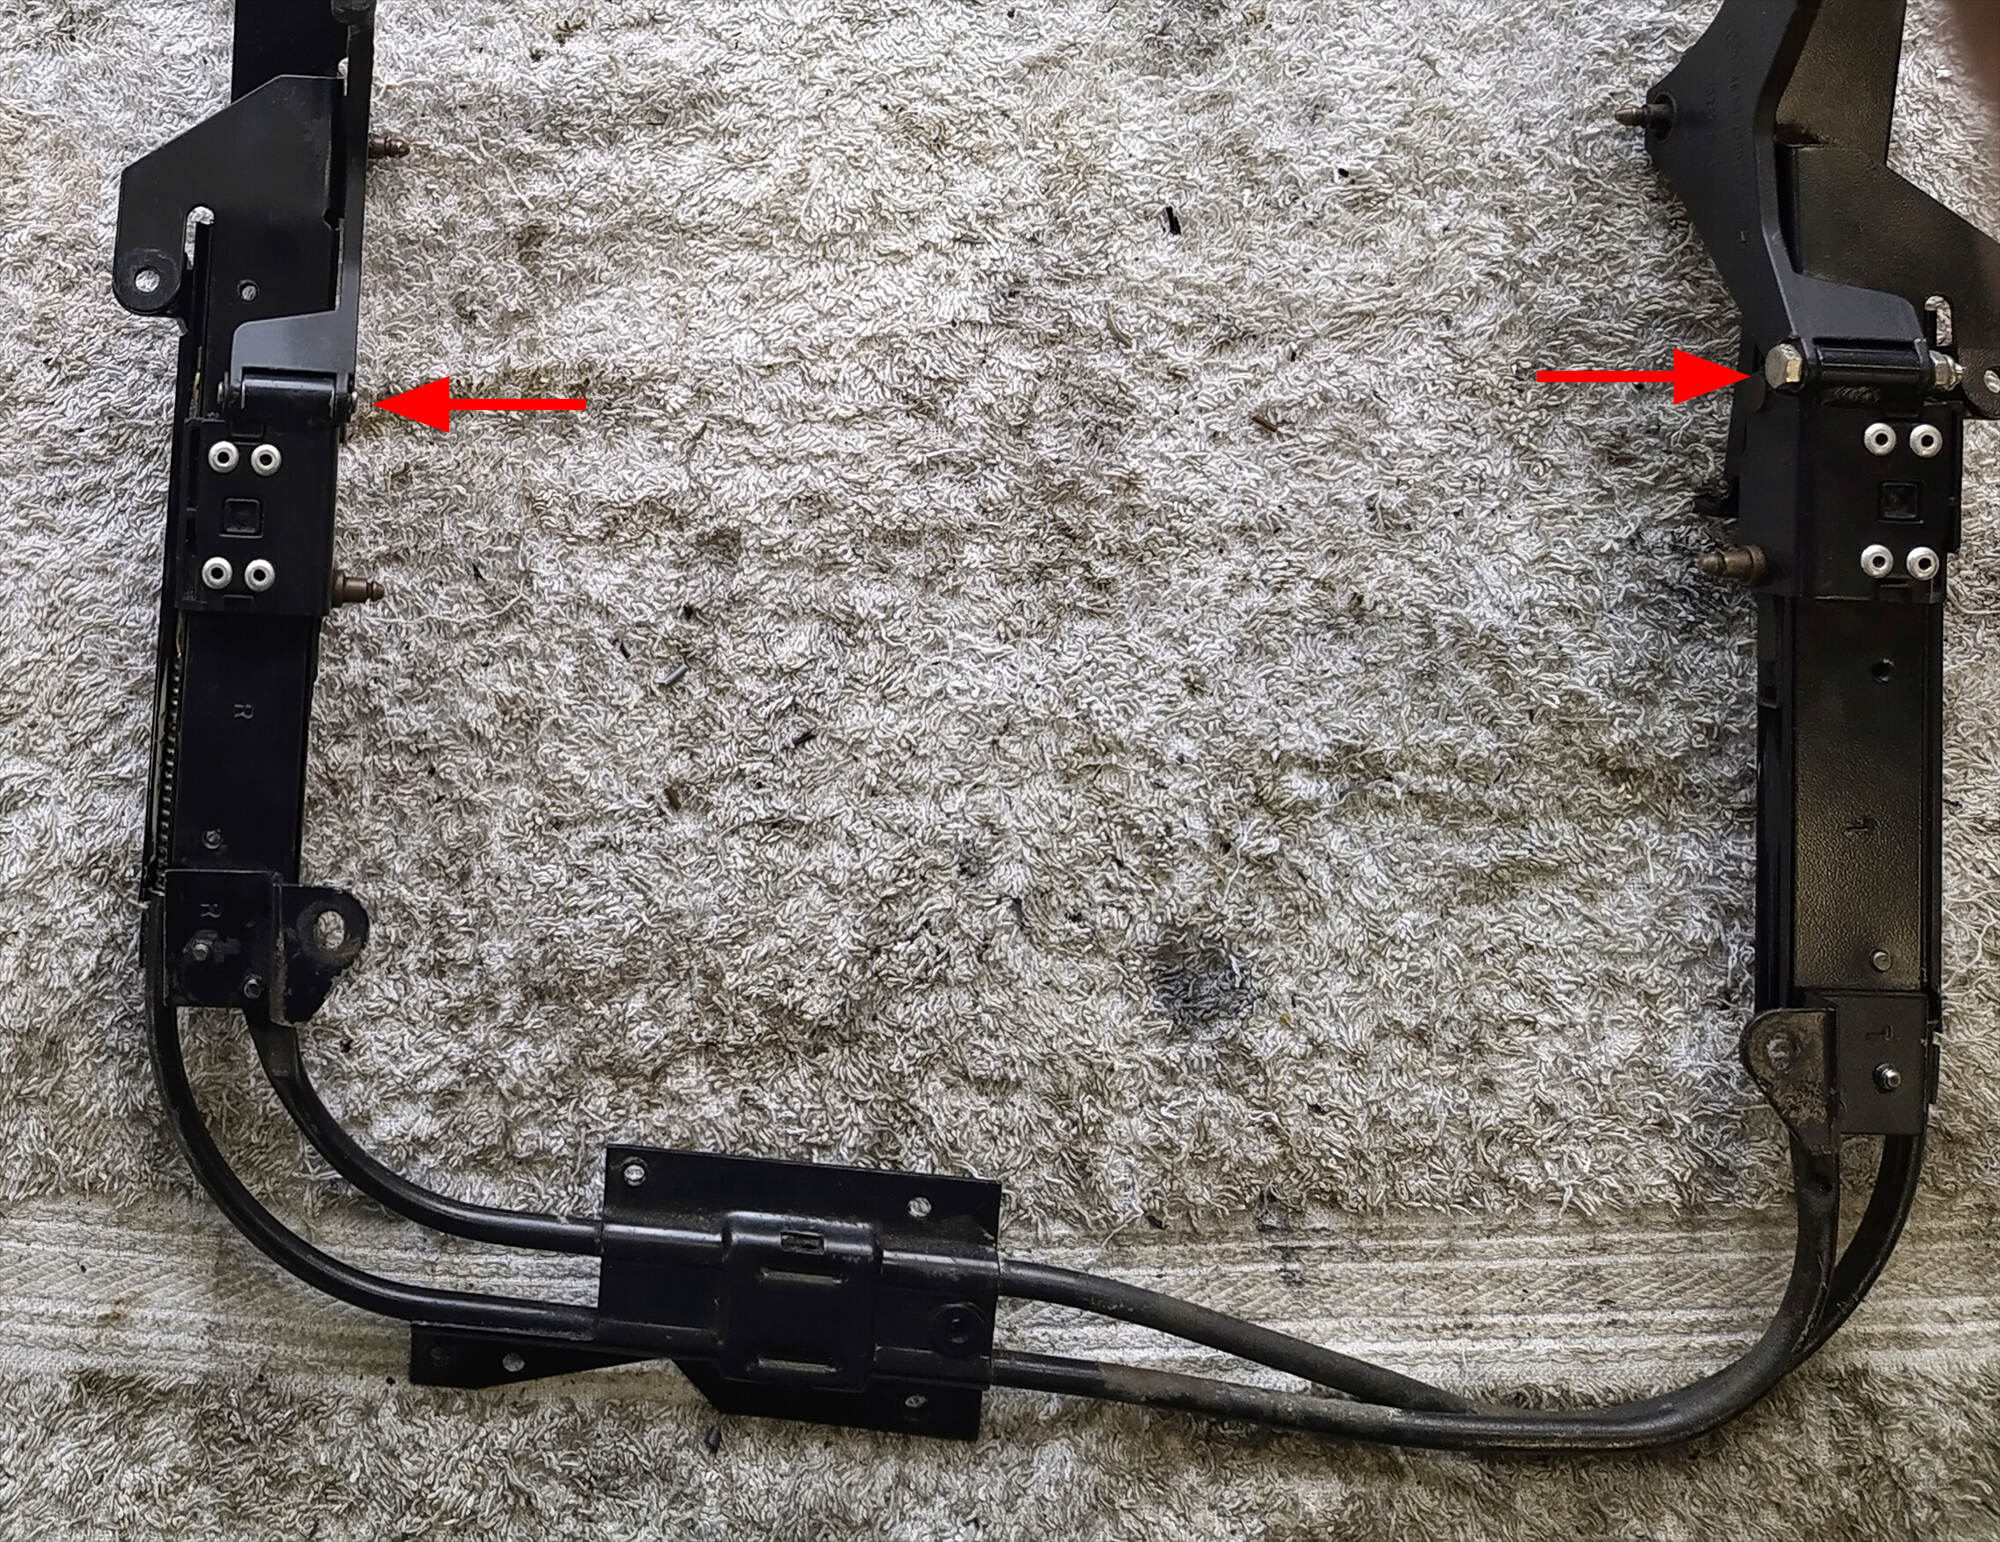
8. Check the pivots for the guide rod bush. On the other mechanism both nuts were loose and the bush could move sideways. They should be tight against the lifting arm preventing the guide bush from moving sideways but not from rotating easily. Note here that there are two different nuts: the original lefthand one and the pivot had gone awol, so a PO had replaced the pivot with a bolt with the head cut off and the outer threads filed flat to allow a small spanner to grip it. The OEM pivot (right side) has a Philidas nut and the pivot is held with an allen key.
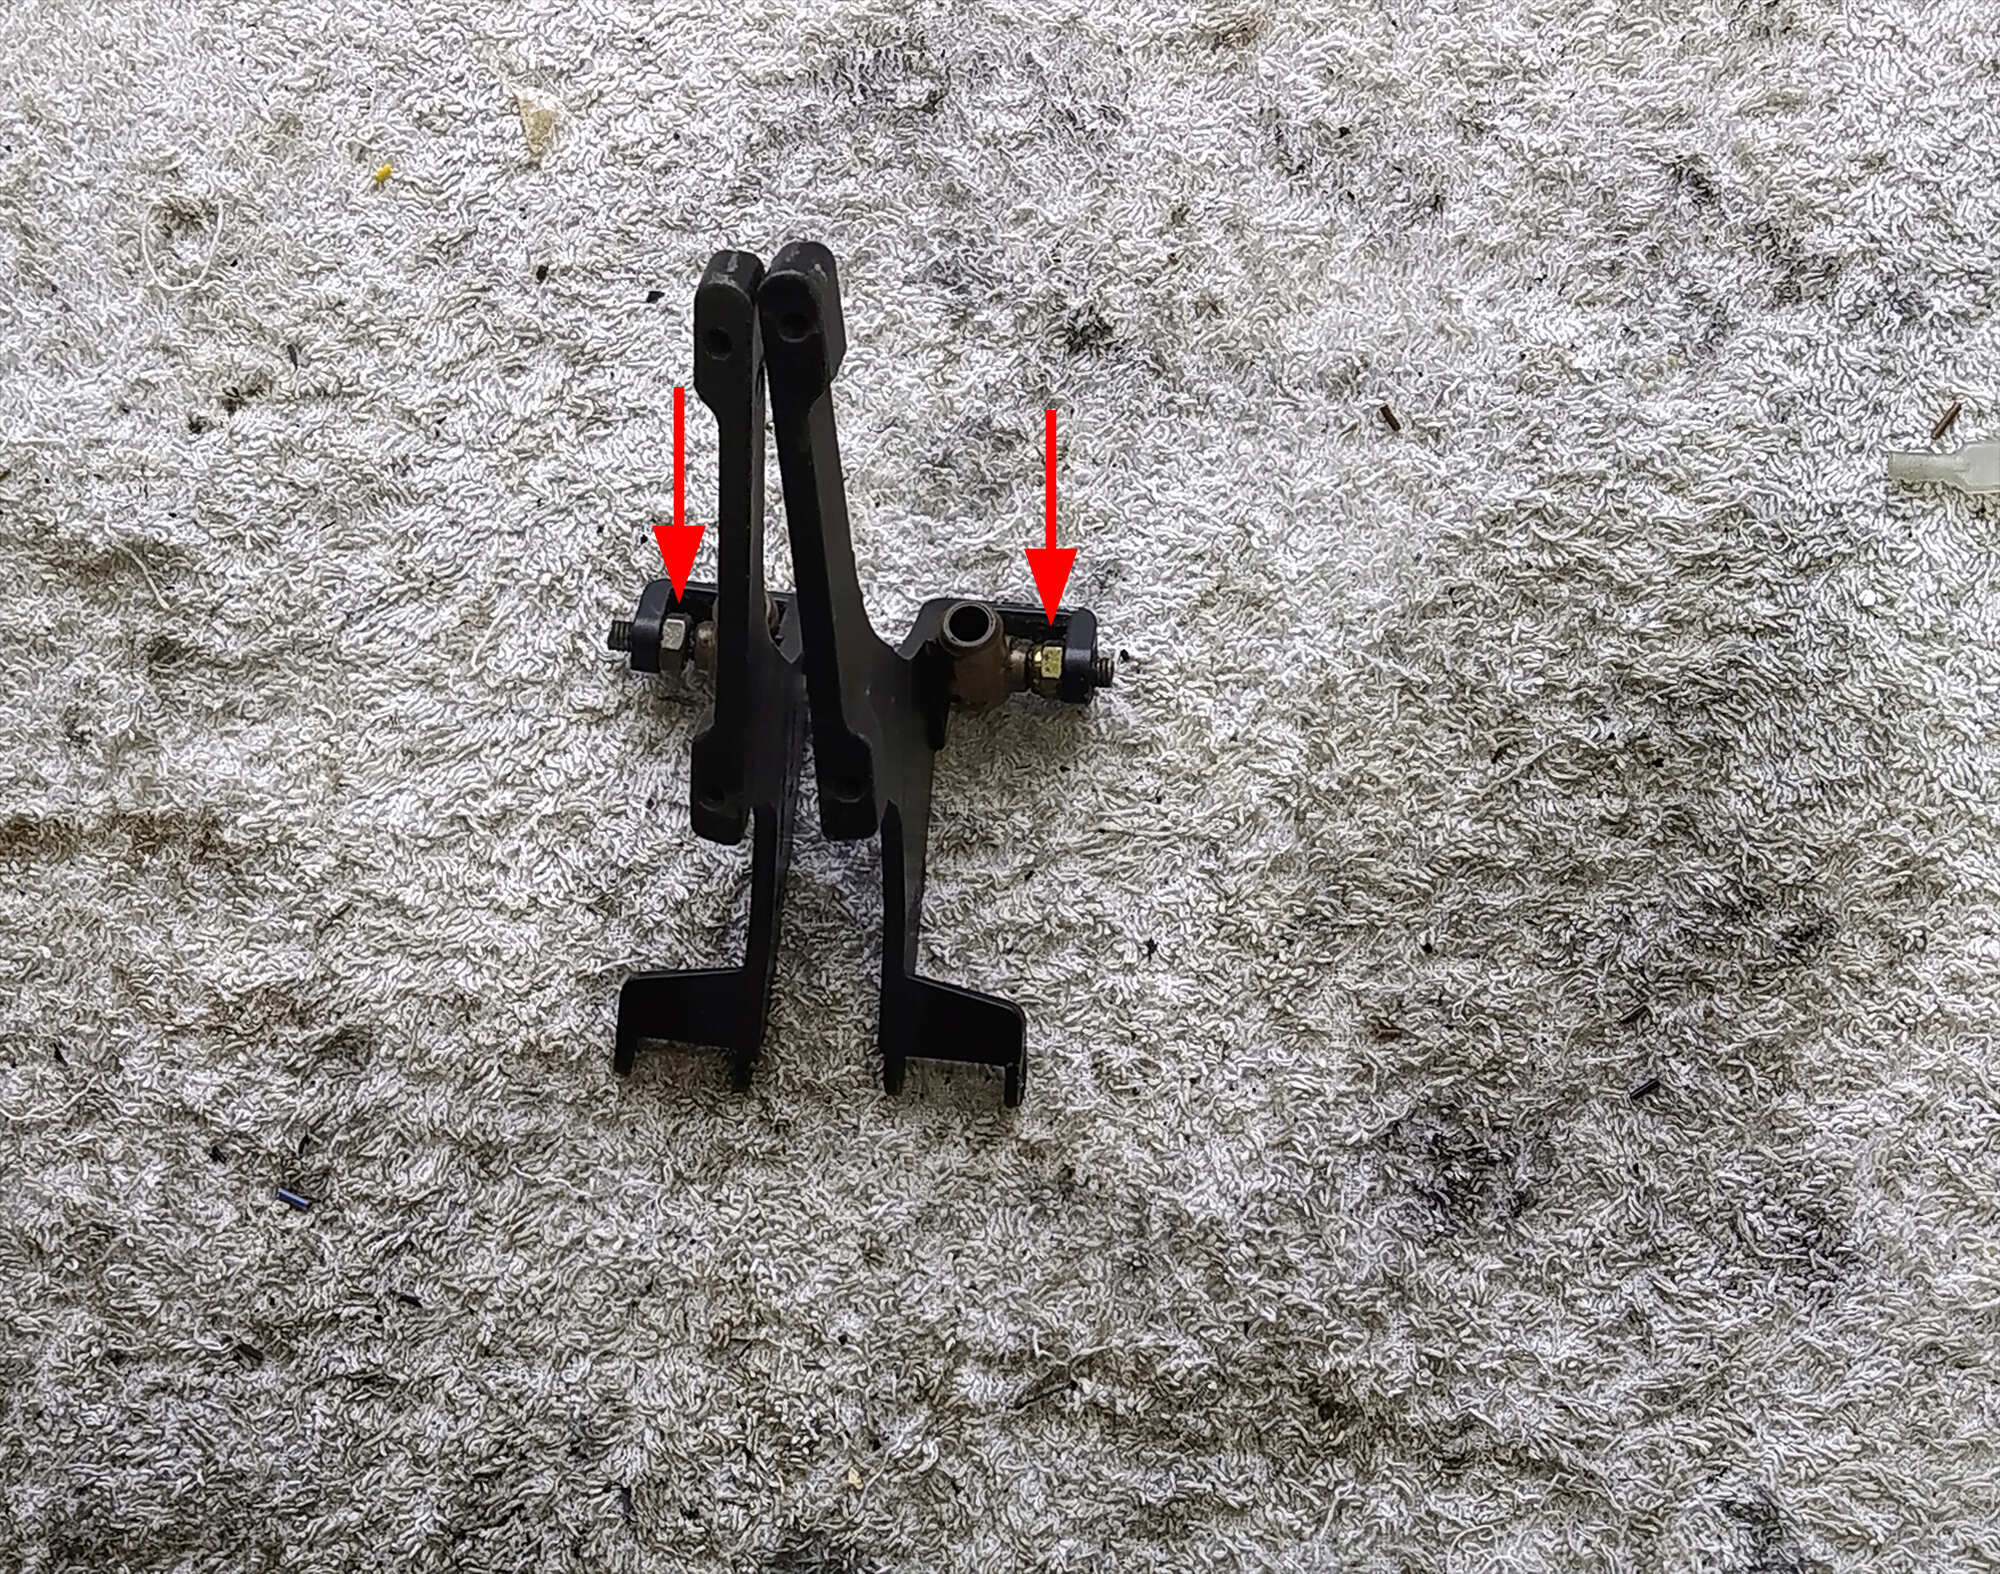
9. Remove these two screws to free up the sliders and drive cables. The tubes will be full of crap. BMW recommend using a silicon grease for the sliders (thanks for the info, Duck), so I used a silicon spray to clean the guide tubes out.
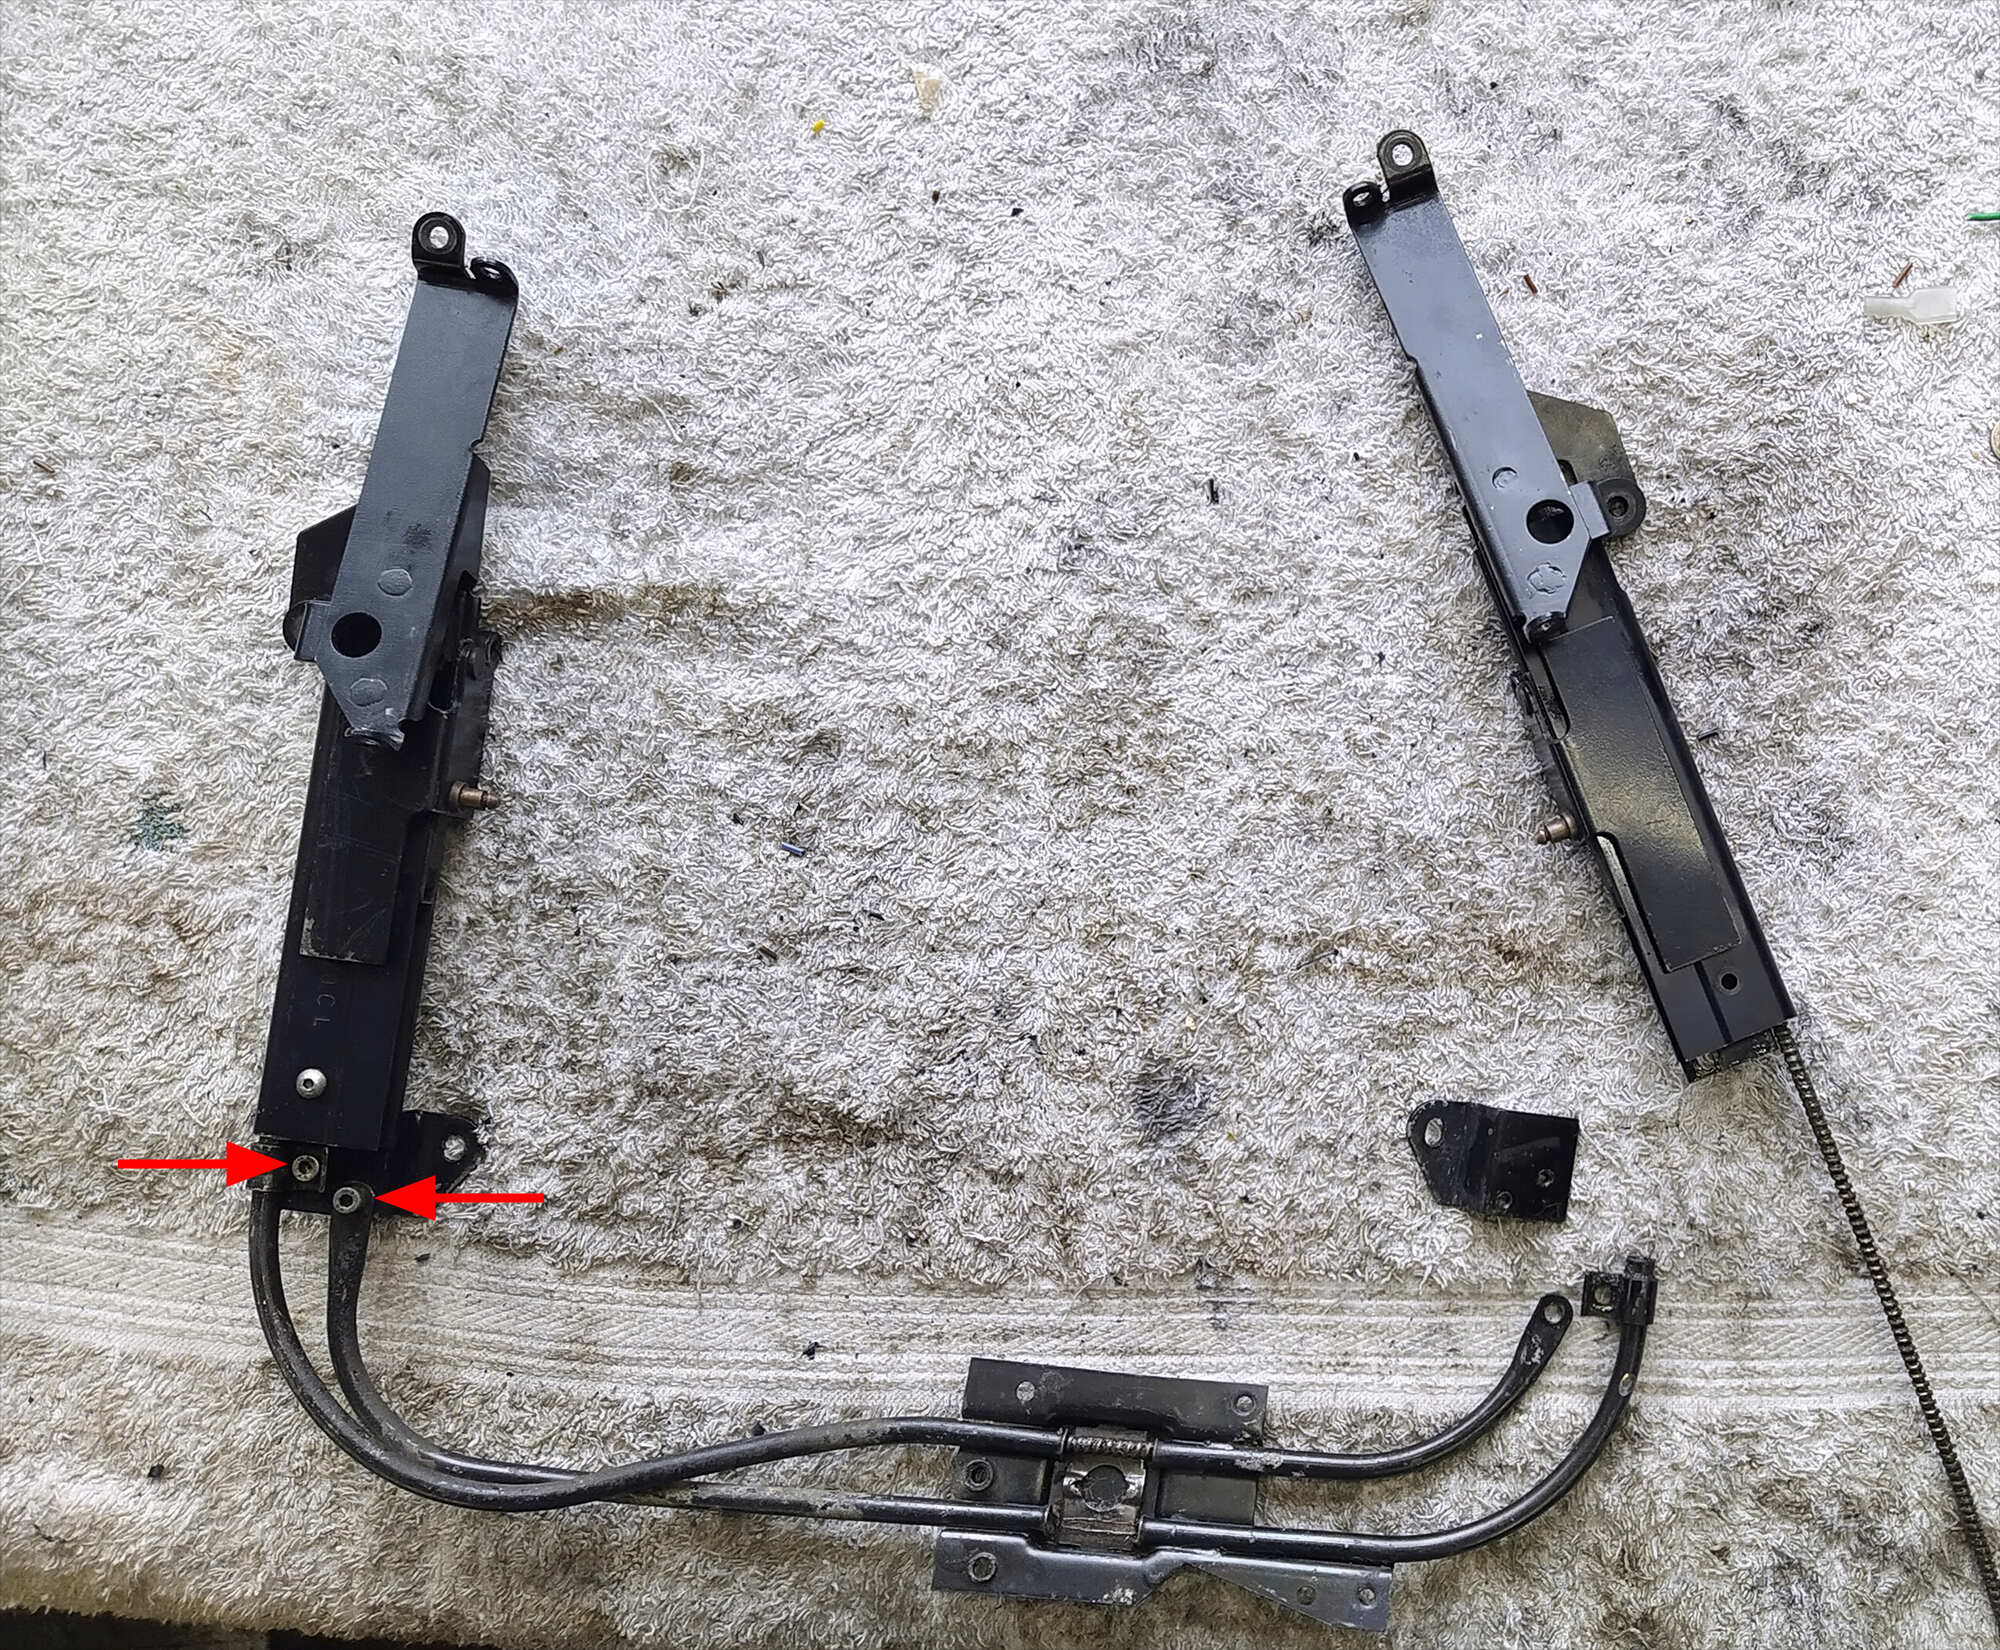
10. And here's part of my problem. The nipple on the end of the drive cable has gone missing. Closer inspection also showed that, possibly as a result of the cable not sliding properly, some of the driven spiral was so badly worn that the motor sprocket was jumping the cable.
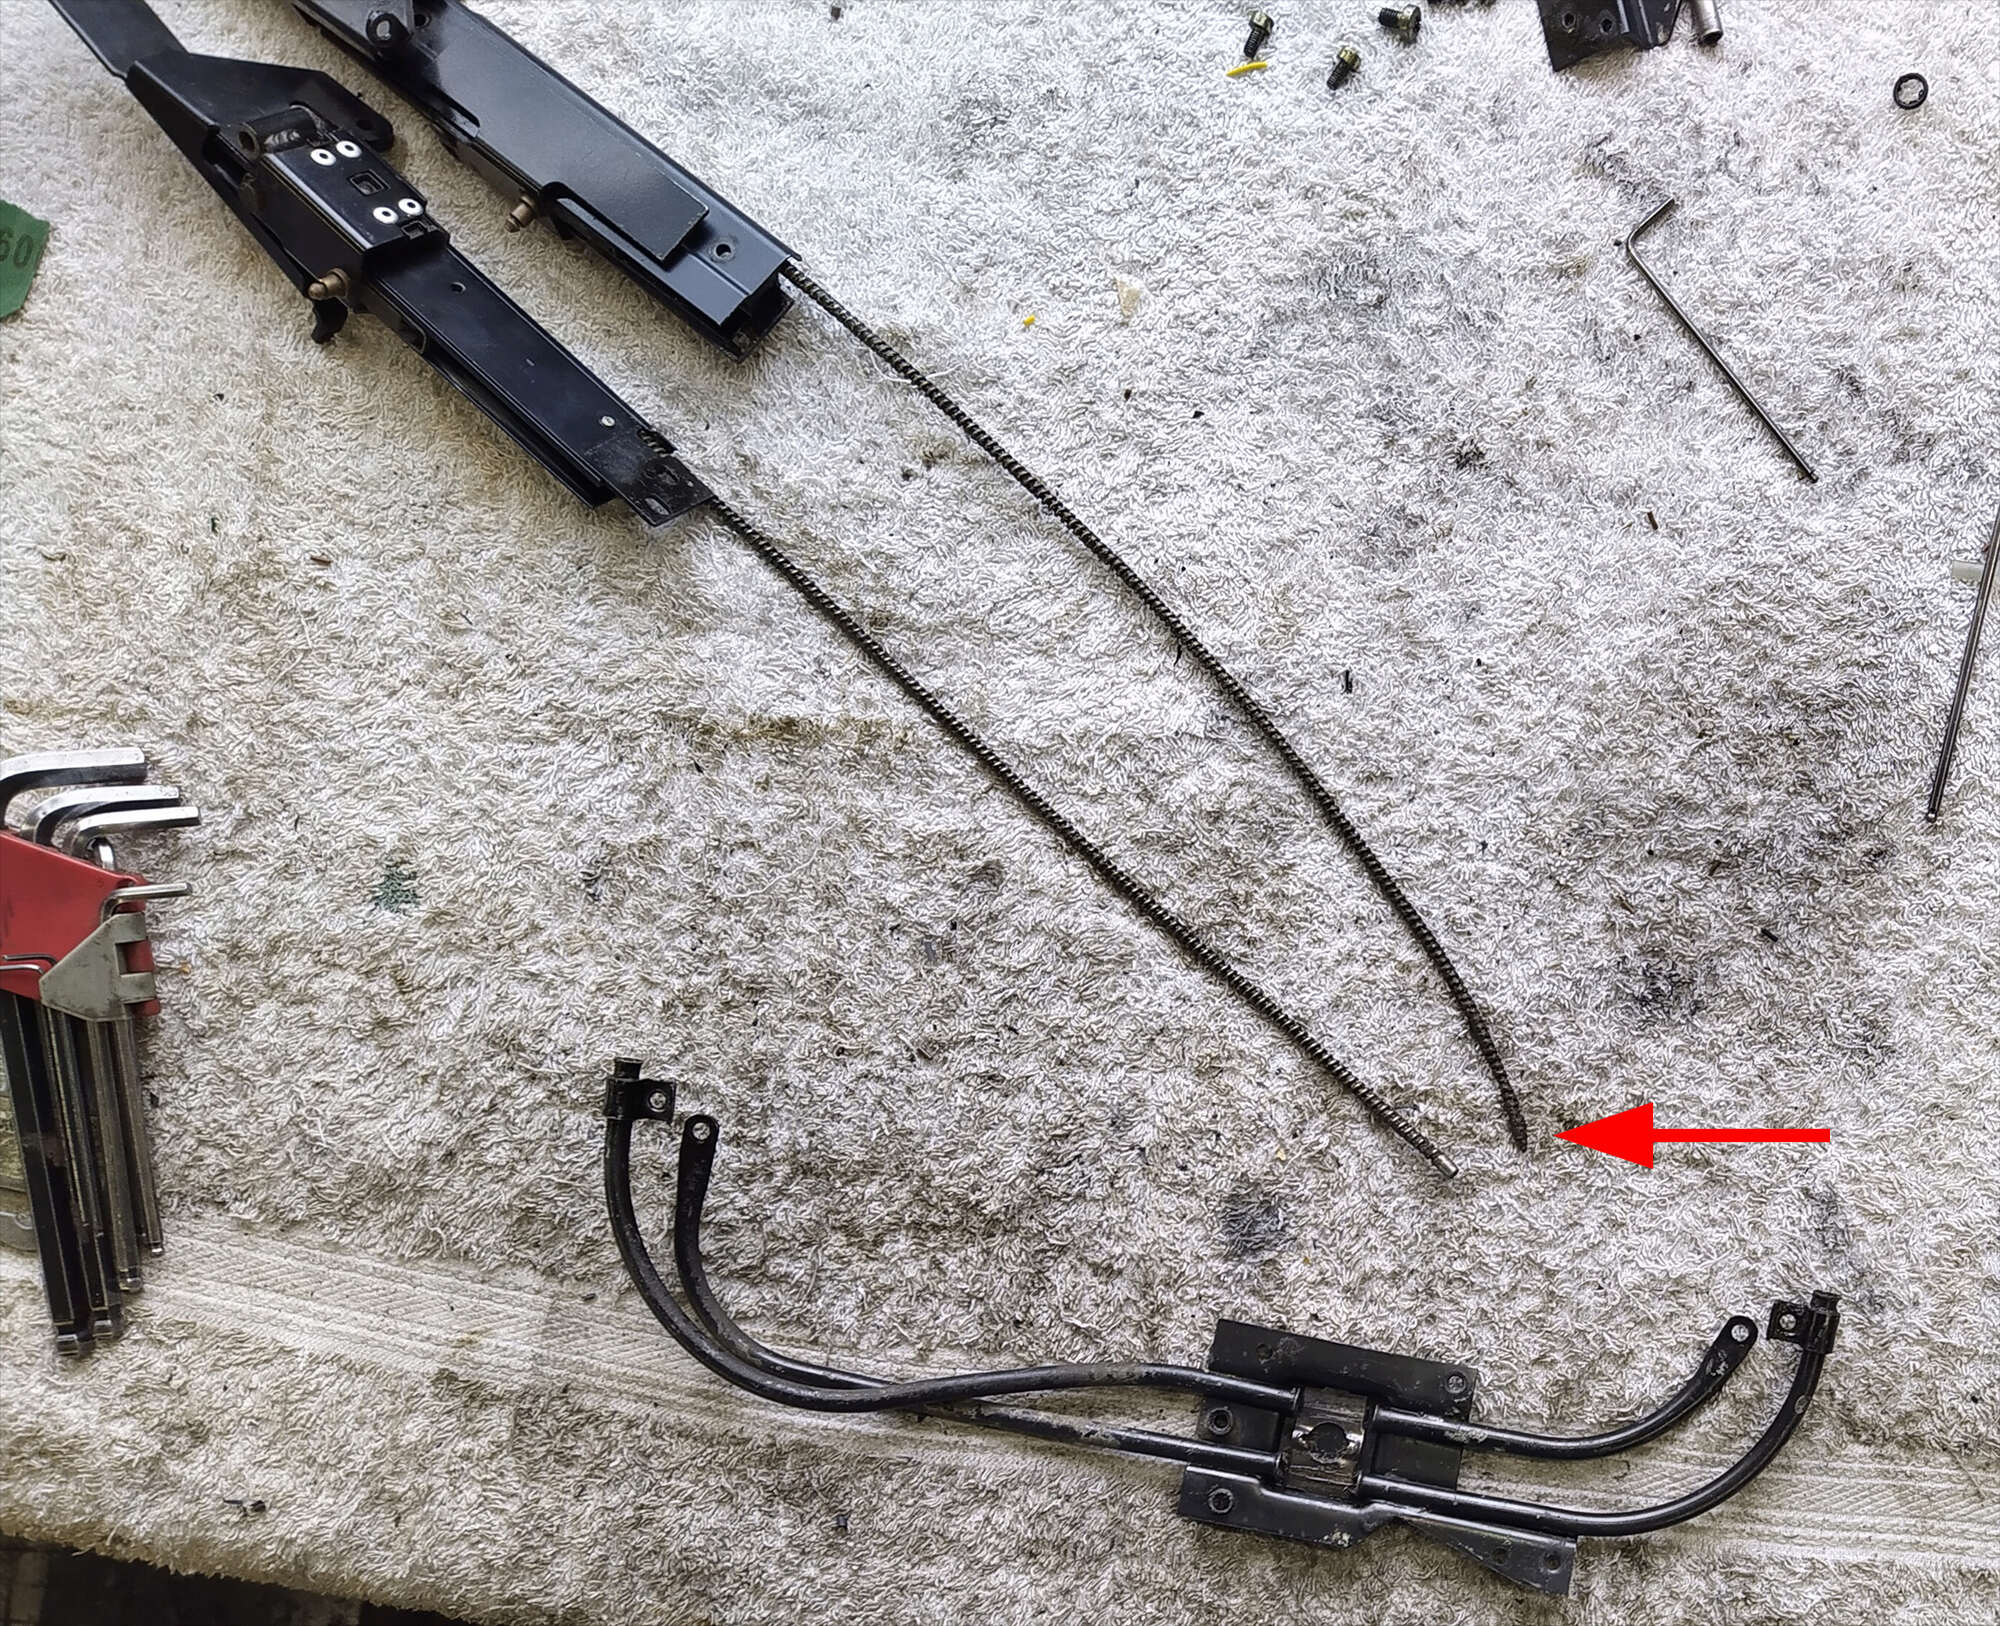
11. Remove the two dome head allen bolts you lined up earlier.
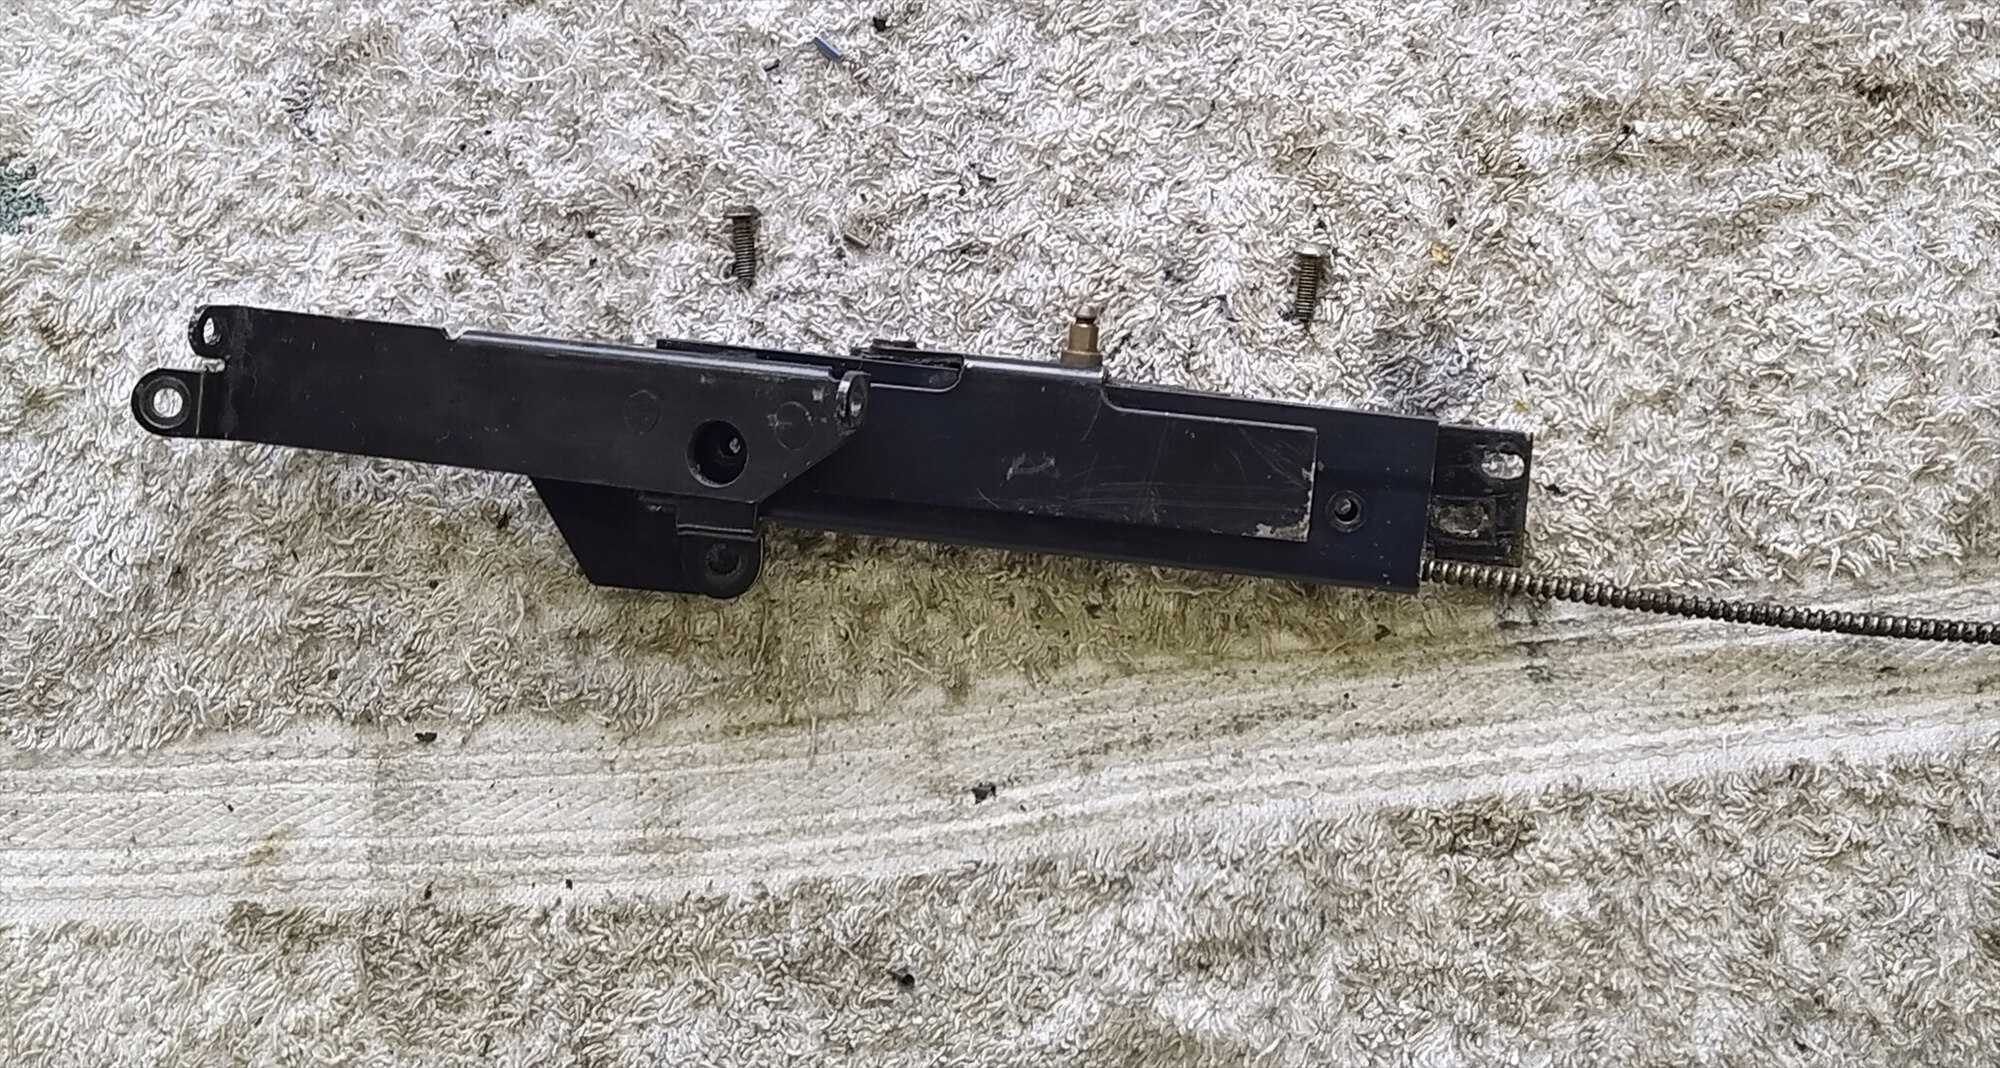
12. That will free up the drive cables to be slid off.
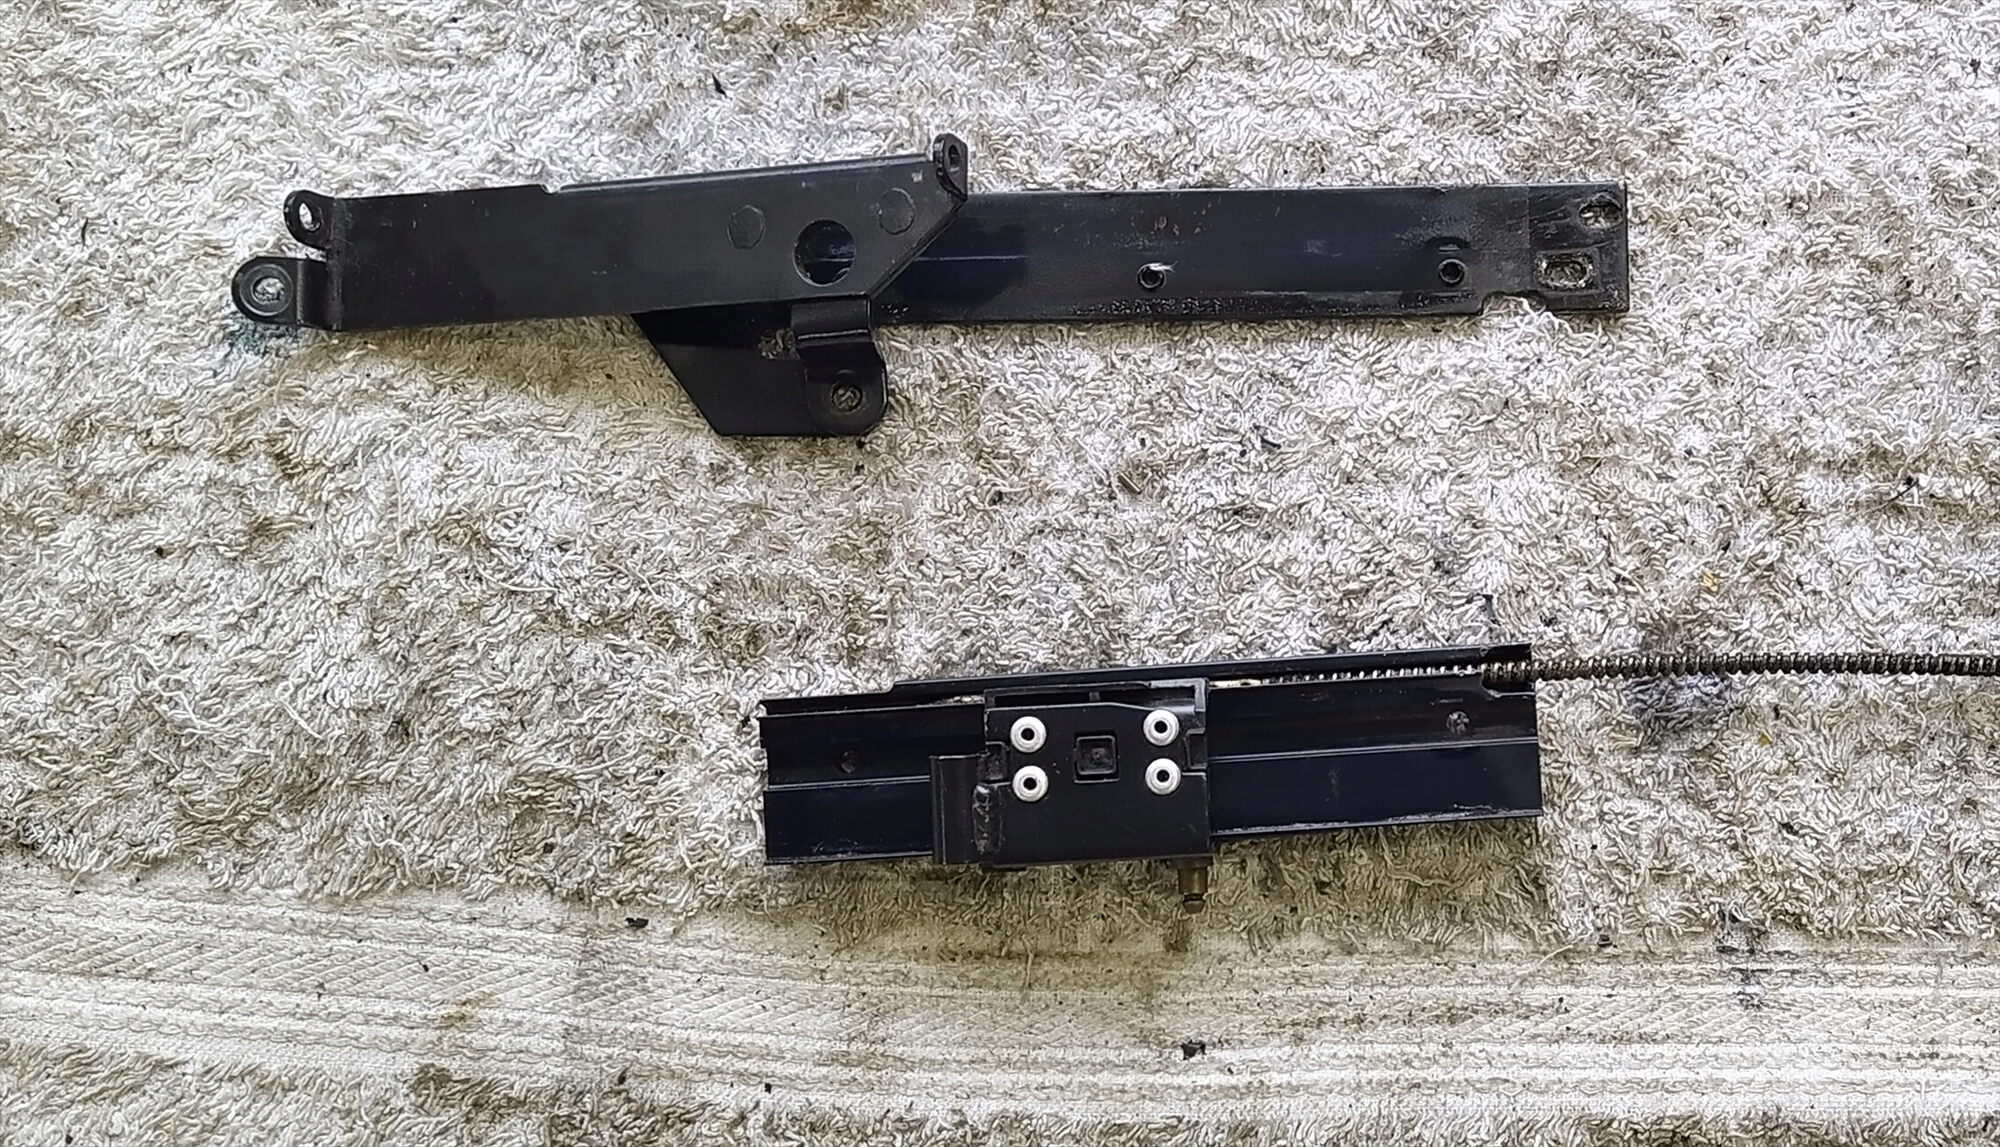
13. Pull the drive cables off. Each slider has a nylon shoe on it that can be easily pushed off with fingernails. This one is pretty dirty. Under the shoe are two rubber buffers - one will be out of sight inside the slider. A screwdriver will lift them off easily as they are shaped to fit. This was the second source of the jamming. Crud had got in between the rubber buffer and the nylon shoe, forcing the shoe outwards and jamming it against the slider rail.
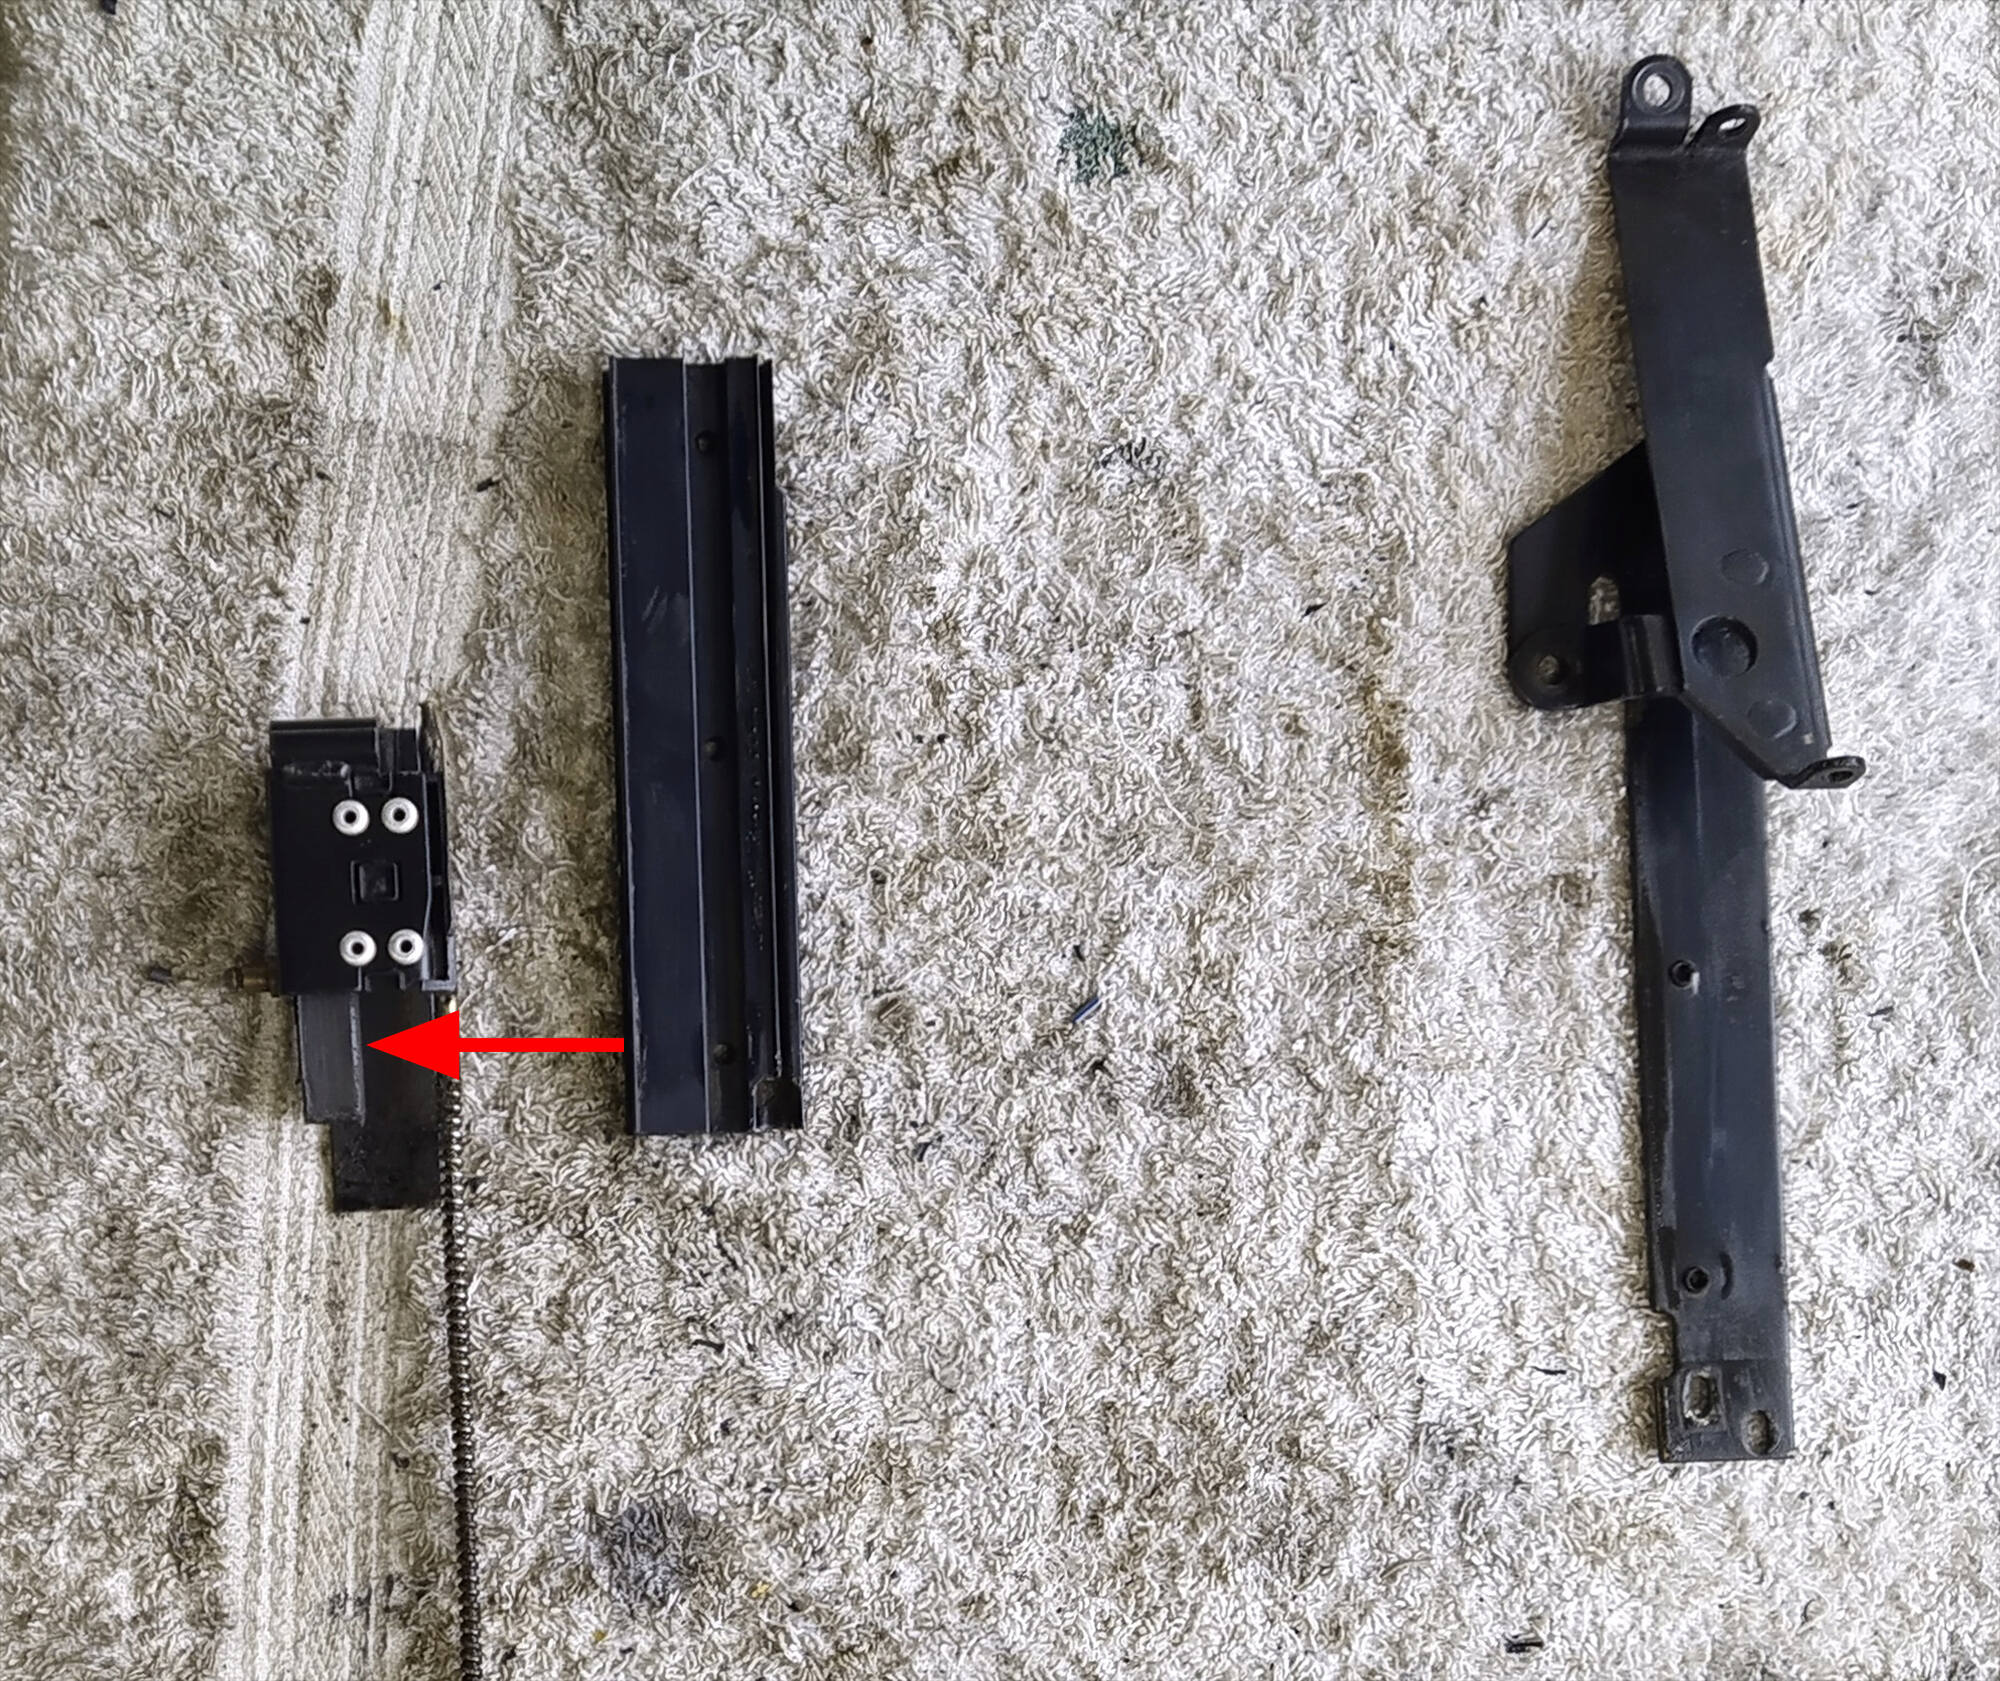
At this point, clean everything thoroughly.
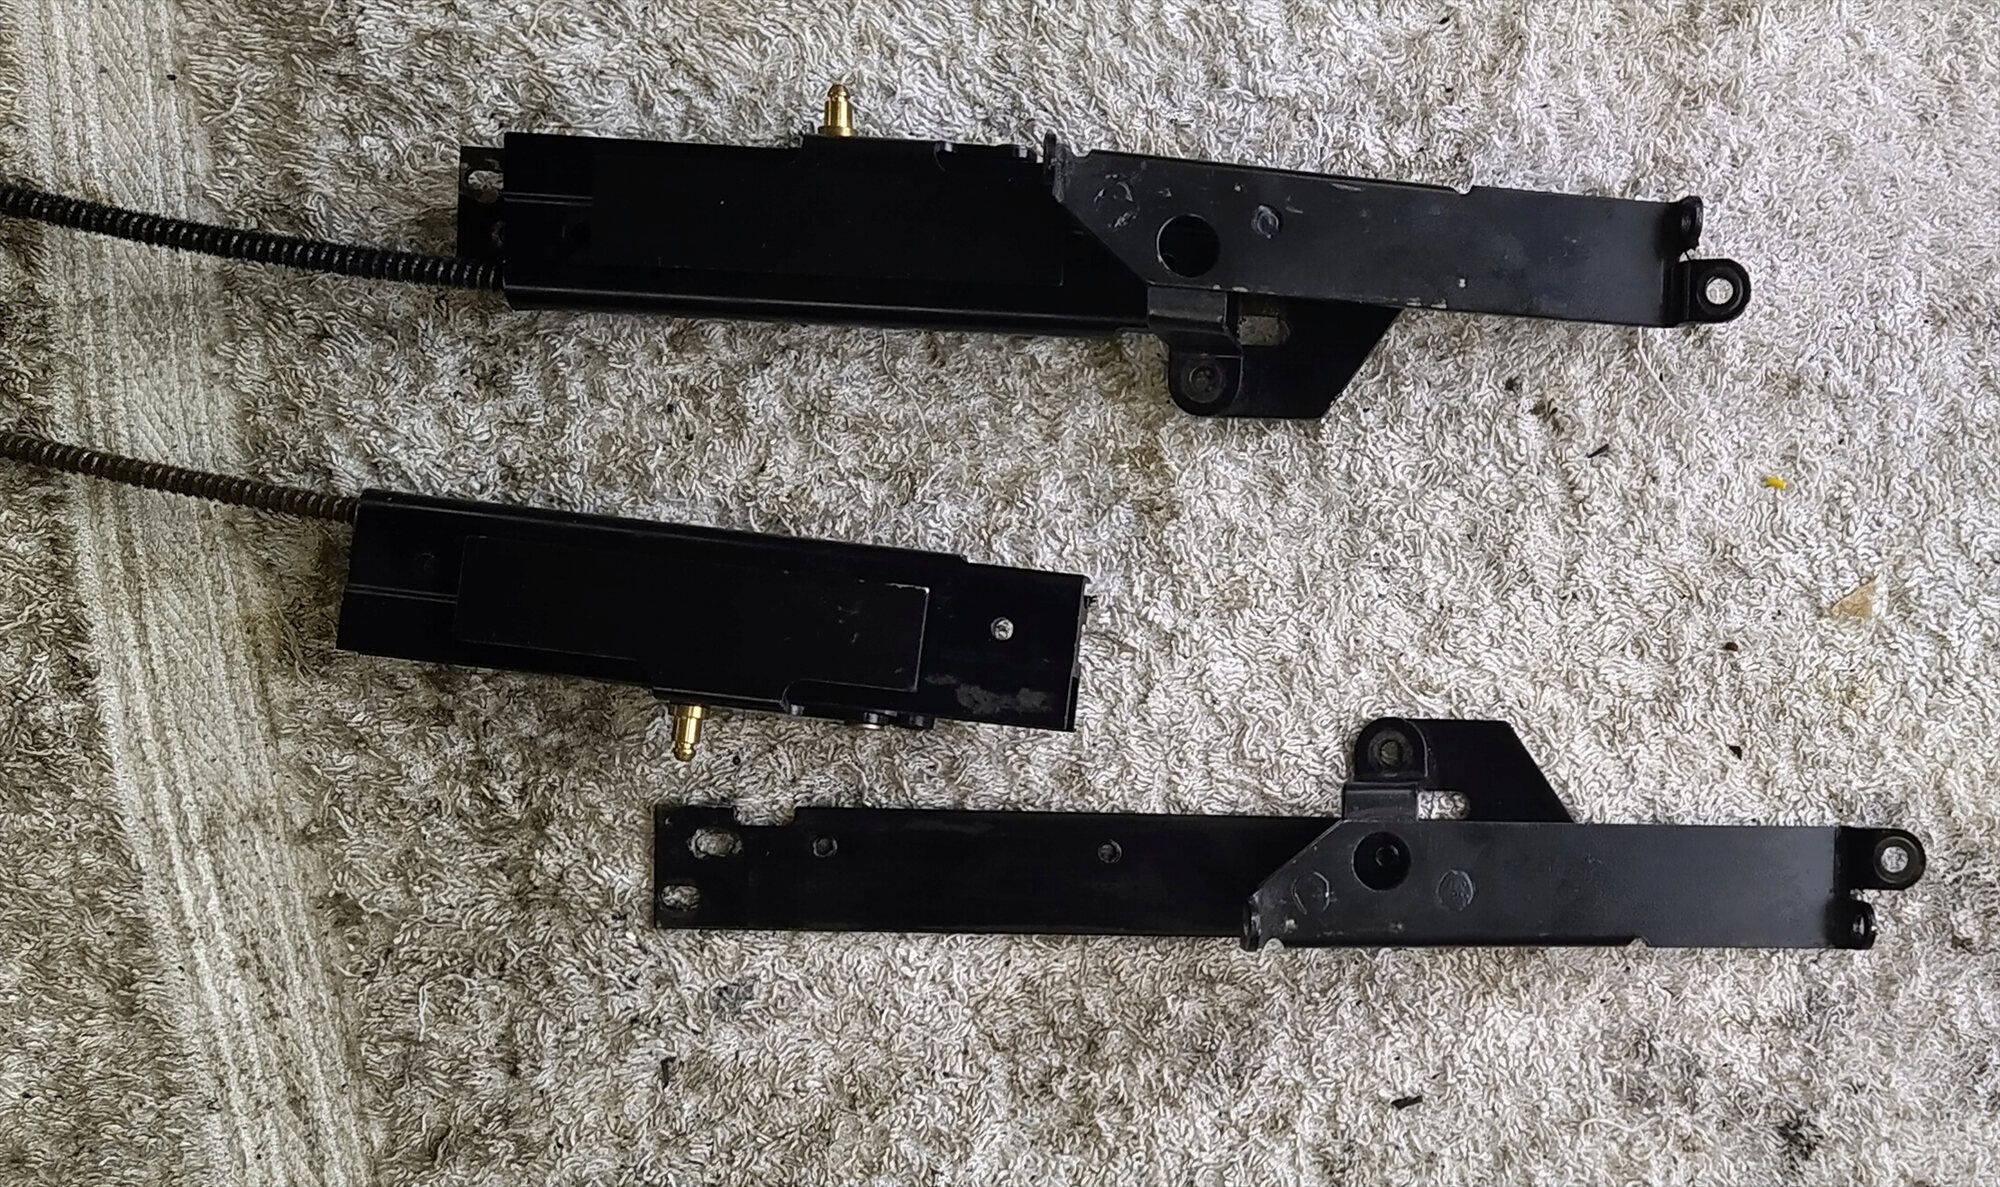
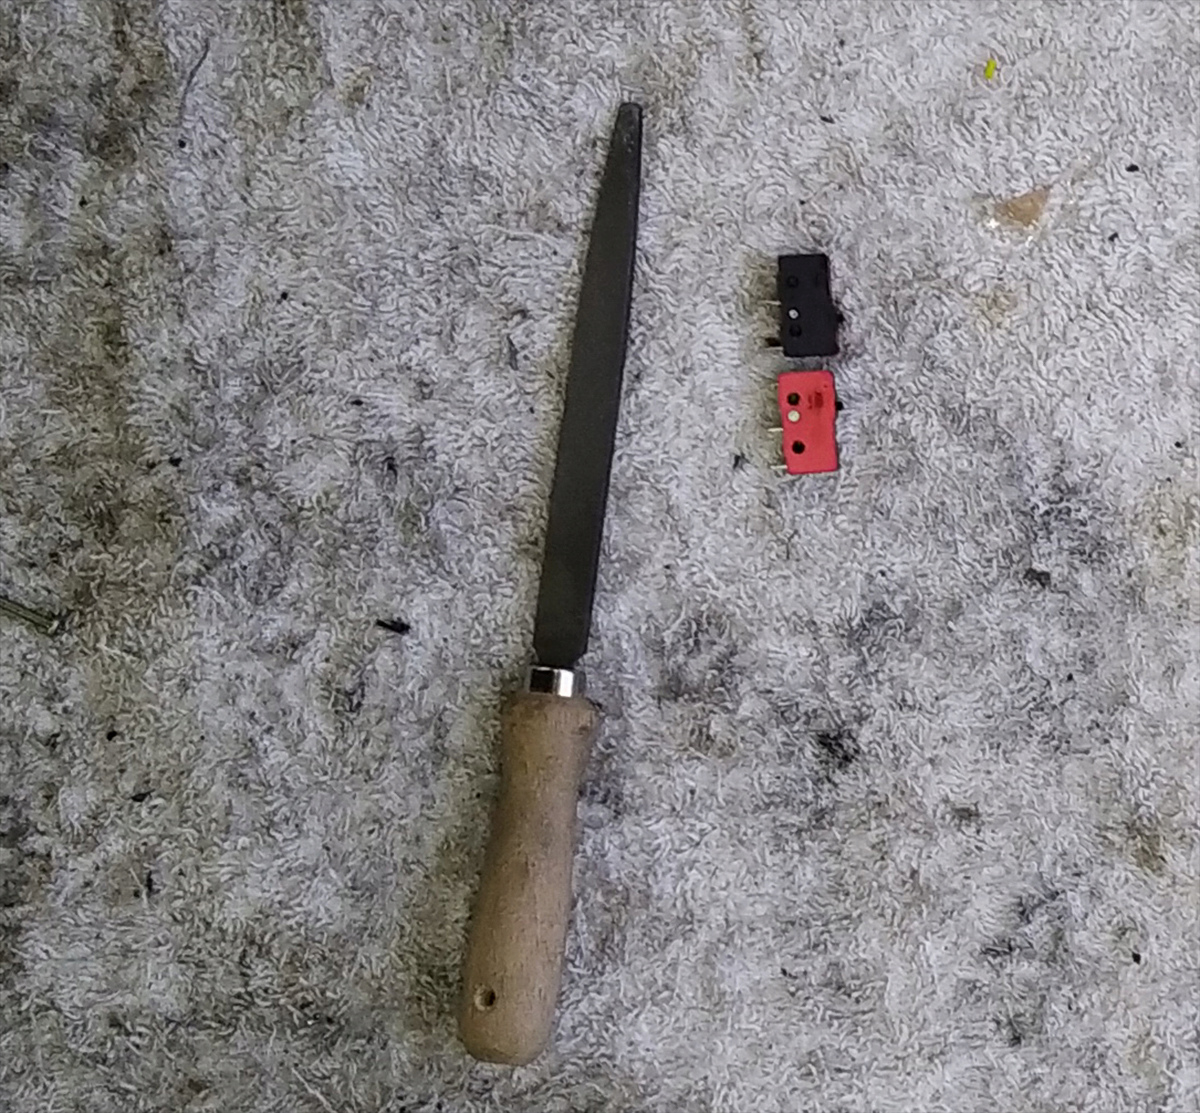
14. These are my replacement drive cables. The one on the left has the nylon shoe removed to show the rubber buffer. Once you have cleaned everything, push the rubber buffers back into place and slip the nylon shoe back on top. Yes, the cables are hairy! I suspect this is to trap lubricant. At this point I found a third problem - something had been dropped on the drive cable side of the l/h slide rail and had driven the drive cable into it. I used a very fine file and 600 grade wet'n'dry to remove the dents and realign the edge.

Reassembly follows!
Chris Harris has a Youtube video in which he uses copious quantities of various lubricants and the power of the lifting motor to free up the sliding mechanism but IMO, that's not a particularly good idea because it could be something a bit more nasty jamming things up. I had two windscreen mechanisms, both of which were jammed and both, as it turned out, had something blocking the sliders that lubricant would not have shifted. The first one ran nice and smoothly after cleaning but the second one would not stay in sync. On top of crap in the sliders, this one also turned out to have one severely damaged drive cable and the other was very close to giving up. So, two new drive cables it was. BMW wanted £140 each for them (WTF!!!) but Motorworks will do good s/h ones for considerably less (£40 each). I got unbelievably lucky and picked up brand new left and right drive cables on ebay on successive days from different sellers for just £30 each.
As this windscreen was destined for an RT, the relays are mounted on the crossbar as per Bert's original post. You can use a pair of micro-relays and a much smaller bracket mounted higher up, but this was just the way I chose to do it.
Haynes, eat your heart out

Disassembly.
1. There are seven pretty obvious crosshead screws holding the mechanism to the windscreen mount. It's also obvious in this picture that the lifting arms are out of sync. Remove the three screws holding the lifting motor and put it to one side. Don't worry about drive positioning - we'll deal with that later.

2. That will free up the crossbar. Put that to one side too.

3. Remove the tension springs. They will come off with just finger and thumb.

4. Remove the guide rods. There's a crosshead screw and a rubber o-ring at each end. One screw will always come out easily, but to release the other you will need to hold the slide rod gently! with a pair of pliers.

5. Rod and o-rings. These are new o-rings - the old ones were pretty manky. Change them if you can.

6. Manually move the slider to expose these two dome head allen screws. Don't remove them just yet.

7. Release the lifting arms. There should be a pivot with a circlip at each end. If you look at the right side there's a bit of a giveaway that this mechanism has been apart before and the pivot/circlips were lost. You may need to wriggle the lifting arms off but be careful: they feel like they are cast ally and so could break if handled too roughly.

8. Check the pivots for the guide rod bush. On the other mechanism both nuts were loose and the bush could move sideways. They should be tight against the lifting arm preventing the guide bush from moving sideways but not from rotating easily. Note here that there are two different nuts: the original lefthand one and the pivot had gone awol, so a PO had replaced the pivot with a bolt with the head cut off and the outer threads filed flat to allow a small spanner to grip it. The OEM pivot (right side) has a Philidas nut and the pivot is held with an allen key.

9. Remove these two screws to free up the sliders and drive cables. The tubes will be full of crap. BMW recommend using a silicon grease for the sliders (thanks for the info, Duck), so I used a silicon spray to clean the guide tubes out.

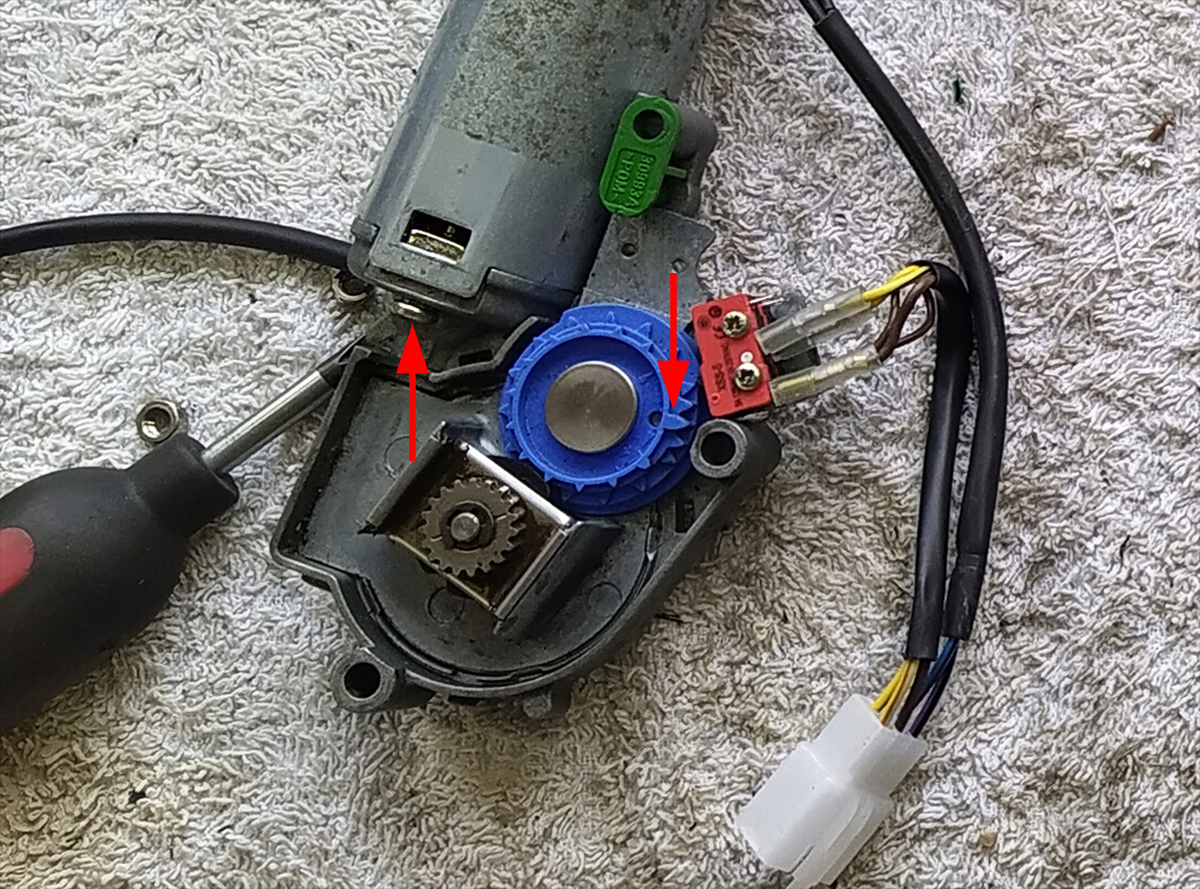
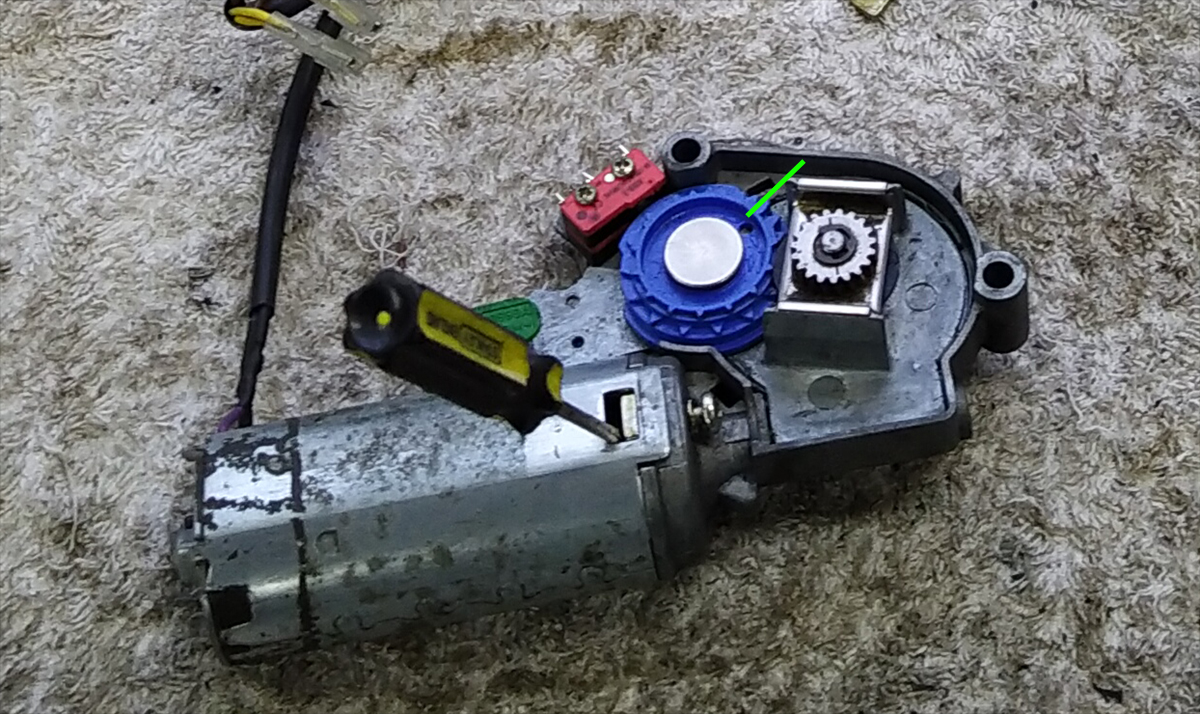
10. And here's part of my problem. The nipple on the end of the drive cable has gone missing. Closer inspection also showed that, possibly as a result of the cable not sliding properly, some of the driven spiral was so badly worn that the motor sprocket was jumping the cable.

11. Remove the two dome head allen bolts you lined up earlier.

12. That will free up the drive cables to be slid off.

13. Pull the drive cables off. Each slider has a nylon shoe on it that can be easily pushed off with fingernails. This one is pretty dirty. Under the shoe are two rubber buffers - one will be out of sight inside the slider. A screwdriver will lift them off easily as they are shaped to fit. This was the second source of the jamming. Crud had got in between the rubber buffer and the nylon shoe, forcing the shoe outwards and jamming it against the slider rail.

At this point, clean everything thoroughly.
14. These are my replacement drive cables. The one on the left has the nylon shoe removed to show the rubber buffer. Once you have cleaned everything, push the rubber buffers back into place and slip the nylon shoe back on top. Yes, the cables are hairy! I suspect this is to trap lubricant. At this point I found a third problem - something had been dropped on the drive cable side of the l/h slide rail and had driven the drive cable into it. I used a very fine file and 600 grade wet'n'dry to remove the dents and realign the edge.

Reassembly follows!
Last edited by Dai on Sat Mar 11, 2023 11:36 am; edited 1 time in total
__________________________________________________
1983 K100 naked upgraded to K100LT spec after spending time as an RS and an RT
1987 K100RT
Others...
1978 Moto Guzzi 850-T3, 1979 Moto Guzzi 850-T3 California,1993 Moto Guzzi 1100ie California
2020 Royal Enfield Bullet 500








 Ich bin enge Kirchröatsjer jong; adieë wa ?!
