1

 Rear suspension spring compressor. Sun Feb 09, 2014 8:33 am
sidecar paul
Life time member

I use a Spax rear unit, with adjustable damping, on my outfit and when the first one, bought in '88, deteriorated, I bought a new one in '98. As they are re-buildable I use one and keep a refurbed one ready to swop over as required (or when I fancy trying a different spring or something).
My old spring compressors are adapted car spring clamps and always damage the paint as well as being a bit awkward to use, so I decided to design and make something more elaborate.
My design parameters were:-
A rubber faced plate to contact the spring, to avoid paint damage.
A single screw to apply the pressure.
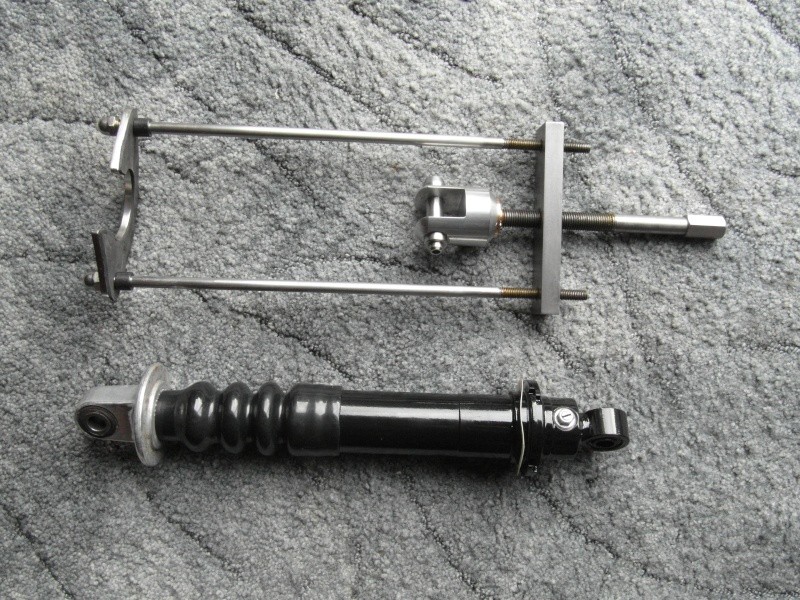
This is what I eventually came up with:-
The top plate had to be twisted into a helix to follow the spring contour.

The damper shown here is the original 1988 one, which I have shortened, fitted a BMW bottom fitting to the top and re-made the damper adjustment in stainless steel. Although, once set where you want it, further adjustment of the damping isn't necessary, I didn't like the rusted up adjuster.
The gaiter, BSA Bantam, fits inside the spring and keeps all the muck and grit off the damper rod.
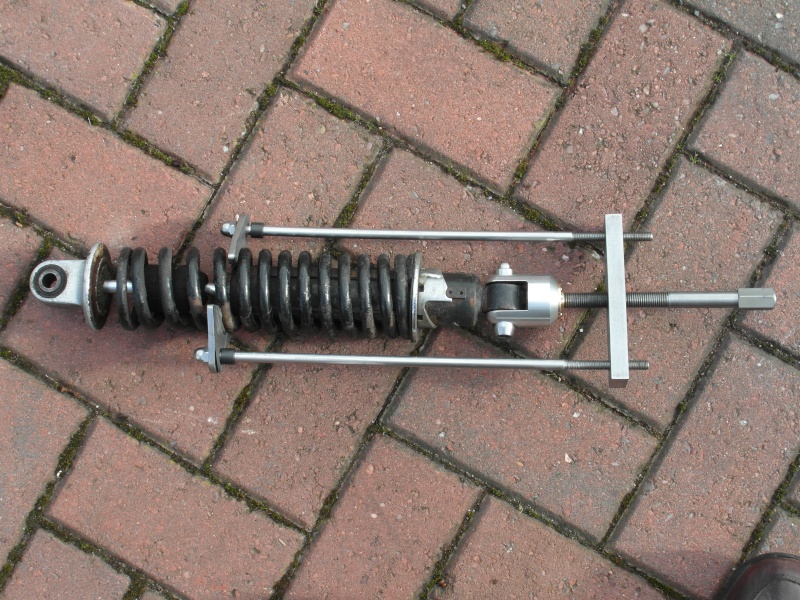
This next pic shows the tool in action, compressing the spring on an old clapped out BMW unit.
Note the rubber facing on the top plate......old inner tubes do have their uses.

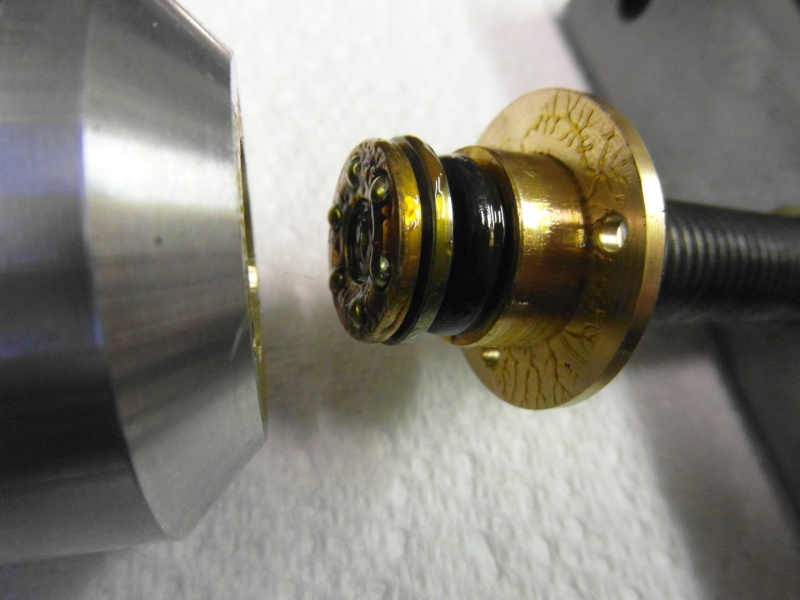
When contemplating on how to locate the main screw in the alloy block, I settled on using
a K injector 'O' ring in a groove on the shaft!.......Works a treat.

I don't suppose many of you will be rushing out to make on of these, but I thought I'd share the
design anyway.
Paul.
My old spring compressors are adapted car spring clamps and always damage the paint as well as being a bit awkward to use, so I decided to design and make something more elaborate.
My design parameters were:-
A rubber faced plate to contact the spring, to avoid paint damage.
A single screw to apply the pressure.
This is what I eventually came up with:-
The top plate had to be twisted into a helix to follow the spring contour.

The damper shown here is the original 1988 one, which I have shortened, fitted a BMW bottom fitting to the top and re-made the damper adjustment in stainless steel. Although, once set where you want it, further adjustment of the damping isn't necessary, I didn't like the rusted up adjuster.
The gaiter, BSA Bantam, fits inside the spring and keeps all the muck and grit off the damper rod.
This next pic shows the tool in action, compressing the spring on an old clapped out BMW unit.
Note the rubber facing on the top plate......old inner tubes do have their uses.

When contemplating on how to locate the main screw in the alloy block, I settled on using
a K injector 'O' ring in a groove on the shaft!.......Works a treat.

I don't suppose many of you will be rushing out to make on of these, but I thought I'd share the
design anyway.
Paul.
__________________________________________________
'84 K100RS (0014643) (owned since '85), 86 K100RS (0018891) with Martello sidecar (built as an outfit in '88),
'51 Vincent (since '67),'72 Montesa Cota (from new), '87 Honda RS125R NF4 (bought 2015)
....No CARS never ever!


 1988 K100RS SE/ABS
