BMW K bikes (Bricks)


You are not connected. Please login or register

View previous topic View next topic Go down  Message [Page 1 of 1]


jayk47

avatar
active member
active member
Hi All. 

I fitted a new cam cover after an altercation with the ground that left the other one all scratched up as described in another post.. 

I fitted the new one without replacing the inner and outer seal, bad move i know, the outer was fine but the inner leaked and was perished so have ordered two new seals. 

I had used Hylomar blue on the rubber seal on the outside and it was fine however the inner not so. Which leads me to the first question. Hylomar blue vs Three bond or similar silicone instant gasket. thoughts opinions on the difference or preferred sealant...? I have used it successfully on the sump and some other metal to metal parts as well as the oil filter cover would be interested to hear of other experiences. 

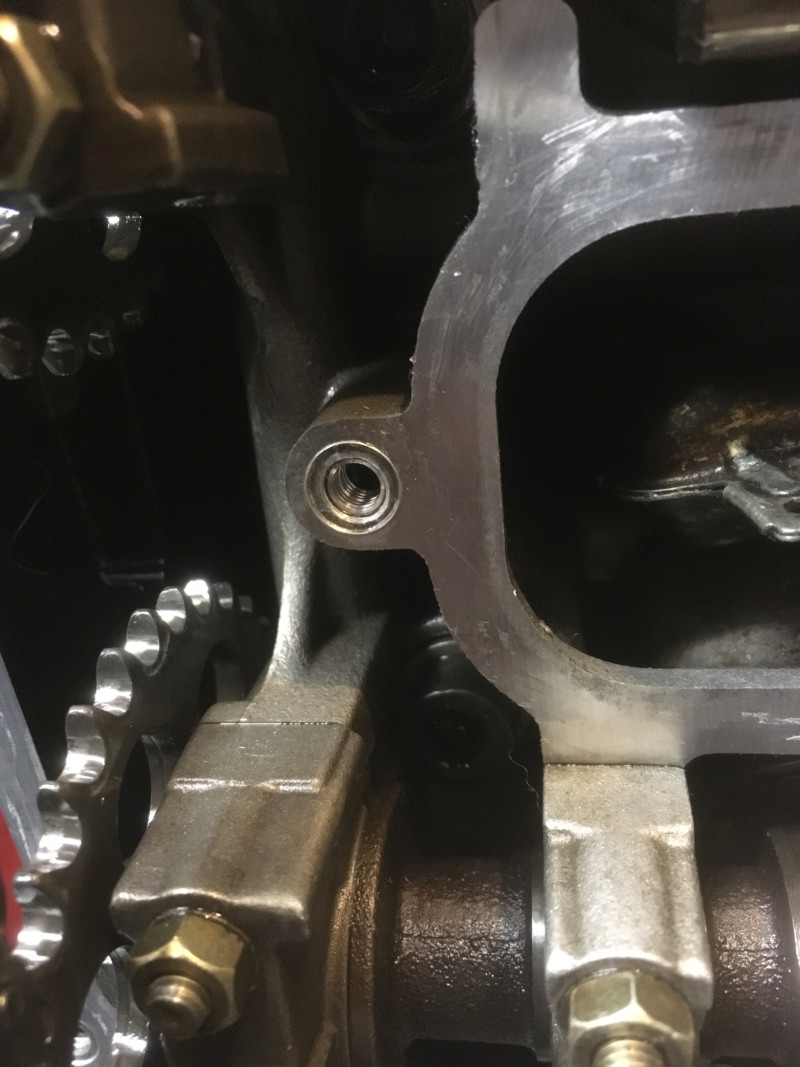
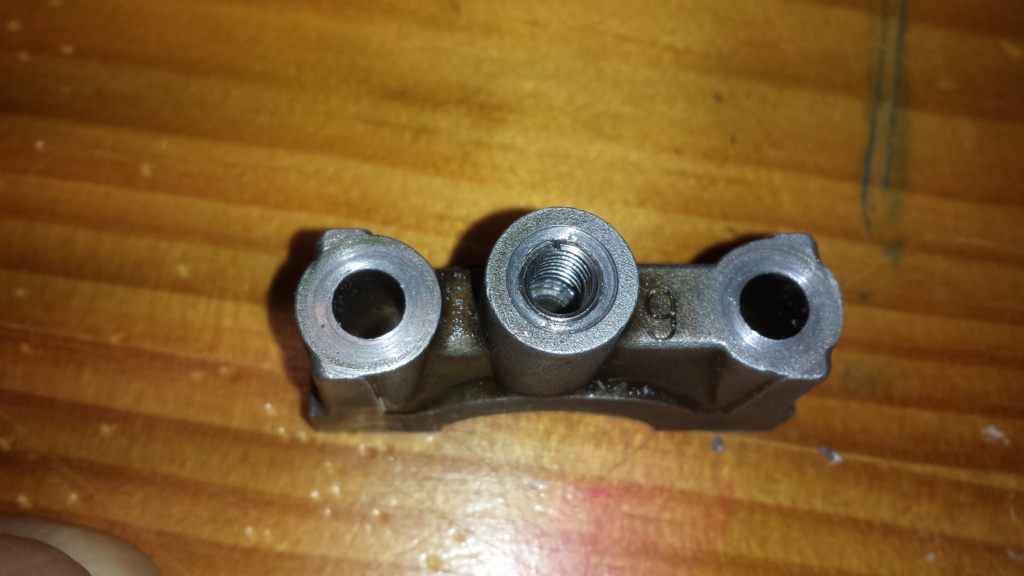
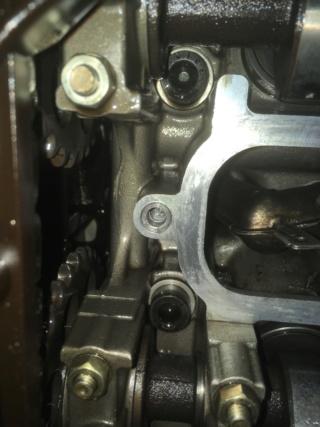
Secondly, i discovered a stripped thread on the inner left of the spark plugs (see pic) . I had thought that this was the case when i refitted the cover the first time but had hoped not. So.. Helicoil time.. thought tips welcome, it's a delicate spot. Again looking for others experiences, i have a recoil coarse M6 kit on the way from eBay.  
 Helicoil fun and Hylomar blue vs three bond on a K75 Unadju10


__________________________________________________
Learning how to repair the bike i broke......
    

MartinW

MartinW
Life time member
Life time member
A lot of silicone style sealants would do, however I prefer non acidic. I use the grey Threebond on mine, but don't overdo it using too much can lead to it forming beads. These beads can break off and get sucked into places causing blockages leading to oil starvation. Using a drill guide when drilling for the Heli coil leads to a square aligned installation. If you can't get a drill guide use a spotter with good eye sight, make sure it is square in both planes. Go slow, read and follow the installation instructions and you shouldn't go wrong.

Regards Martin.


__________________________________________________
1992 K75s
    

Suzi Q

Suzi Q
Life time member
Life time member
I think that age & heat hardens the cover gaskets and they become set in their 'as compressed' shape - i.e. there's no squash (technical huh) when you tighten the cover screws.

I have this idea, which I'm going to try as soon as the engine that I'm currently rebuilding inevitably starts to piss oil when I get round to running it..

Rather than put sealant on the gasket as normal - which always runs the risk of beads forming on the inside as MartinW says - I'm going to try cleaning and degreasing the rebate in the cover, then laying a bead of sealant in the bottom of the rebate. I'll make a tool shaped like a 'T' to run along the rebate so's it sets the sealant to the correct depth - twenty thou or so less then the height of the rib on the gasket. I'll let the sealant set in the rebate before assembly.

If this cockeyed idea has any hope of working, it'll put some 'squash' back into the situation. It appeals to me cos it's cheap, and a workaround.

NB I have a big bin full of 'cheap, workaround' ideas from the past...


__________________________________________________
Sometimes I'm not really Suzi Quatro.
    

jayk47

avatar
active member
active member
Thanks for the advice folks. 

I don’t have a drill guide so I reckon my mate will have to spot me for square. It strikes me as the kind of job that takes patience and a bit of skill with a drill. 

Re sealant, might just order up a bit of three bond, it’s what is suggested in the shop manual so best to just go for it. I know hylomar is recommended by rolls Royce and all but I think it may not be right for this application.. 

Will update with pics once the helicoil is in!! 

Sound!


__________________________________________________
Learning how to repair the bike i broke......
    

MartinW

MartinW
Life time member
Life time member
I've just received a valve cover set and bolt seals from Motobins. Every time I check the valve clearance I wonder whether it will seal, a slight smear of Three bond grey has so far worked. However after 26 years on the OEM gaskets I thought I better have a spare set on hand. Make sure all traces of previous sealant is removed. The advantage of using the grey sealant is that is easier to see that it has been totally removed. Make sure to apply a smear of sealant on the half round end seals. Warning make sure that you don't loose the earth spring that goes between the cover and the cylinder head.
Regards Martin.


__________________________________________________
1992 K75s
    

MartinW

MartinW
Life time member
Life time member
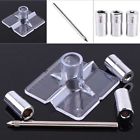
I actually bought a drill guide off Aldi they come up occasionally. It has come in handy a couple of times and with a bit of modifications it can be used for other sizes.https://www.ebay.com.au/itm/Mini-Pocket-Hole-Drill-Dowel-Jig-Guide-6mm-8mm-10mm-Woodworking-Drilling-Locator/142977130459?hash=item214a19dfdb:g:hK0AAOSwFIRbxb~M:rk:29🇵🇫0
Regards Martin.
Helicoil fun and Hylomar blue vs three bond on a K75 Drill_10


Last edited by MartinW on Fri Jan 18, 2019 7:04 am; edited 1 time in total


__________________________________________________
1992 K75s
    

jayk47

avatar
active member
active member
Thanks for that.

I might have a scout around on eBay. Was in the local Aldi the other day. Didn’t spot it..


__________________________________________________
Learning how to repair the bike i broke......
    

nobbylon

nobbylon
Silver member
Silver member
Don’t try and drill without a guide, never works properly. Get a sleeve lathed up to sit in the larger hole that is drilled through the center. Use proper drills for drilling tough steel.
As far as cam cover goes, the rubber seals shouldn’t have any sealer applied. It makes a mess and plenty of work to clean it off next time around. Use new seals and a bead of Permatex blue or black on the front and rear half moon rubbers and all should be well. Blue hylomar is good but strangely never had a lot of success on K bikes with it because very few paper gaskets are used I suppose. It’s best left as a back up for paper gaskets.


__________________________________________________
R1100GS Feb 1995
K100RS July 1989
R90s June 1975
R75/6 Feb 1976
F650GD May 2001
    

jayk47

avatar
active member
active member
Ok. Will see about some sort of guide. It’s very shallow and the block is aluminum so I do see where there is great potential for skew.. it’s quite a tight spot so whatever guide I use it will need to be compact.

Re sealant Have new seals ready to go, not going to fall for that one again, and picked up new seals for the bolts. So should be all good there. Going to apply a smear of three bond or similar, (looked up permatex and seems to be another silicone gasket), as recommended in the motorrad workshop manual. Should hold this time.


__________________________________________________
Learning how to repair the bike i broke......
    

Dai

Dai
Life time member
Life time member
A 6mm helicoil requires a 6.2mm drill. With some care it is possible to accurately drill the hole without a drill guide. Start with a sharp 6mm drill to remove the damaged threads and let the drill bit tell you which way it wants to go (same principle as 'let the saw blade do the work'). The bit will always want to go the easy way i.e. down the existing hole. Then follow up with the 6.2mm bit. Be very, very careful not to increase the depth of the hole as if you look at the design of the OEM bolt, it uses the depth of the hole to prevent excess pressure on the cam cover. That's why the buggers strip; hamfisted owners not reading the manual.

Same principle applies when tapping the hole; get the tap as square as possible by eye and then let it find its own way in by gently turning it for the first couple of threads. Once you have a proper bite, always follow the principle of 'quarter in, half-back' to clear the swarf. You need a 6x8 helicoil; that is, a 6mm helicoil that is 8mm long. And don't forget to snap the driving tang off the helicoil; if you do, the next time you remove the cambox you stand a good change of wrapping the tang around the bolt and ripping the helicoil out.

Hylomar used to be the weapon of choice but the formula was changed in the 1990s somewhen and IMO it went downhill. Threebond is four times as expensive and ten times better. As Nobbylon says, get new rubber gaskets and only bond the half-moons. It's particularly important to get new round gaskets for the bolts; if you don't, they will almost certainly leak.

Just FYI: LFB has six helicoils in the cambox cover and one in the fuel rail. The fuel rail hole was so badly damaged that I had to take it out to 8mm.


__________________________________________________
1983 K100 naked upgraded to K100LT spec after spending time as an RS and an RT
1987 K100RT
Others...
1978 Moto Guzzi 850-T3, 1979 Moto Guzzi 850-T3 California,1993 Moto Guzzi 1100ie California
2020 Royal Enfield Bullet 500
    

jayk47

avatar
active member
active member
That’s good advice, thanks for that Dai.

I take it that when you refer to the half moon side I assume that that is the part of the rubber seal that faces out / fits into the cover?

I did get new gromits for the bolts but not for all as some seemed fairly new. I should be ok..


__________________________________________________
Learning how to repair the bike i broke......
    

Dai

Dai
Life time member
Life time member
Smear Threebond into the half-moon cutouts in the head. If the rubber gaskets are all new Very Happy , you shouldn't need to apply Threebond anywhere else.


__________________________________________________
1983 K100 naked upgraded to K100LT spec after spending time as an RS and an RT
1987 K100RT
Others...
1978 Moto Guzzi 850-T3, 1979 Moto Guzzi 850-T3 California,1993 Moto Guzzi 1100ie California
2020 Royal Enfield Bullet 500
    

jayk47

avatar
active member
active member
Ahhhh. I get you now.. Smile the two cut outs towards the back wheel... thanks..


__________________________________________________
Learning how to repair the bike i broke......
    

Laitch

Laitch
Life time member
Life time member
jayk47 wrote:Ahhhh. I get you now.. Smile the two cut outs towards the back wheel... thanks..
If there is any oil on the gasket surfaces of either the head or the cover when the cover is attached, the gasket is likely to leak. Clean mating surfaces thoroughly and assemble asap.


__________________________________________________
1995 K75 90,000 miles
    

jayk47

avatar
active member
active member
Helicoil fun and Hylomar blue vs three bond on a K75 15493110


__________________________________________________
Learning how to repair the bike i broke......
    

Dai

Dai
Life time member
Life time member
See? Easy! Very Happy


__________________________________________________
1983 K100 naked upgraded to K100LT spec after spending time as an RS and an RT
1987 K100RT
Others...
1978 Moto Guzzi 850-T3, 1979 Moto Guzzi 850-T3 California,1993 Moto Guzzi 1100ie California
2020 Royal Enfield Bullet 500
    

brickrider2

brickrider2
Life time member
Life time member
"If there is any oil on the gasket surfaces of either the head or the cover when the cover is attached, the gasket is likely to leak. Clean mating surfaces thoroughly and assemble asap."


You may be interested to know that my Haynes service manual says that the gasket should get a coat of clean motor oil before it is installed with the cover.    drunken


I'd never heard of that recommendation before.  I doubt I'll follow it. 


__________________________________________________
1996 K1100LT
    

Laitch

Laitch
Life time member
Life time member
brickrider2 wrote:You may be interested to know that my Haynes service manual says that the gasket should get a coat of clean motor oil before it is installed with the cover.    drunken
I'd never heard of that recommendation before.  I doubt I'll follow it. 
Luckily, the methods of installation are few so the alternative will be obvious if the first-chosen fails. cheers


__________________________________________________
1995 K75 90,000 miles
    

charlie99

charlie99
VIP
VIP
Dai wrote:A 6mm helicoil requires a 6.2mm drill. With some care it is possible to accurately drill the hole without a drill guide. Start with a sharp 6mm drill to remove the damaged threads and let the drill bit tell you which way it wants to go (same principle as 'let the saw blade do the work'). The bit will always want to go the easy way i.e. down the existing hole. Then follow up with the 6.2mm bit. Be very, very careful not to increase the depth of the hole as if you look at the design of the OEM bolt, it uses the depth of the hole to prevent excess pressure on the cam cover. That's why the buggers strip; hamfisted owners not reading the manual.

Same principle applies when tapping the hole; get the tap as square as possible by eye and then let it find its own way in by gently turning it for the first couple of threads. Once you have a proper bite, always follow the principle of 'quarter in, half-back' to clear the swarf. You need a 6x8 helicoil; that is, a 6mm helicoil that is 8mm long. And don't forget to snap the driving tang off the helicoil; if you do, the next time you remove the cambox you stand a good change of wrapping the tang around the bolt and ripping the helicoil out.

Hylomar used to be the weapon of choice but the formula was changed in the 1990s somewhen and IMO it went downhill. Threebond is four times as expensive and ten times better. As Nobbylon says, get new rubber gaskets and only bond the half-moons. It's particularly important to get new round gaskets for the bolts; if you don't, they will almost certainly leak.

Just FYI: LFB has six helicoils in the cambox cover and one in the fuel rail. The fuel rail hole was so badly damaged that I had to take it out to 8mm.


fyi just fixed mine with an el cheapo helicoil kit about 1/3 the price , locally quoted and 2 days delivery .
installed and tightened up all good

Helicoil fun and Hylomar blue vs three bond on a K75 20190210


__________________________________________________
cheezy grin whilst riding, kinda bloke ....oh the joy !!!! ...... ( brick aviator )

'86 K100 RT..#0090401 ..."Gerty" ( Gertrude Von Clickandshift ) --------O%O
'86 k100 rs.. #######..  "Fred " (f(rame) red ) ( Fredrick leichtundschnell ) - -
bits and pieces from many kind friends across the k100 world ...with many thanks ..
1987 k100rs ########   "Red"  - (red sports rs TWB style )
1989 K100rt #009637   "Black Betty"  (naked rt ala Nigel , now sporting an rs main fairing )
    

jayk47

avatar
active member
active member
Cool!

Got a "Recoil" kit from Brooks Barn in the UK for about €30, was warned off cheaper kits because of the tooling, came with 15 coils and a decent tap and 1/4" drill bit. 

I have a lovely old machinist drill bit set so was able to take all the old thread out in two stages, then use the 1/4 bit, tap out the hole and fit the coil. 

It's a great tool to have and i reckon a must have in the toolbox for a bike getting on to 32 years old, reckons i need one for the fuel rail now. 

A mate of mine has a Yamaha FJ 1200 of the same vintage and has already borrowed the kit. Smile


__________________________________________________
Learning how to repair the bike i broke......
    

View previous topic View next topic Back to top  Message [Page 1 of 1]

Permissions in this forum:
You cannot reply to topics in this forum