1

 Repairing left switch block Tue Aug 25, 2015 9:58 am
Gaz
Life time member

In recent times I dismantled and cleaned/lubed the handlebar switch blocks and fitted headlight relays to my K75 during renovations and at the time I made a mental note to do the same job on my K1100 before I experienced any problems.
Alas! ........ too late. On the return from a recent visit to Waz and RT's places on the K1100 I was just into the night when I swung off the freeway about 3 kms from home and flicked my headlight onto high beam and was plunged into darkness. Some frantic operation of the dip switch while I was slowing down achieved nothing but I was able to pull up safely on the side of the road. More wriggling of the switch got low beam on again and I slowly rode home.
So it was time to do the business with the switch.
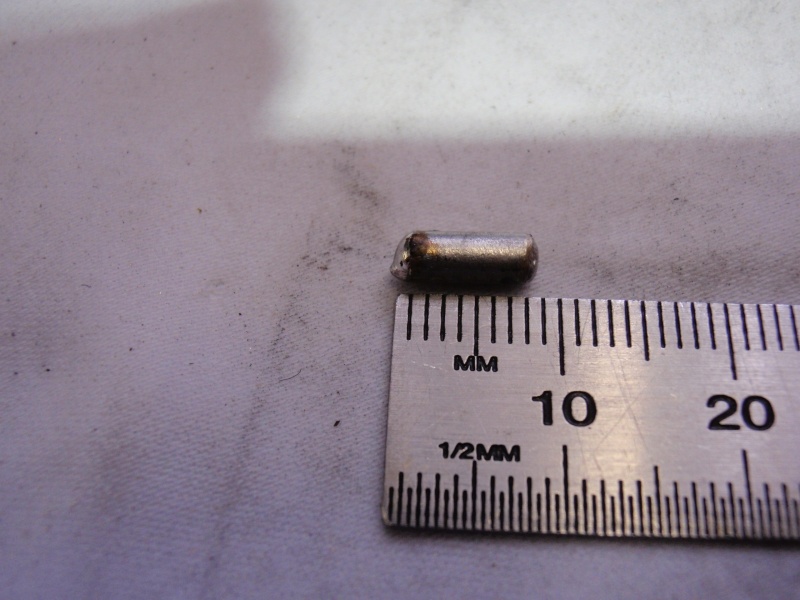
As I carefully dismantled the switch I was greeted with this small blob of metal resting in the horn button.

Once I had the switch completely dismantled I cleaned the stationary contacts in the hi/lo switch section and could see that one contact was now down below the level of the housing and appeared to be where the melted metal had come from.

This was preventing the sliding contact from making proper contact. I considered trying to build up the contact with some solder but felt that I would damage the plastic housing with the iron so I decided to try to replace the contact that was damaged. The sliding contact had cleaned up OK.
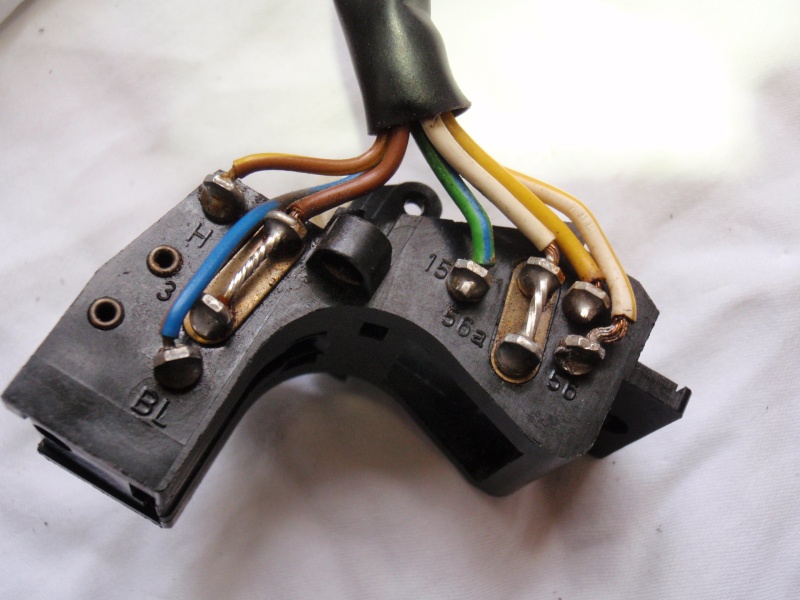
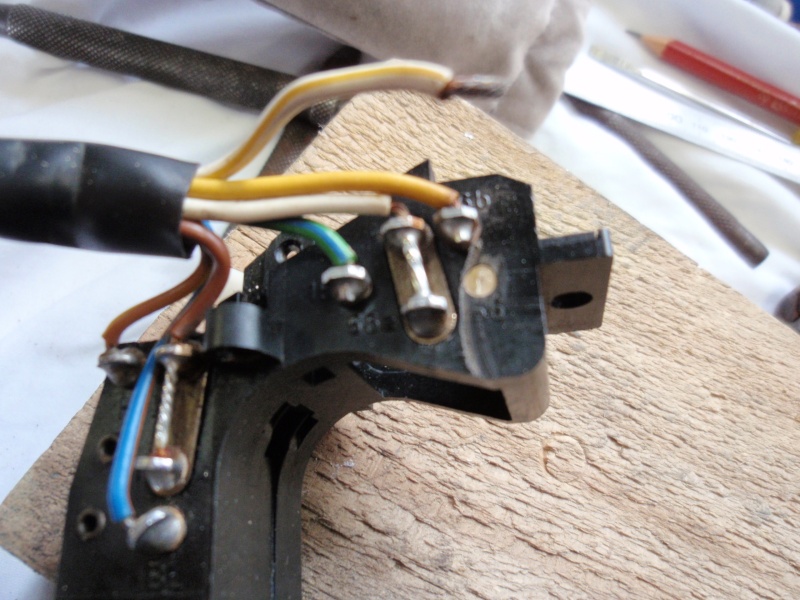
Here's a close up of the connections inside the left switch block for anyone who has not played there. The white/yellow wire is the one I need to work on.

First up I cut the wire off at the connection post then used a dremel to cut the post off flush on the outside. I did this with very short bursts of cutting and had a damp rag handy to keep cooling it between cutting so as not to damage the plastic housing.

This allowed me to set it up on the drill and using a 3mm drill bit I drilled out the contact.

I looked around for something to use as a contact and found a brazing rod that was a whisker under 3mm diameter so I cut off a short section and tinned it so I could solder the wire back on.


Next I cut a small piece of wood the slide in the inside space to set the depth of protrusion of the contact inside then mixed up some 2 part epoxy and glued the contact into place.

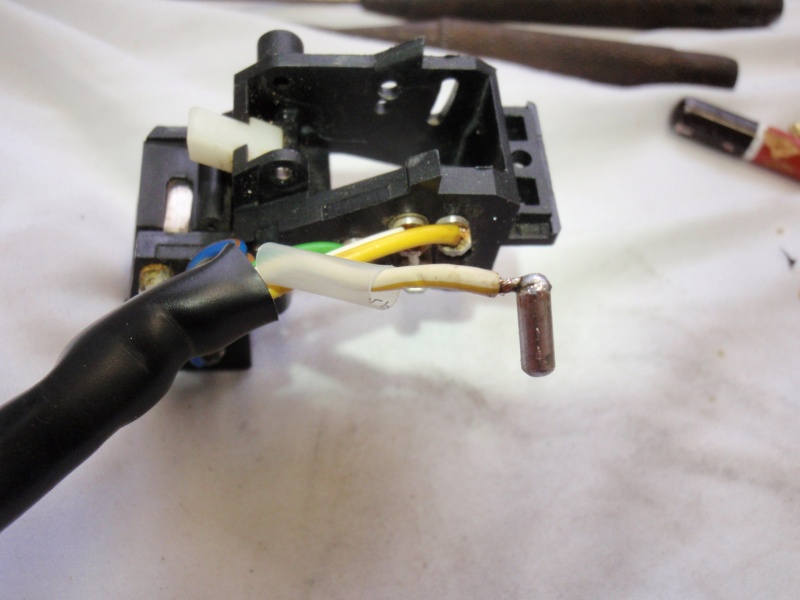
Here is the new contact before I cleaned a little bit of epoxy around the edges after it had cured.

While I was waiting for it to cure properly I installed headlight relays on the K1100 then reassembled the switch and fitted it to the bike for testing. Happy to report that it is working fine (I hope it stays that way).
Cheers
Alas! ........ too late. On the return from a recent visit to Waz and RT's places on the K1100 I was just into the night when I swung off the freeway about 3 kms from home and flicked my headlight onto high beam and was plunged into darkness. Some frantic operation of the dip switch while I was slowing down achieved nothing but I was able to pull up safely on the side of the road. More wriggling of the switch got low beam on again and I slowly rode home.
So it was time to do the business with the switch.
As I carefully dismantled the switch I was greeted with this small blob of metal resting in the horn button.

Once I had the switch completely dismantled I cleaned the stationary contacts in the hi/lo switch section and could see that one contact was now down below the level of the housing and appeared to be where the melted metal had come from.

This was preventing the sliding contact from making proper contact. I considered trying to build up the contact with some solder but felt that I would damage the plastic housing with the iron so I decided to try to replace the contact that was damaged. The sliding contact had cleaned up OK.
Here's a close up of the connections inside the left switch block for anyone who has not played there. The white/yellow wire is the one I need to work on.

First up I cut the wire off at the connection post then used a dremel to cut the post off flush on the outside. I did this with very short bursts of cutting and had a damp rag handy to keep cooling it between cutting so as not to damage the plastic housing.

This allowed me to set it up on the drill and using a 3mm drill bit I drilled out the contact.

I looked around for something to use as a contact and found a brazing rod that was a whisker under 3mm diameter so I cut off a short section and tinned it so I could solder the wire back on.


Next I cut a small piece of wood the slide in the inside space to set the depth of protrusion of the contact inside then mixed up some 2 part epoxy and glued the contact into place.

Here is the new contact before I cleaned a little bit of epoxy around the edges after it had cured.

While I was waiting for it to cure properly I installed headlight relays on the K1100 then reassembled the switch and fitted it to the bike for testing. Happy to report that it is working fine (I hope it stays that way).
Cheers
__________________________________________________
Gaz
1990 K75 6427509; 1987 R80G/S PD 6292136; 2010 G650GS ZW13381;


 nice one.